#258 Boiled Ox Tongue: To Serve Cold

Hello there Grigsoners! No, I’ve not died, I have simply been a lazy bastard. I am going to stop apologising for my blog-tardiness and try my very best to pull my finger out. All that said, I have been preparing this recipe on the sly for the last few days. I went to Central Market with Gerda from the lab a while ago and found that quite alot of the ingredients that are tricky to get hold of in the UK are actually much easier to get hold of here in Texas. In the meat section, I happened upon an ox tongue and I knew that there are quite a few recipes using ox tongue specifically so I thought I’d grab it and do something with it later.

I decided upon this one – Boiled Ox Tongue: to Serve Cold, because I could take it into work and force my new labmates to eat it and (hopefully) put some comments on here! The recipe calls for a 2 ½ to 5 pound pickled (i.e. brined) ox tongue – these you can order form your butcher (in the UK at least). I thought I would pickle it myself using this now tried-and-tested brine method from English Food. The tongue needs 5 to 7 days in the brine tub, but there is no maximum time really – you can’t oversalt anything, because you can soak it in water for 6 or so hours beforehand. It’s recommended you do this with a pickled tongue from the butcher’s shop.


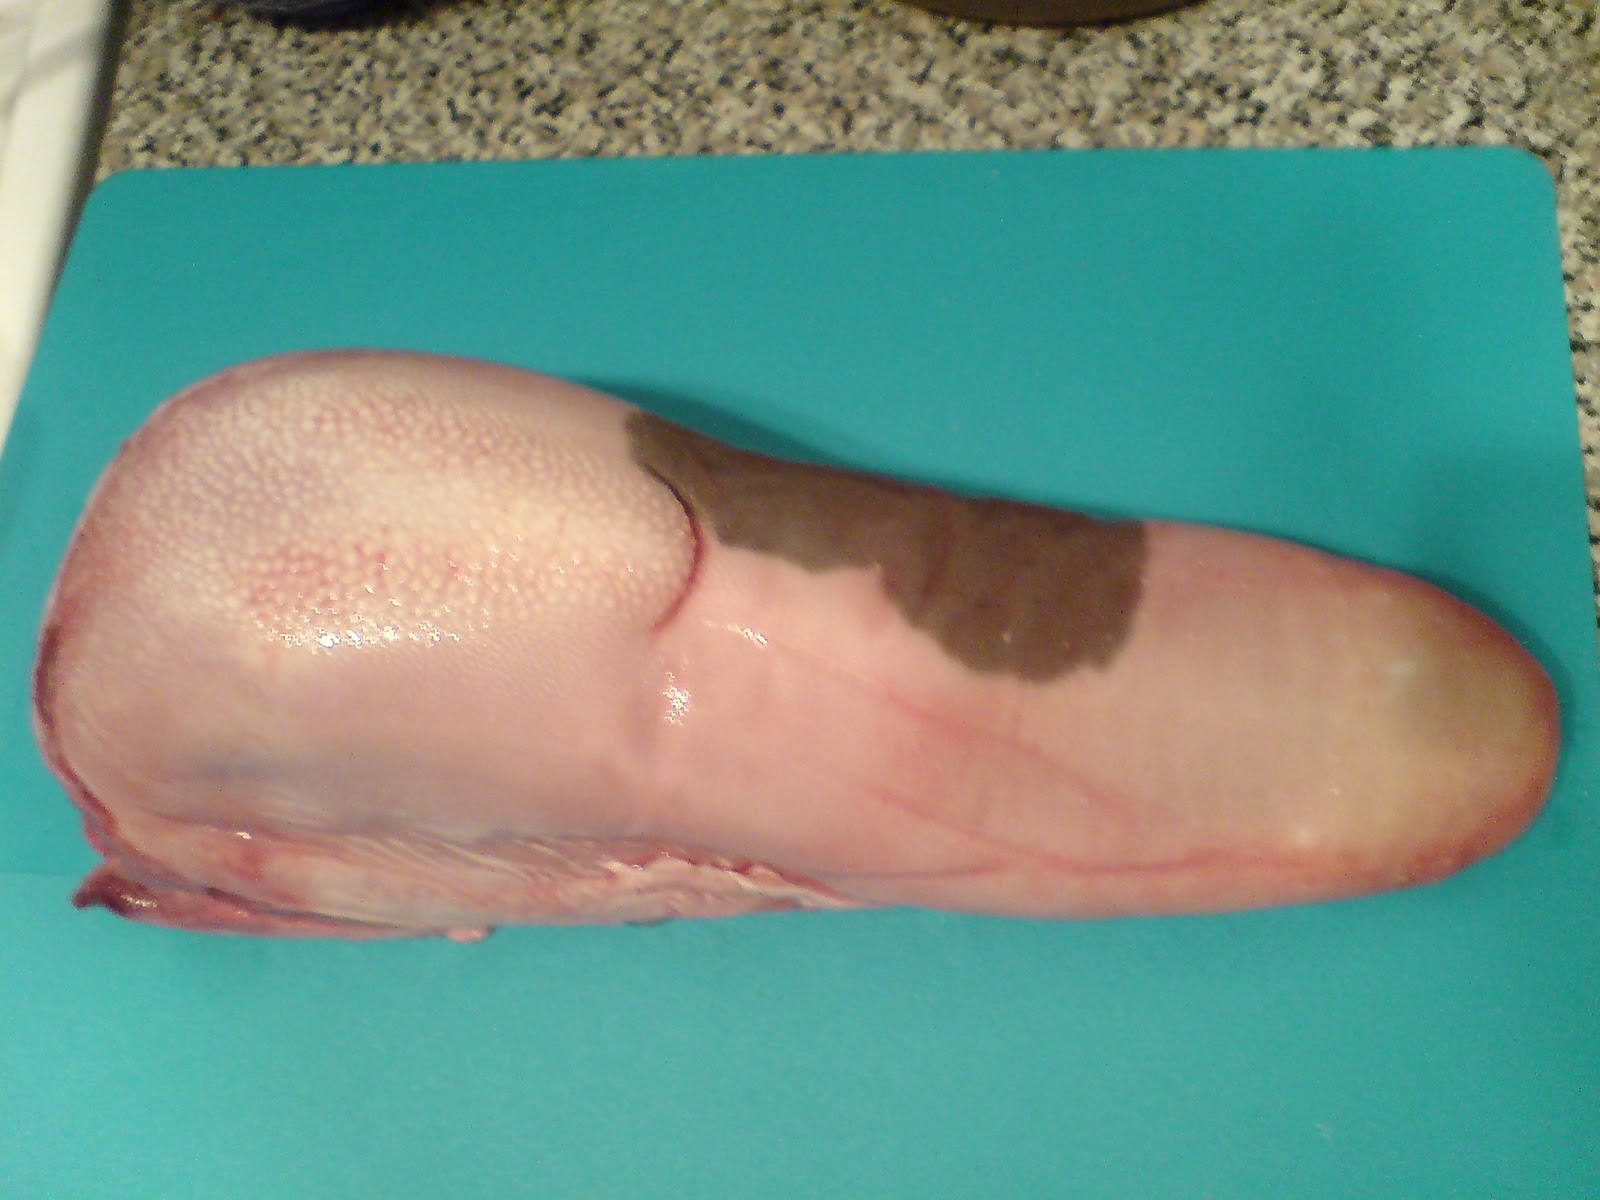
The tongue before brining

 Anyways, after you have soaked your tongue place in a stock pot and cover with cold water or a light stock. Bring it to the boil and skim any scum that appears at the water’s surface. Turn the heat down to the merest simmer. After half an hour, taste the water – if it is horribly salty, thrown the water away and start again. Add some stock vegetables: an onion studded with a couple of cloves and a chopped carrot and celery stick. Add also a bouquet garni and 12 crushed black peppercorns. Allow the whole thing to simmer for a total of 3 or 4 hours (don’t forget to include that first half hour!). The tongue is cooked when you can insert a skewer with ease.

The pressed but unsliced tongue
Remove the tongue from the water and allow it to cool slightly. Peel away the skin and remove any gristly bits from the thick end. The tongue is now ready to be pressed. Coil the tongue and place it in a 5 or 6 inch loose-bottomed cake tin with base removed. If you can’t get hold of one (I couldn’t) you could invest in a proper tongue press. I actually used a straight sided mixing bowl that I happened to have and it worked very well. Place the tin base on top (or something similar) along with a couple of tins of food and allow to cool and press for several hours or overnight. When cool, transfer to the fridge.


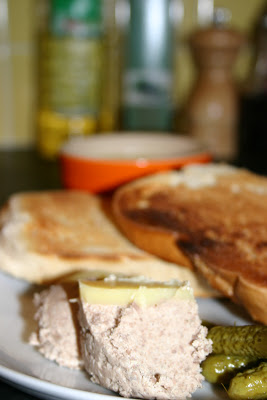
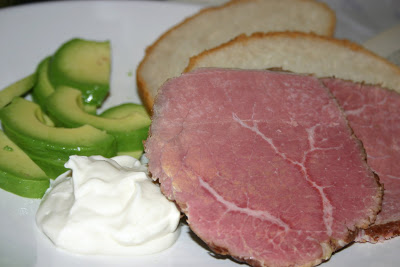
When you are ready to eat it, slice it thinly and serve with a salad and some horseradish sauce so says Lady Jane Griggers. If you want to be all Victorian about it ‘press the tongue into a slipper shape, and then decorate it with aspic jelly and bits and pieces’. However, The Grigson goes on to say: ‘I think we have lost sympathy with over-presented food of this kind: it always arouses my suspicious – I wonder what the caterer is trying to conceal.

FYI: the tongue is the only muscle in the body not attached at both ends.

#258 Boiled Ox Tongue: To Serve Cold. I’ve not had much experience of eating tongue, except the kind you get already sliced for sandwiches and always found it a little bit on the tasteless side and have never really cared for it. This was much better, though didn’t pack much of a flavour-punch; which was a shame because when I pulled it hot out of the stock, it smelt absolutely delicious. Perhaps I over-cooked it. Anyways, this tongue was wonderfully tender and moist due to its high fat content and gelatinous qualities. Nice, but I’m not doing back-flips: 5/10.

#228 Spiced Salt Beef

This is a posh recipe; this cured beef is produced by Harrods by the wheelbarrow-load every Christmas. It’s an old recipe that was revived by Elizabeth David and Griggers helpfully imparts it to us. Good girl. This uses a dry cure mix rather than brine like I’ve done before (see this post). It’s a lot easier than a wet cure as there’s no messing about making the brine itself, so if you’re thinking about curing your own meat, this is good place to start. It’s a good idea to use good quality sea salt, not crappy table salt. Good salt is not only a preservative, but also lends good flavour. Very important for this sort of thing.

You need to start by buying your beef – a piece of silverside between 2 and 6 pounds should be okay. Place the beef in a clean tub (that comes with a clean lid!) and rub 3 ounces of dark brown sugar into it. Fit the lid on tightly and leave in a cool place for 2 days. Next, make the spiced salt mixture using 4 ounces of good sea salt, a heaped teaspoon of saltpetre and an ounce each of crushed peppercorns, allspice berries and juniper berries. Use a spice grinder or coffee grinder to break up the spices if you have one, otherwise use your pestle and mortar and some elbow grease. Now rub this mixture into the beef well and leave for another nine days, rubbing the salt mix and any juices into the beef and turning it every day.

To cook the beef, rinse off any spice by running it briefly under the tap. Place the beef in a tight-fitting lid with around 8-10 fluid ounces of water. Pack shredded suet over the top surface of the beef to hep keep in the moisture as it cooks. To doubly ensure that minimal moisture is lost from the beef cover the pot with a double layer of foil before putting the lid on. Place in an oven heated to 140⁰C for 45 minutes per pound, or 50 minutes per pound if the joint is small. Remove from the oven and allow to cool for three hours before removing the lid and foil. Wrap the joint is some greaseproof paper and place a three pound weight on it and allow it press overnight. Slice it thinly and use it for sandwiches et cetera.


#228 Spiced Salt Beef. This may have been the best cured meat thus far; it was certainly the easiest. The spice-salt mixture comes across very obviously but does not take over. It keeps well in the fridge for a while if wrapped in clingfilm too. Try it in a sandwich with cucumber and horseradish sauce. Great stuff. 8.5/10.

#212 Bradenham Ham

Well here it is, Merry Christmas, everybody’s having fun. Well we are here in Pudsey, Leeds because – as for most of the UK – we are having a proper white Christmas.

Hope all of you are having a good one.

The plan this year is to not have a turkey, but three different meats: ham, beef and pheasant. We all decided as a family to not do turkey, but now the time is here there are some that are having a bit of a complain. Well tough tits – you should have piped up at the time.

So the the first to report is the Bradenham ham from Dukeshill. I actually did this for Christmas Eve dinner and that’s why it is being reported to you good fellows.

Bradenham ham is apparently the best of the dry cured hams – so good in fact that the Queen has it every year herself. It’s quite pricey, but it is Christmas.

The story of the creation of the Bradenham cure is that the Lord of Bradenham invented it in 1781 – so it is pretty old – but his butler took umbrage saying he had invented it and nicked the recipe. What a card. Anyways, he stowed the recipe to Dukeshill and they still make it today. It is dry cured for 3 months in a briny bath of spice, molasses and cochineal of all things.


The hams can be bought whole or in halves. I went for the half ham as the whole one is absolutely huge and I had to buy a huge pan for the half one anyway. Griggers gives instructions for a whole ham so I had to go for the cooking times give by Dukeshill themselves.

Start off by soaking the ham in cold water for 2 days (Griggers reckons four, but since mine is half the size, I went with Dukeshill method. Put the ham in a large pot and cover with water. Add half a jar of mollases and half a hanful of pickling spices (double up, if a whole ham). Bring slowly to a bare simmer and then turn very low on the hob and allow to keep ticking over for 20 minutes per pound.

When done, remove tentatively from the opt and remove the black skin. Cover the sticky fat with breadcrumbs and bake in a medium oven until they go nice and brown. Allow to cool. Serve the ham sliced with nice mustard or Cumberland sauce.

#213 Bradenham Ham. Absolutely delicious; very salty and very sweet. The spices are sublime. When you eat it, your mouth waters. Alot. It may be pricey, but it is worth it. The only problem was that because I bought a half ham, some meat – rather than skin – was exposed to the water and dried out a little. However, anything behind fat or around bone was deliciously moist. If you buy one and you don’t want a whole one, buy an already cooked one instead, I reckon. 8.5/10.

I have more to report over the rest of the festive period. Hope you are all having a great time and eating good food.

FYI: to make your own pickling spice mix use: 2 teaspoons each of black peppercorns, allspice berries, coriander seeds, cloves, mace as well as two dried chillies and two pieces of dried ginger.

#205 Potted Tongue

There are several recipes in English Food that involve tongue; a bit of the animal now much ignored by most, including me. It’s one of the few things I’ve never tried, so I thought I should make sure my first foray into tongue cookery a simple one. Potting is nice and easy as long as you have a food processor or blender, plus I always need sandwich fillings for work. It uses eight ounces of cooked tongue – this can be calf’s or ox tongue, pickled or fresh. The calf’s tongue that I got from Winter Tarn was exactly eight ounces in weight after it had been cooked and trimmed. However, if tongue is not your bag then you can use beef, salt beef, venison or any other game.

Chop the calf’s tongue and place in a blender or food processor – use a blender for a smooth finish, a food processor for a slightly coarse one – along with four or five ounces of clarified butter, some salt, pepper and mace (if you are potting a different meat, you could use a different spice or even a couple anchovy fillets). Blend until the right consistency and place in pots, making sure you pack them down well and leave flat surface. Pour more clarified butter over to form a seal.


#205 Potted Tongue. In Yorkshire, potted beef is still quite popular, but for me, the tongue did not work quite as well as I’d hoped. The tongue tasted okay when it had been cooked, but perhaps stronger tasting cured ox tongue would have been more appropriate. Oh well, never mind – you can’t win ‘em all. 4/10.

#202 Pressed Beef

A quickie this one.

I wanted to do a recipe from the cured meats section of the book as I haven’t done many of them and I didn’t want to start getting behind. This one appealed to me because it was similar to the salt beef recipe I had already done and I knew that the cold, pressed beef would keep me in sandwiches and snacks for the week, plus the cooking process would produce a nice stock which could be turned into a lovely soup. I also thought that you don’t really see salt beef these days in supermarkets etc, and then by total coincidence my workmates and I went to the very good café in the Whitworth Art Gallery (which makes up part of Manchester University’s campus) and what was on the menu? Salt beef sarnies! I may be some kind of soothsayer.

To make your own pressed beef you need a joint of silverside – go for somewhere between 2 and 3 ½ pounds in weight, I reckon. You can use either fresh or salted for this. If you want to do pressed salted beef, you can buy it from your butchers, but it is much better if you make your own. I did – follow the instructions on brining on this earlier post if you want to have a go. Next, you need to boil the beef joint – follow the instructions on this post here for how to do that (I love how the blog is becoming self-referential!) you can follow the same recipe if you’re using fresh beef too. Leave the beef to cool in the broth for a couple of hours before removing and wrapping well in cling-film or foil. It now needs to be pressed overnight; either use a tongue press or place it under some very heavy weights. I used an upturned loose-bottomed cake tin so I could precariously balance a cast-iron griddle pan, an earthenware jug and some tins of food on it with at least some attention to health and safety.


Next day, you can slice the beef as you need it. Make sandwiches using rye bread, pickled gherkins and horseradish sauce (I also added some mayonnaise). Alternatively serve with an avocado salad.

#202 Pressed Beef. This is absolutely delicious. So much more tasty and such better quality than any supermarket pre-sliced nonsense. I would really recommend trying the curing, cooking and pressing yourself, it’s doesn’t take much effort at all and the pay-off is great. The beef is firm and deliciously sweet and salty. The spices – particularly the mace – come through beautifully and compliment the beef so well without drowning out its flavour. 8.5/10.

#161 Boiled Salt Beef and Dumplings

After the reasonable success of the ham I cured, I was keen to try something else so I went for salt beef. You can of course just buy your beef already salted, but if you want to have a go at your own, follow this link. My friend Evelyn had also made a request for it a while back, and although beef and dumplings are in no way summery I thought I’d do it anyway.

Put your beef – silverside or brisket – in a large pot and pour in enough water to just cover it. Bring it slowly to a simmer – taste the water after 10 minutes, if it’s salty change the water and start again. Add 2 unpeeled onions that have been studded with four cloves each, a small piece of nutmeg, two blades of mace and a generous seasoning of black pepper. Once the beef is simmering turn it down to the lowest heat possible so that the tiniest amount of bubbling occurs. Now cover and leave to simmer – the time depends upon the weight of the meat, to calculate it use the same method as on this entry, but a 3 pound piece of beef will take 3 ½ hours in total.

Toward the end of the cooking time, make your dumpling mixture: sift 4 ounces of plain flour with a teaspoon of baking powder and a good pinch of salt into a bowl and stir in 2 ounces of shredded suet (i.e. packet suet). Add just enough water to make a slightly stick dough and with floured hands make little balls of the dough (about ten, I’d say). Add a little grated horseradish in their centres. Alternatively use a cube of fried bread or mix chopped parsley into the dough.

When the beef is cooked, remove it and let it rest. Add the dumplings and let them poach for 10-15 minutes.

Serve it with gravy made using some of the cooking liquor and glazed carrots, says Lady Griggers. I did peas too and some horseradish sauce.

#161 Boiled Salt Beef and Dumplings – 8/10. Really delicious and definitely the best of the cured meat thus far. The beef was flaky and pink with the saltiness perfectly balanced with the aromatic herbs, spices and sugars from the brine cure and stock. I’ve never bought salt beef, so I’ve nothing to compare it to, but I shall be definitely doing this one again, but perhaps during wintertime! The dumplings were okay – they could have been fluffier, however, they were cooking for longer than 10 minutes as I lost track of time getting everything else ready. Oopsey!

Sorry there’s no photo – I took one, but for some reason it’s no longer on my camera’s memory! Double oopsey!!

#151 To Cook Salt Pork or Hams: Part 1 – To Eat Hot

After a 5 day wait, the pork I had put in the brine tub was ready for cooking. Jane outlines three different ways to cook your salt pork or ham if you want to serve it hot, but they all start with the same process: simmering in water with stock vegetables.

The first thing to do is to rinse your joint and weight it on some scales. Place the joint in a heavy casserole or stockpot, cover it with cool water and let it come to a boil slowly. Let it simmer for 5 minutes and taste the water – if it’s too salty throw the water away and start again (though it was fine when I tasted mine). For hams up to 4 pounds (2 kilos), cook for 30 minutes to the pound (1 hour to the kilo) plus an extra 30 minutes. However, this can be reduced if the joint is slim. To improve the flavour of the ham, add some stock vegetables: carrot, onion, leek, turnip, that kind of thing. They also flavour the stock with which delicious soups can be made – like this one.

It now depends on how you want to serve your ham:
1. Simply boiled – easy-peasy! Serve it with whatever vegetables or salad you like.

2. Encased in pastry – yes, you heard correctly! Remove before the final hour; encase it in thick pastry, glaze with egg and bake in a moderate-hot oven for an hour.

3. Glaze it. This the one I went for. Remove the ham half an hour before the end of cooking and remove the skin. Criss-cross the fat with a sharp knife and stud the crosses with cloves. Then make a glaze:

Sorry about the shit picture – I’m sure I took a better one than this!

Mix together a tablespoon of French mustard, one of double cream and one of either brown sugar, marmalade or apricot jam (or anything else sweet you like), next mix in a teaspoon of ground cinnamon or cloves. Spread this mixture all over the fat. Place in a roasting tin, add a ladleful of the stock to the bottom to stop any glaze from catching if it falls, and bake for 30 minutes at 190°C. When done, remove and let it rest before carving.

To accompany it, make a sauce with the pan juices by boiling them up with some cream, white wine or fortified wine, depending on the glaze you used. I went for cream as I used dark brown sugar.

Serve with seasonal vegetables and glazed onions, Grigson says. However, she also says that glazed turnips go well too. So I made those, plus boiled potatoes and peas.

#151 – To Cook Salt Pork and Hams: Part 1 – To Eat Hot: 7/10. I really enjoyed this – the ham cure was beautifully seasoned and salty and the spiced sticky sugar glaze complimented it perfectly. It was a little dry though, but I have a feeling that I cooked a little too long in the stock though as it was a slim piece of meat. That said, it was still delicious and we all polished it off quick-smart. I think that with a bit of practise at this kind of thing, the scores will quickly creep up to the high 8s, 9s or 10s!

#150 How to Cure Meat in Brine

Well here we are – 150 recipes in. I didn’t realise I was at this milestone until yesterday – unfortunately it’s not some magnificent feast, in fact it’s really a recipe as such, and I can’t really give it a rating (at least not yet).

Jane Grigson has quite a few recipes that require salting and brining, so I thought I’d better start to get to grips with this completely ignored section of the book, by making roast ham from start to finish as the best way for me to get started, though I’ll discuss that in a separate post – this one is just concerned with brining generally.

I’ve been doing a bit of reading on the subject of brining and it seems a bit of a lost art – there’s not much information about the history of it or how to do your own curing by the method. Obviously it’s gone out of favour to some degree because it is a method of preservation first and foremost, and now with frozen and refrigerated meats on tap these days we don’t have to do such things. However, brining also lends good flavour – we all like good ham, gammon or salt beef – so you would think it popular (seeing as it’s easy too). The thing is that it is time-consuming, and we can all just pick some up ready brined or ready roasted meat, but one thing I read was that for many wet-cured meats, the wet-cure part of the process is missed out! These days they are cured with nitrating bacteria – nitrates help preserve things – resulting a lack of flavour. I’m certainly not insinuating that this method is ubiquitous, but I reckon most supermarkets (and many butchers) use it.

Brine contains three magic ingredients that help preserve meat: salt, sugar and saltpetre. The first two do so because they are in huge quantities in the brine, and can affect the normal osmotic pressures of cells – both animal and microbe. Salts and sugar enter the cells, and water rushes out in an attempt to equal the concentrations inside and outside of the cells. This results in the death of the microbes and the preservation of the meat. Saltpetre (or potassium nitrate) is antibacterial and also gives the meat a pleasing pink colour (it is what makes corned beef so pink, for example). Aside from these three ingredients there are several herbs and spices that improve the flavour of the meat.

FYI: In days of yore, saltpetre was produced by pouring stale urine to huge haystacks where it would drain and crystallise. Yum!!

To make the brine, start off by cleaning a tub or bucket with a close-fitting lid and a plate that will comfortably fit inside with soda crystals. I used a six litre Tupperware tub with a handle. Do not use a metal tub as it may react with the salt or saltpetre. Allow them to drip dry. Whilst you’re waiting for that, make the brine: To a large stockpot or similar add 5 pints of water, 12 ounces each of sea salt and brown sugar and an ounce of saltpetre. This is the basic mixture, but now you need some aromatics (all of which are optional): 1 level teaspoon of juniper berries, a small piece of grated nutmeg, a bay leaf, 3 sprigs of thyme, a level teaspoon of black peppercorns and 4 cloves, Grigson says, but anything you like in that goes with the meat you are brining. Bring to a rapid boil and skim off any scum should there be any. Allow to cool in the pot. Once cool, strain it into your cleaned tub. Place in the joint of meat and keep it submerged in the brine with the plate you washed earlier. Place in a cool cupboard or pantry – though don’t allow it to go below 4°C. The length of time it sits there now depends upon the type of meat and the reason you are brining it (see your recipe, or below, for guidelines). When it is done remove with some clean tongs.

The brine won’t last indefinitely – it may grow mould on it’s surface, which some people say just to skim off. The reason is; the amount of salt depletes every time you use it. For a corrective dose, boil 1 ¾ pints of water with 7 ounces each of salt and sugar and a heaped dessertspoon of juniper berries. Let it cool and add it to the skimmed brine. You could of course just make more from scratch.

Pork leg joint magically being tranfomed into ham

Brining times:
To convert shoulder or leg of pork into ham, or for pork loin: 3 to 10 days
Pig trotters and halved heads: 24 hours
Small tongues (e.g. pig): 36-48 hours
Large tongues (e.g. ox): 5 days
Duck (minus giblets): 36-48 hours
Beef silverside or brisket: 7-10 days
Lamb or mutton shoulder, leg and loin: 7-10 days.

The meat needs to be cooked by boiling – check the cooking water is not too salty after about 5 minutes cooking. If it is change the water and start again. If it’s okay, then add your stock vegetables or whatever the recipe requires.

However, if you are making a roast joint for Sunday lunch, try popping the joint in brine overnight to season it.

So there you have it – hopefully all works out and it doesn’t taste completely foul. My fingers are crossed that it ends up being worth the effort.