#269 Elizabeth David’s Everlasting Syllabub

I made this syllabub to end to the little meal Hugh and I cooked for Maartin and Ninja. I’d had a feeling no one had tried one before as they have gone out of fashion rather. I’d only had one in my life before.
Syllabubs were very popular up until recently. Originally they were simply a mixture of ales or cider mixed with milk or cream, which was probably like a boozy curds-and-whey. The more solid, whipped and ever-lasting syllabubs first appeared in the seventeenth century, according to Griggers, although both were kinds were obviously eaten because recipes for both appear in the Experienced English Housekeeper by Elizabeth Raffauld from 1769 (I have recently got hold of a copy of it).
The recipe in English Food, is from a pamphlet called Syllabubs and Fruit Fools, written by the great Elizabeth David, but I thought I’d give this one from Elizabeth Raffauld too, you know, for those of you who want to keep it real. And have your own cow….
“To make a Syllabub under the cow
Put a bottle of strong beer and a pint of cider into a punch bowl, grate in a small nutmeg and sweeten it to your taste. Then milk as much milk from the cow as will make a strong froth and the ale look clear. Let it stand an hour, then strew over it a few currants well washed, picked, and plumped before the fire. Then send it to the table.
Brilliant. Sounds awful.
Anyway, here the recipe from Ms David:
This serves four to six. Bear in mind that you have to start this one the day before you want to serve it.
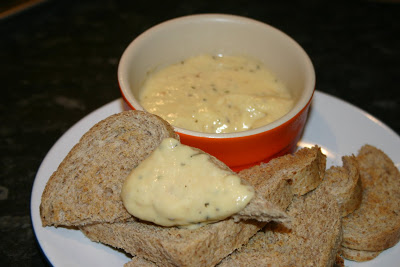
To a small bowl, add 4 fluid ounces of white wine or sherry (I went with wine, as sherry seemed a bit too rich), 2 tablespoons of brandy and the pared rind and juice of a lemon. Cover the bowl and let the flavours infuse together overnight. Strain everything into a large bowl and dissolve into the liquor two ounces of caster sugar. Next slowly mix in half a pint of double cream and grate in some nutmeg. Whisk the syllabub until it almost reaches the stiff peak stage so it is still a little floppy. Don’t over-whip it. There’s nothing worse than over-whipped cream; it goes all weird and cloying. You have been warned. Spoon onto glasses or ramekins and cover with foil or cling film. Leave them somewhere cool. Sir Kenelm Digby in 1669 recommends ‘[a] tiny sprig of rosemary or a little twist of lemon peel’, so I pared some thin pieces of lemon peel and let those stand in sugar overnight too as a traditional garnish. I served them with those little caramelised biscuits you get with coffee, I forget their name.
#269 Elizabeth David’s Everlasting Syllabub. Quite a boozy affair, this dessert, and I have never really got used to alcoholic puds, we just do eat them these days. However, as far as those kinds of desserts go, this was a good one, and nothing like the awfulness that was the Whim-Wham. The lemon and the fact it was a whipped dessert made it feel lighter than it was. Hugh ended up scoffing loads of them and made himself sick. Oh dear. I can’t scoff, cos I did exactly the same with the Whim-Wham. 6/10.

#239 Rice Bread

Baking is the best form of procrastination because at least you have something to show for it other than a lack of what you should have been doing. I chose this bread simply because I had all the ingredients in. Although it is a rice-based bread, don’t be getting it confused with the awful rice cake I made last year. This recipe is another from Elizabeth David’s tome English Bread and Yeast Cookery, and was very popular with one Lady Llanover who said rice bread is the best for sandwiches. It has gone out of favour since the nineteenth century, let see if it worth bringing back…

First cook three ounces of long-grain rice in double its volume of water in a covered pan. Let it simmer and don’t take the lid off until all the water has been absorbed. Meanwhile, cream half an ounce of fresh yeast in a little water. The recipe calls for quite a lot of salt: between a half and three-quarters of an ounce of it! I measured a shy half an ounce. Dissolve the salt in a quarter pint of water from the kettle and add to it a further 8 fluid ounces of cold water. Place 18 ounces of strong plain flour in a mixing bowl, make a well in the centre and add the creamed yeast and warm salty water. Mix to form a soft dough with your hands, adding more water of flour if appropriate. Cover and leave to rise in a warm place: you know the drill.


Knock back the risen dough and briefly knead, either by hand or with a dough hook, then place in a large greased bread tin that has a three to three-and-a-half pint capacity. Cover once more and allow to prove until it has risen up to the top of the tin. Place in an oven preheated to 230⁰C for 15 minutes and then lower the heat to 200⁰C for a further 15 minutes. Remove the loaf from the tin, invert it, and then place it back in the oven for a final five minutes so that the crust can crisp up.

#239 Rice Bread. A lovely pale, fluffy and slightly spongy bread that was indeed great for sandwiches. I polished most of it off with fried bacon and rocket with mayonnaise. Definitely the best of the plain breads so far, and definitely one of the easiest. I wouldn’t put more than a quarter of an ounce of salt in though as any more and it could have been horrid. 8/10

#228 Spiced Salt Beef

This is a posh recipe; this cured beef is produced by Harrods by the wheelbarrow-load every Christmas. It’s an old recipe that was revived by Elizabeth David and Griggers helpfully imparts it to us. Good girl. This uses a dry cure mix rather than brine like I’ve done before (see this post). It’s a lot easier than a wet cure as there’s no messing about making the brine itself, so if you’re thinking about curing your own meat, this is good place to start. It’s a good idea to use good quality sea salt, not crappy table salt. Good salt is not only a preservative, but also lends good flavour. Very important for this sort of thing.

You need to start by buying your beef – a piece of silverside between 2 and 6 pounds should be okay. Place the beef in a clean tub (that comes with a clean lid!) and rub 3 ounces of dark brown sugar into it. Fit the lid on tightly and leave in a cool place for 2 days. Next, make the spiced salt mixture using 4 ounces of good sea salt, a heaped teaspoon of saltpetre and an ounce each of crushed peppercorns, allspice berries and juniper berries. Use a spice grinder or coffee grinder to break up the spices if you have one, otherwise use your pestle and mortar and some elbow grease. Now rub this mixture into the beef well and leave for another nine days, rubbing the salt mix and any juices into the beef and turning it every day.

To cook the beef, rinse off any spice by running it briefly under the tap. Place the beef in a tight-fitting lid with around 8-10 fluid ounces of water. Pack shredded suet over the top surface of the beef to hep keep in the moisture as it cooks. To doubly ensure that minimal moisture is lost from the beef cover the pot with a double layer of foil before putting the lid on. Place in an oven heated to 140⁰C for 45 minutes per pound, or 50 minutes per pound if the joint is small. Remove from the oven and allow to cool for three hours before removing the lid and foil. Wrap the joint is some greaseproof paper and place a three pound weight on it and allow it press overnight. Slice it thinly and use it for sandwiches et cetera.


#228 Spiced Salt Beef. This may have been the best cured meat thus far; it was certainly the easiest. The spice-salt mixture comes across very obviously but does not take over. It keeps well in the fridge for a while if wrapped in clingfilm too. Try it in a sandwich with cucumber and horseradish sauce. Great stuff. 8.5/10.

#227 Wigs

Wigs go right back to the Middle Ages when a ‘wig’ meant a ‘wedge’. Bakers would make a sweetened cake using yeast as a raising agent, making cuts so that wedge shapes were made. This recipe is from Elizabeth David’s book, English Bread and Yeast Cookery – a classic work that I do not own yet! – and is a Seventeenth Century recipe. Eating sweet cakes really took off in that period of history as people realised that sweet cakes and breads went really nice with morning or afternoon tea. It was during this time that Teatime or High Tea came into being and a whole chapter of English Food is devoted to it. This is a good recipe to try if you’ve never made bread before as there is no kneading, er, needed!

To make your own wigs start off by creaming half an ounce of yeast in six fluid ounces of warmed milk. Beat in 12 ounces of plain flour (not strong white flour – this is more of a cake than a bread) to form a loose dough before mixing in four ounces of softened butter. Next, mix in 4 ounces of caster sugar and ½ teaspoon each of mixed spice and ground ginger along with two or three teaspoons of caraway seeds. Cover with cling film and allow to rise – a couple of hours should do it. Knock back the dough and divide it between two greased 9 inch sandwich tins, making four cuts (i.e. eight wedges). If the dough is too soft to pick up and handle, add some more flour. Cover the sandwich tins with large billowing polythene bags – you don’t want bag to touch dough – and let the wigs prove for 20 – 40 minutes. Bake in the oven for 15-20 minutes at 200⁰C. Eat warm.


#227 Wigs. I liked these – not too sweet, and great hot with plenty of butter on them. The genius thing was the addition of caraway seeds. The fragrant nutty taste may not be for everyone, but I really like it. It is a shame they have gone out of favour. These are definitely worth a go, particularly because they are a real little bit of English history. 6/10

#192 Elizabeth David’s Prawn Paste

In days of yore, we English loved potted meats and fish. You don’t seem to see many potted foodstuffs around these days: though potted beef is still popular in Yorkshire. Pate does not count. This one at first sight seems a bit weird, and perhaps foul, but there are some interesting ingredients in there. One of the great things that Elizabeth David did in the sixties and seventies was introducing us to Mediterranean flavours, and she managed to sneak a few in here: olive oil instead of butter, basil instead of parsley, lime rather than lemon. She transformed our eating habits; along with Grigson, Floyd, et al. of course. It may seem odd these days – all those continental ingredients mashed up in a now-defunct method of preparing meat and fish – but there you go.

Place eight ounces of cooked, peeled prawns in a blender along with the juice of a lime and around six tablespoons of olive oil – use extra virgin if you have it since as it’s not going to be cooked. Blend until smooth and add half a teaspoon of dried basil and a heaped saltspoon (!) of crushed coriander seeds. Season with a little salt and some Cayenne pepper. Divide between some small ramekins, cover and refrigerate. Serve with hot, thin toast.

By the way, I don’t know the capacity of a saltspoon as I don’t own one, so don’t ask me. Actually, I’d not even heard of one. I guessed and added a quarter of a teaspoon. Also, don’t buy dried basil, as it has no flavour; dry your own in a cool oven for about 20 minutes until crumbly: much better.


#192 Elizabeth David’s Prawn Paste. It may have sounded like horrible soggy fish pap, but this was delicious. The prawns were sweet, the olive oil was fruity and the basil and coriander seeds combined with the lime juice provided a morish tang. Really good – go and make some. 7.5/10.

#110 Elizabeth David’s Crumpets

Charlotte and I have been very excited about the prospect of making our own crumpets for a while – just how do you get all the hole in!? We were to find out. The recipe is actually one by Elizabeth David – a very influential food writer, who wrote a book on yeast cookery. It’s making recipes like this – really stoically English fayre that I would never have thought of cooking myself. They are very easy – you need to buy some rings to cook them in as the batter is reasonably runny. If you don’t have one / can’t be arsed buying one, don’t worry, as you can ladle mixture straight into the pan and let it spread out to produce a pikelet which you don’t seem to be able to buy anywhere other than Yorkshire.


This recipe made us a baker’s dozen of crumpets:

Start off by warming a pound of plain flour through in the oven. Whilst your waiting for that warm up a pint of whole milk, 2 tablespoons of flavourless oil and a teaspoon of sugar to blood heat. Take out 3 tablespoons of the warmed milk and fork it through half an ounce of fresh yeast and let it thicken and become creamy. Make a well in the centre of the flour and add the yeast mixture, a tablespoon of salt and the remaining milk and beat the mixture – 5 minutes by hand, or about 3 with an electric beater. Cover the mixture and allow to rise and double in bulk – this is quite rapid with fresh yeast. Knock the mixture back and add ¼ pint of warmed water that has had a very generous pinch of bicarbonate of soda dissolved in it. Beat the mixture well and let it sit a rise again for around half an hour.


Grease a griddle or heavy-based frying pan and the crumpet rings with lard. Place the rings in the pan and pour in mixture two-thirds of the way up. Allow to fry very gently until the top is covered with holes and the surface is no longer liquid. Turn the crumpets over so they cook and colour on the other side. Allow them to cool and toast them, serving them with plenty of melted butter.

#110 Elizabeth David’s Crumpets – 6.5/10. The score I’ve given these crumpets may be changed later. The reason for this is that their consistency was rather soft and doughy, however they were piping hot throughout with no raw flour taste, so I’m not whether they are mean to be like that or whether they are undercooked. Consistency aside, they did taste absolutely delicious, so when I get the chance, I’m going to try them again…