#324 Grouse

I had heard this year was a good one for grouse, so as they were cheap I ordered a brace from Bentley’s, the local butcher in Pudsey, my home town. I had never cooked or eaten grouse before and was excited about adding yet another species to the list.
In Britain, game season begins on the ‘Glorious Twelfth’ of August, and it is the grouse that are shot from that day. Another bird joins them too – the tiny snipe. It is the grouse that is held the most highly among the game shooters however, for the game eaters consider it the best of all the game birds.
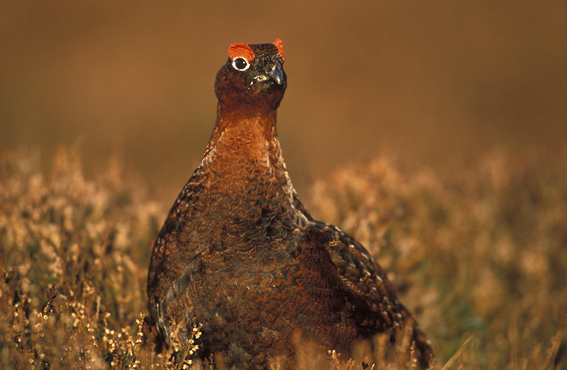
The grouse is not a single species; there are four in the British Isles. If you order grouse from your game butcher, then you will almost definitely be getting red grouse, the most common of the four.
The very beautiful red grouse
There are also the much rarer black grouse, ptarmigan and capercaillie. Of these, only the ptarmigan is still hunted, though in very small numbers, and there is a recipe for it in English Food, though I don’t expect to ever find one and cook it.
Male capercailles are rare, majestic and aggressive
and off the menu these days.
Grouse, like most game species, are very lean, which is great if you are wanting to cut down on your fat intake. The problem with this is that the meat can dry out very easily and so you need to protect the bird by encasing it in fat or bacon. You can also lard the bird with bacon fat or pork back fat. These measures are pretty easy to take, so cooking grouse is pretty straight-forward.
One grouse will serve one or two people.
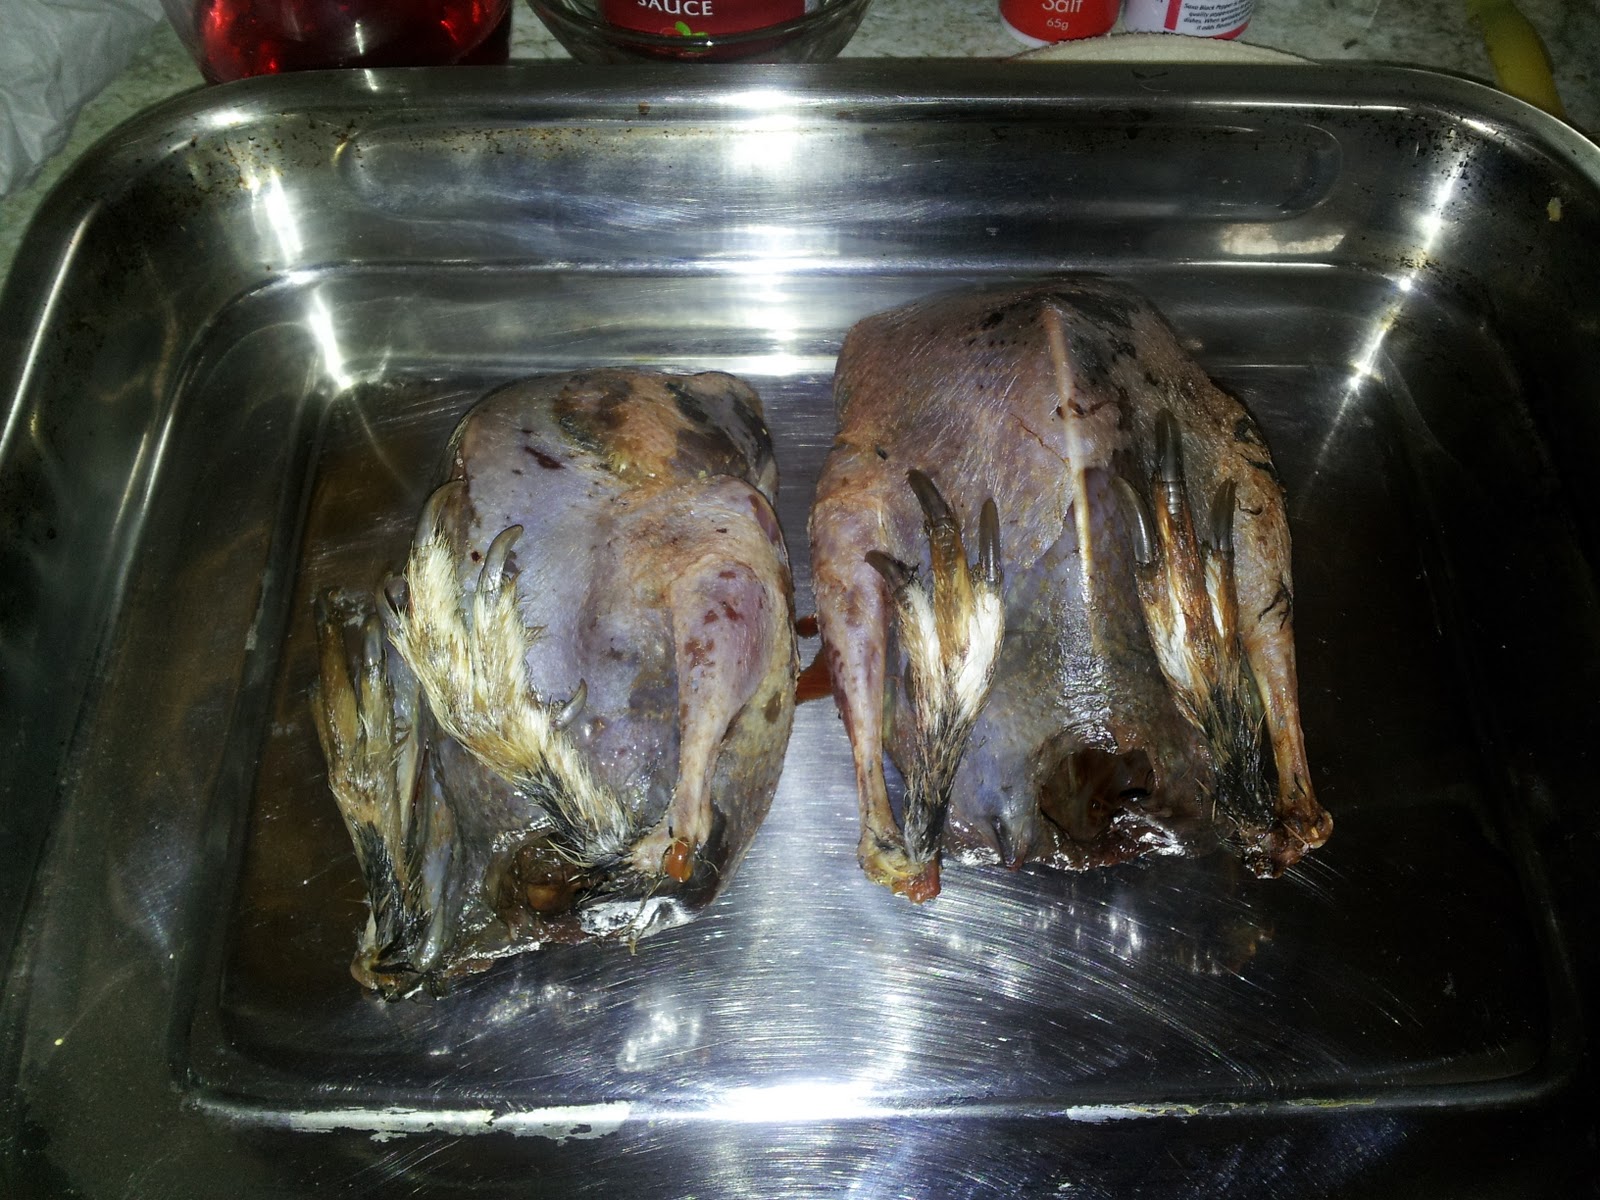
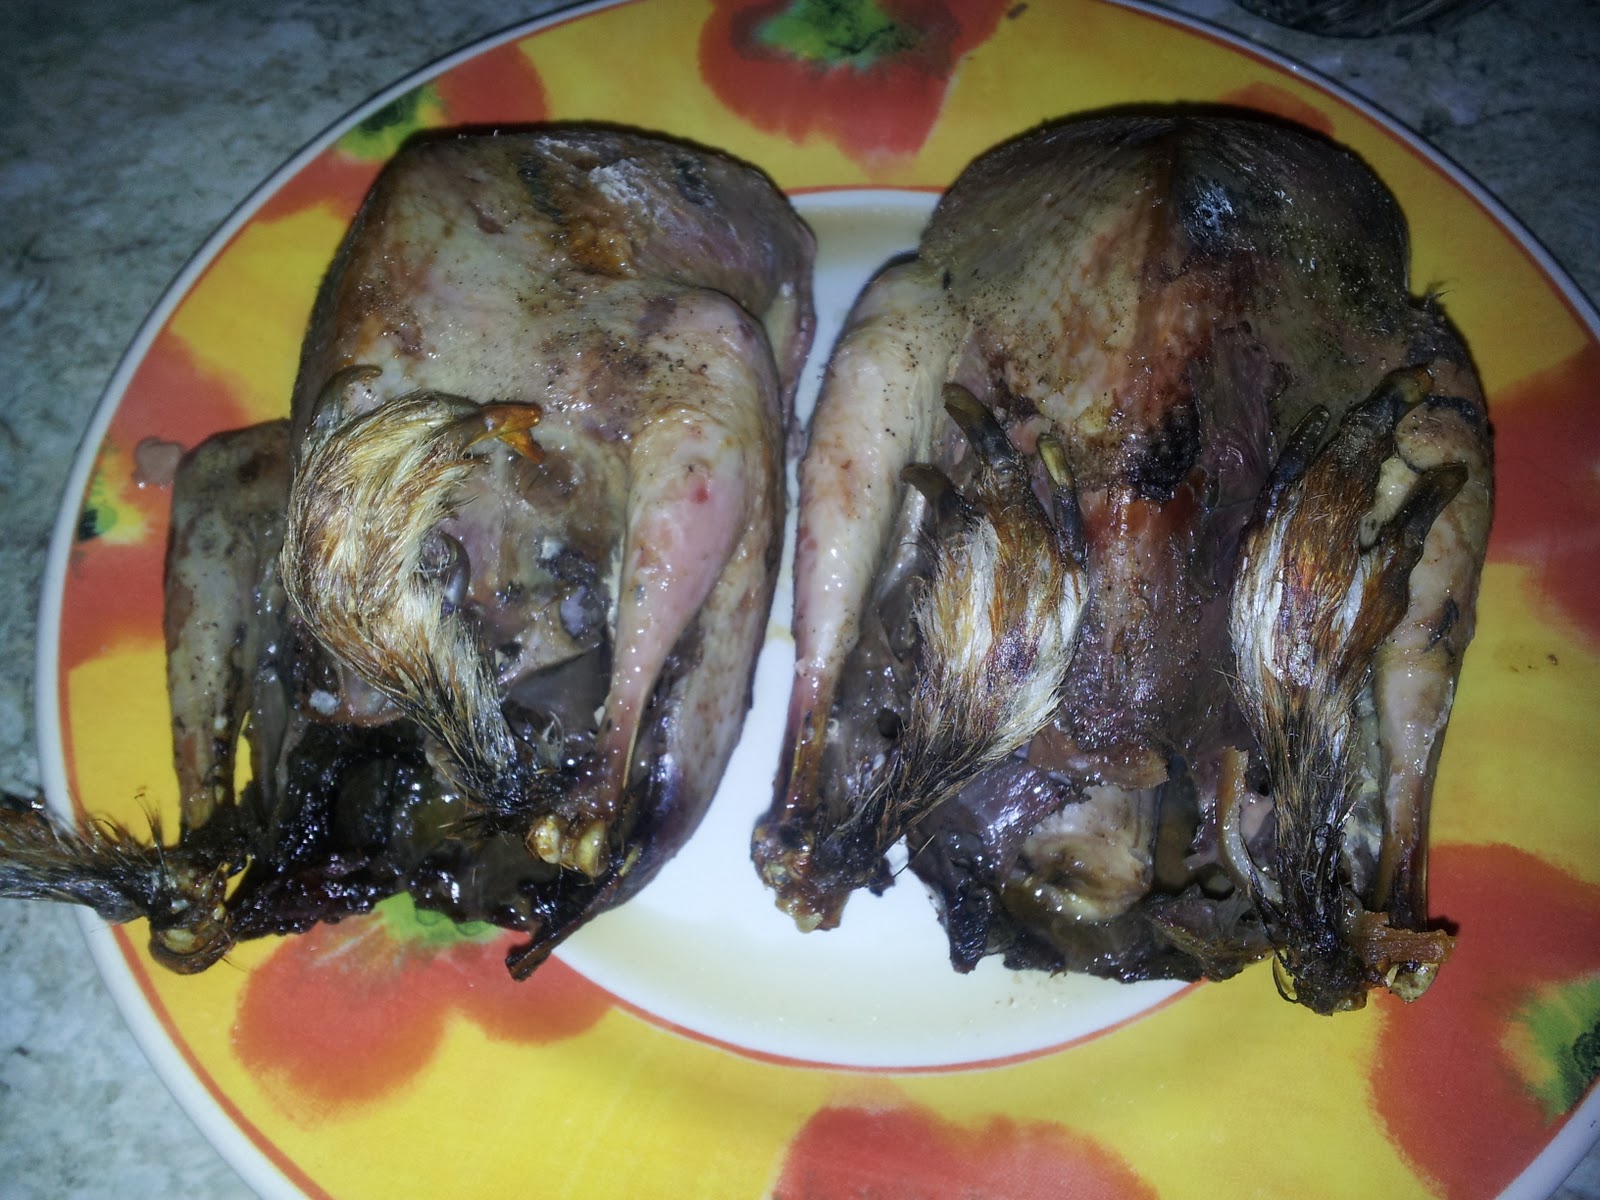
Preheat the oven to 190C (375F). Take your grouse and give them a rinse under some water and pat them dry. Season inside and out with salt and pepper and stuff the bird with some seasonal fruit. This depends upon the month you are eating the grouse; Griggers suggests bananas, wild raspberries, cranberries and peeled and seeded grapes. I went with banana.

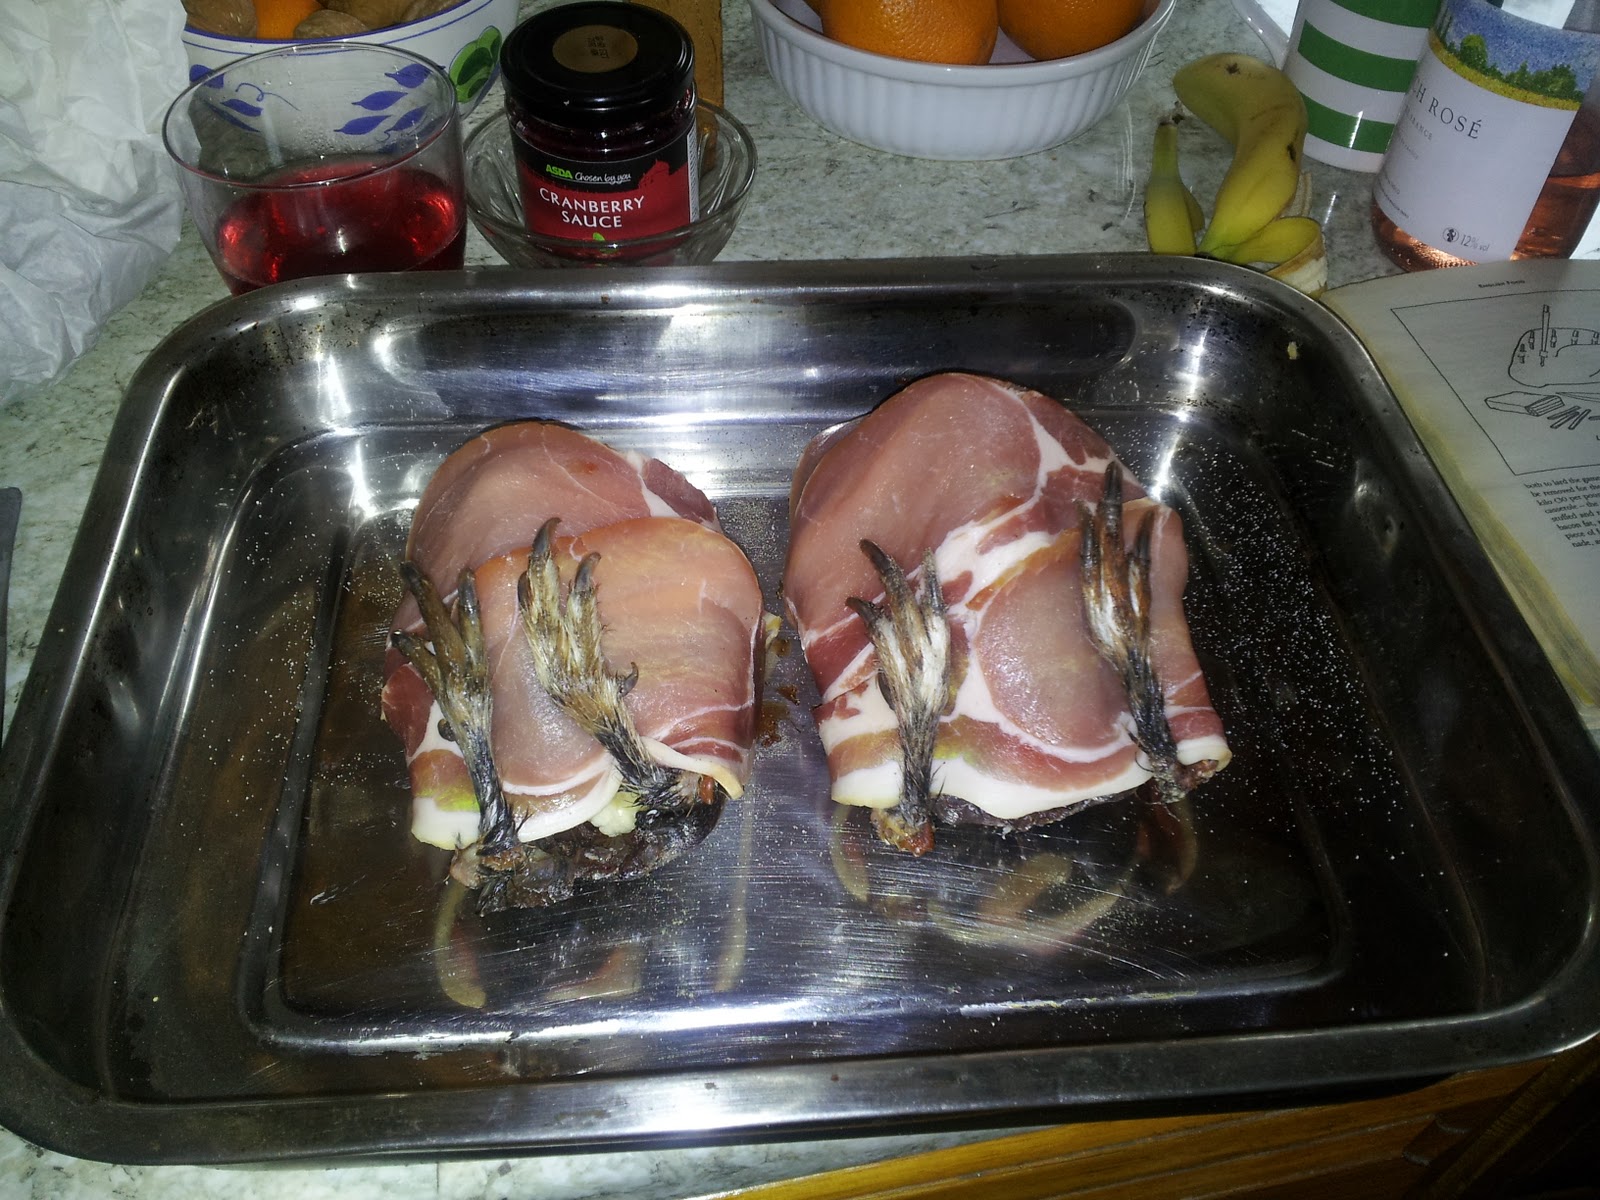
Cover the birds with vine leaves if you can get them. This is not necessary, so don’t worry if you can’t find any (I couldn’t). Next, cover the birds in jackets made of either bacon rashers or a sheet of pork back fat.

I went with bacon here as it could be served up alongside the grouse.

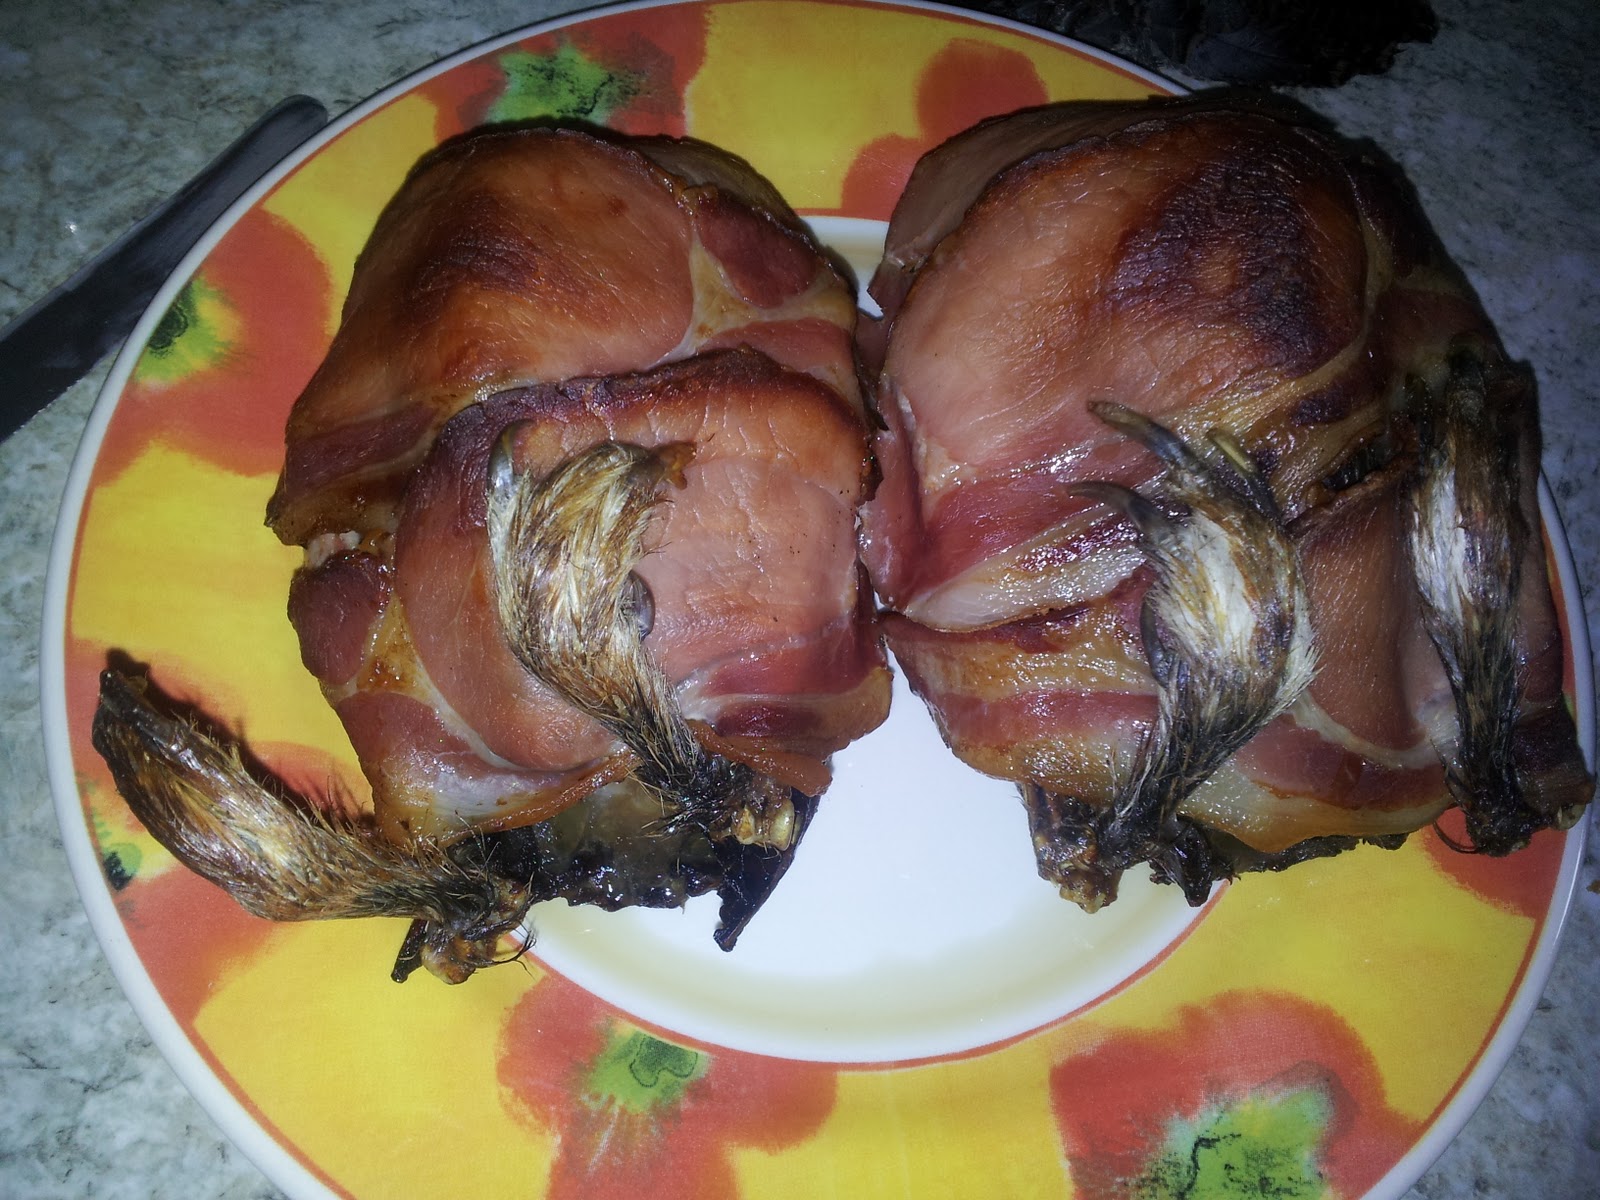
Roast for 35-45 minutes and allow to rest under some foil for around 20 minutes.

You can serve whatever you like with the grouse, but it is typically eaten with the typical game accompaniments like bread sauce, game chips and a tart jelly such as rowanberry. I went with some mashed potato and a couple of veg, myself.

#324 Grouse. This was an extremely gamey bird that was almost overpowering for me. I am not sure if it had been overhung like the mallards from a few years ago as I have no frame of reference. However, if the meat was eaten with something relatively bland like the mash, then it was good. I would like to try it again whenever I can to see if was a little too ripe, as it were. They did look very impressive with their little hairy feet sticking up, though it seemed to freak some people out. As soon as the feet were removed, the legs suddenly became drumsticks and could be dealt by squeamish minds more easily. A difficult one to score as I don’t think I saw this game bird’s full potential, but I must go with what I had on the day: 3.5/10
#323 Salmi of Game (or Duck, or Fish)

A salmi, also known as salmis, salomine and salomene is essentially a posh game stew and is an abbreviation of salmagundi which started life in France as a meat ragoût. A salmi, rather than being any meat, should be made using game birds that are partly-cooked, and then finished off in a rich sauce made from their bones, though domesticated birds like capon and Guinea fowl are commonly used. Jane Grigson complains that more often than not, salmi is made from leftover game meat and then offered at high prices in high-end restaurants. ‘Don’t be deceived’, she says, ‘[i]t is exactly what would have been eaten by Chaucer, or his son, at the court of Henry IV, or by that granddaughter of his, Alice, Duchess of Suffolk, at her manor at Ewelme.’ Grigson mentions the food eaten at the court of Henry IV a few times in English Food: giving recipes for quince comfits and ‘a coronation doucet’.

The dish originally came from medieval France and game wasn’t necessary, as this recipe shows that Grigson found dating from 1430 that uses fish:
Salomene:
Take good wine, and good powder, and bread crumpled, and sugar and boil it together; then take trout, roach, perch, or carp, or all these together, and make them clean, and after roast them on a griddle; then hew them in gobbets [chunks]; when they be cooked, dry them in oil a little, then cast them in the bruet [the sauce] and when you dress it, take mace, cloves, cubebs, gilliflowers; and cast them on top, and serve forth.

Cubebs are a type of pepper (latin name: Piper cubeba) that you can still buy from specialists, gilliflowers are a very fragrant species of carnation and ‘powder’ refers to a mixture of ground spices.

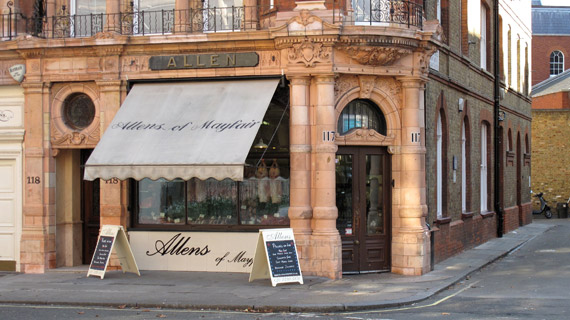
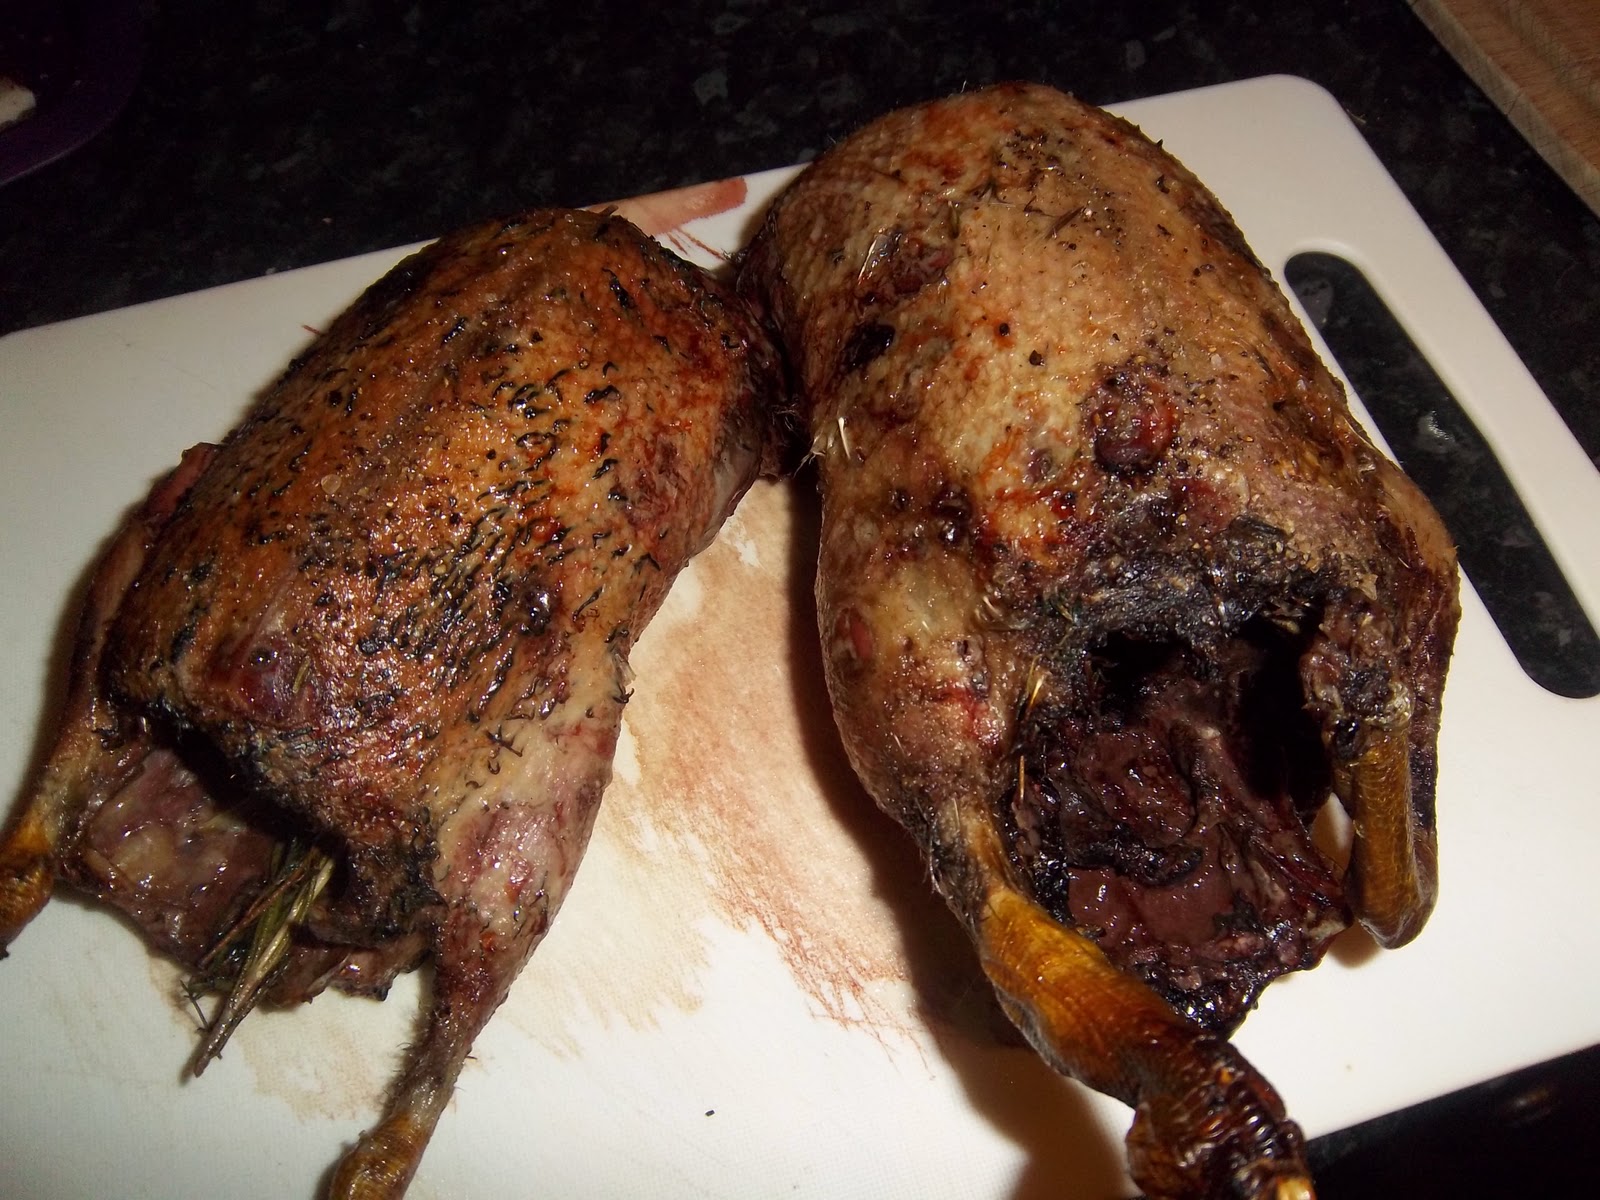
I have been eager to cook a couple of game recipes whilst I am over in England for Christmas, and seeing as I was in London, I thought I would visit the very excellent butcher Allen’s of Mayfair – an amazing place that consists of a central circular butcher’s block surrounded by the meat hanging up around it. I felt as though I had walked into a scene from a Dickens novel. I bought a couple of mallards and used those for the salmi.

Roast your game birds rare, cut the meat from the carcass into neat ‘gobbets’.

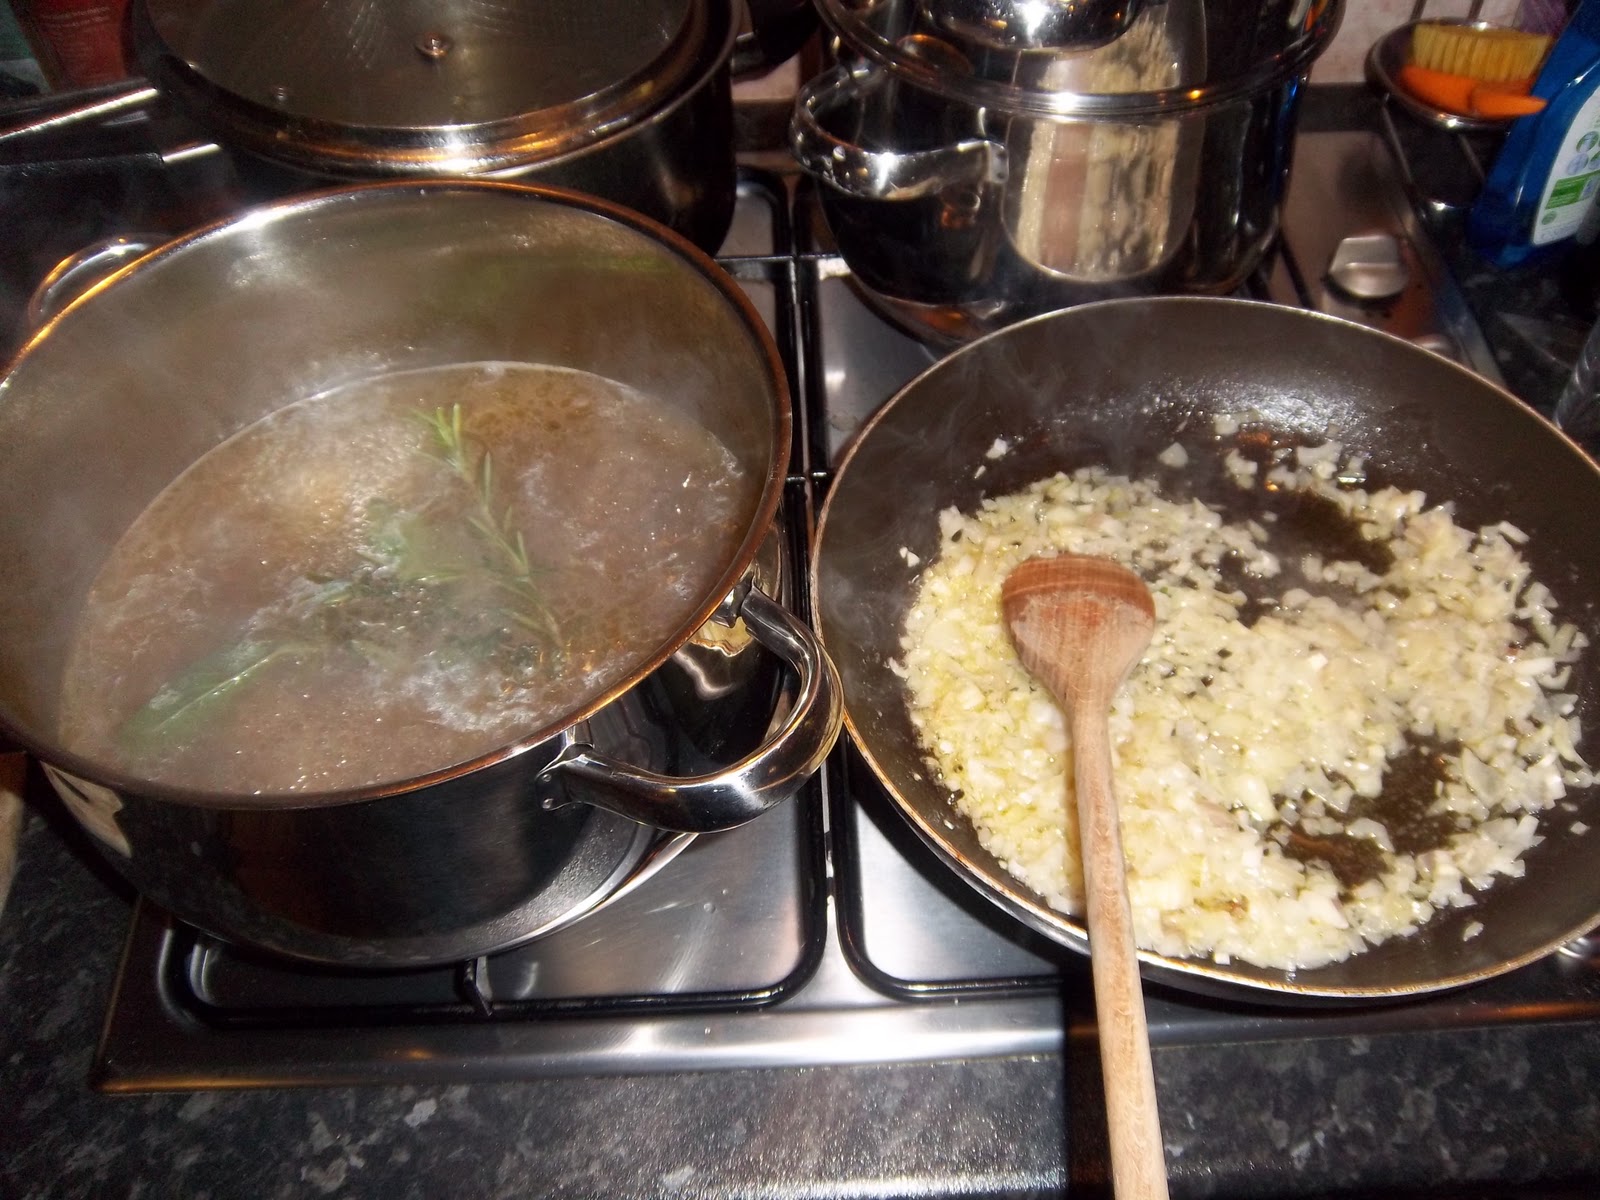
Use the carcasses to make ¾ pint of game stock. Melt 2 ounces of butter in a pan and cook 3 chopped shallots until soft and golden. Now stir in a heaped tablespoon of flour and whisk in the hot stock a third at a time to prevent lumps forming.

Add a bouquet garni and a pared strip of orange peel (Seville oranges would be great if you can get them) and simmer for 20 minutes, to make a thick sauce. Pass the sauce through a sieve and add ¼ pint of red or white wine and 4 ounces of mushrooms that have been fried in butter. Season with salt, pepper and lemon juice. Simmer for a further 5 minutes, then add the game and simmer very gently again for 10 more minutes. Add a little cayenne pepper. Serve with orange wedges and croûtons fried in butter.

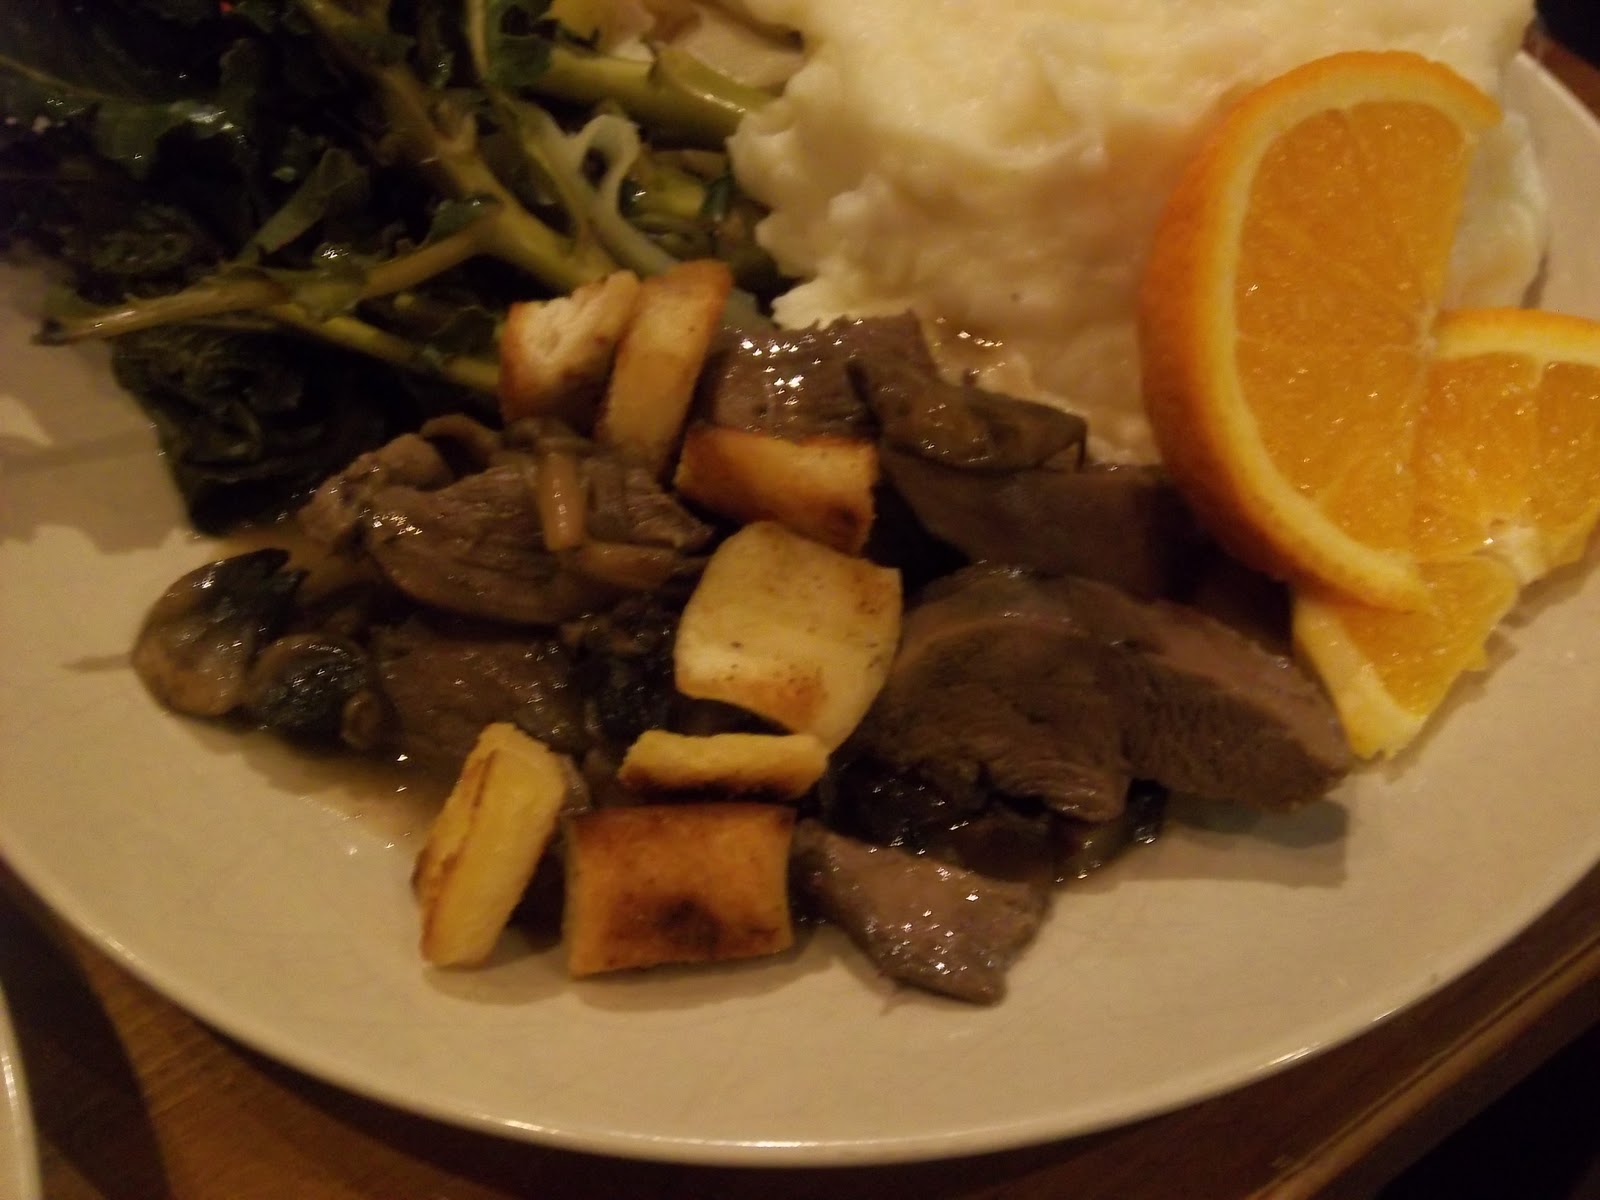
#323 Salmi of Game (or Duck, or Fish). I must admit that I was a little worried about eating mallard – the last time I cooked them it was pretty grim (see here). I needn’t have worried though, it seems that the previous mallards had been overhung because this salmi of mallard was delicious. The meat was beautifully tender and surprisingly mild in its gaminess considering how dark the flesh was. The sauce too was wonderfully rich and silky. Plus the inclusion of orange wedges for squeezing was inspired. Tres bon! 9/10.

#322 To Make a Goose Pye

What do you get for the person who has everything at Christmas? A giant pie of course. This goose ‘pye’ consists of an ox tongue within a chicken within a goose within a hot-water crust, so it’s not for the faint-hearted.

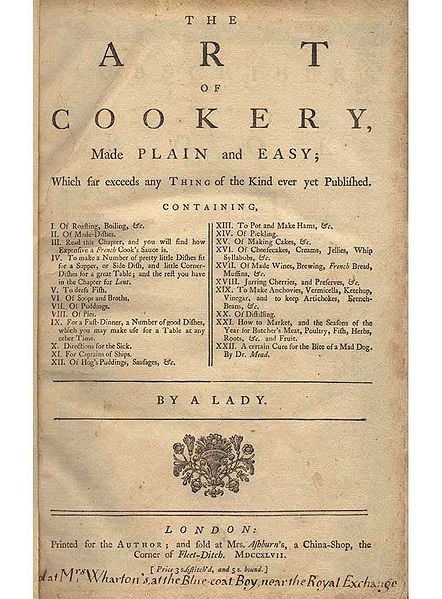
Great big pies like this were often given as gifts at Christmas time. The many meats were covered in a nice thick crust, not just because it tastes good, but also to help preserve and protect them – after all, these pyes were travelling by horse and carriage! These days, it is best as ‘a splendid centre-piece for a party’. Indeed, that the was the reason why I made it – my bosses Dave and Joan were hosting a Christmas party, and my fellow workmates are quite enthusiastic about the blog so I knew they’d all be up for this pye. Personally, I have always wanted to do this recipe – these crazy recipes are the reason why I love doing this blog. It comes from Hannah Glasse’s classic 1774 book Art of Cookery:

Half a peck of flour will make the walls of a goose pie…Raise your crust just big enough to hold a large goose; first have a pickled dried tongue boiled tender enough to peel, cut off the root, bone a goose and a large fowl; take half a quarter of an ounce of mace beat fine, a large teaspoon of beaten pepper, three teaspoons of salt; mix all together, season your goose and fowl with it, then lay the fowl in the goose, and the tongue in the fowl, and the goose in the same form as if whole. Put half a pound of butter on the top, and lay on the lid. This pie is delicious, either hot or cold, and will keep a great while. A slice of this pie cut down across makes a pretty little side-dish for supper.

Griggers kindly converts all the quantities into modern-day terms – less flour can be used (unless you are having it sent somewhere by horse!) and birds are rather larger nowadays. Good old Griggers. It is certainly the most extravagant recipe I have done thus far and possibly the most complicated; the recipe itself is quite straight-forward, but it requires a boned goose and a boned chicken, something that I had to do myself. Would the effort be worth it..?

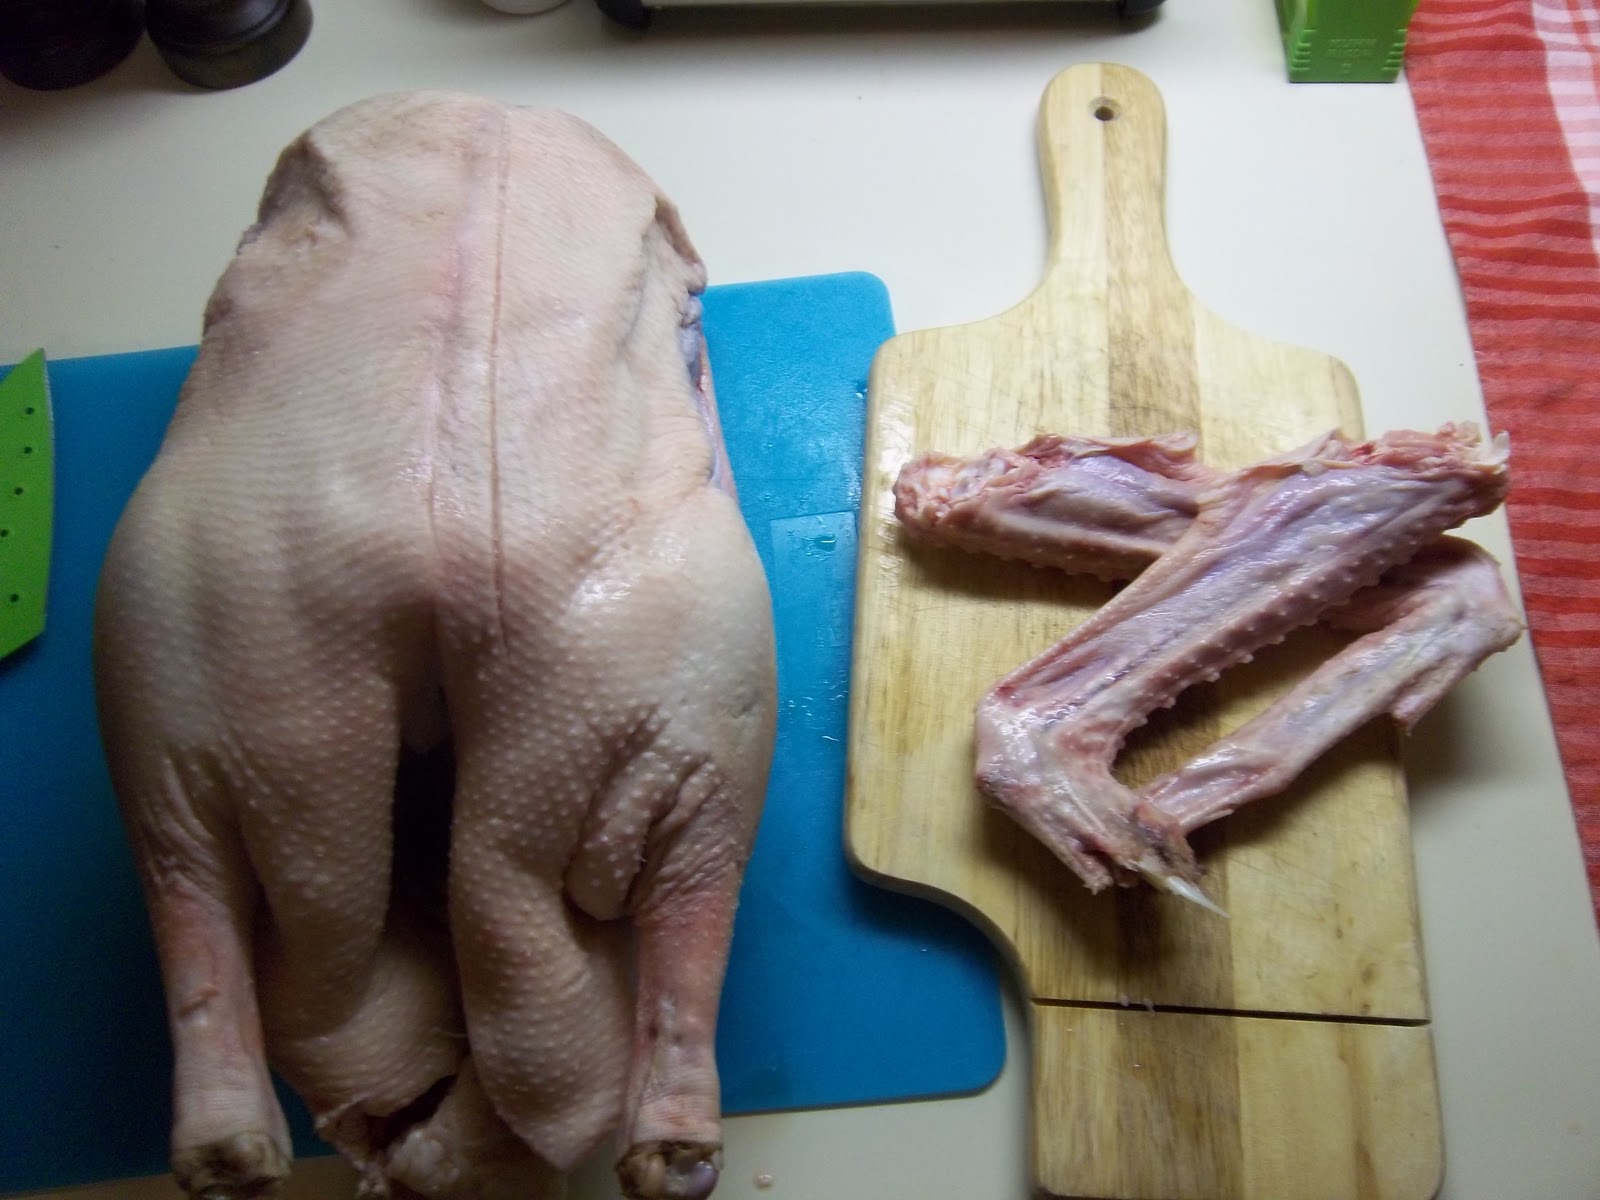
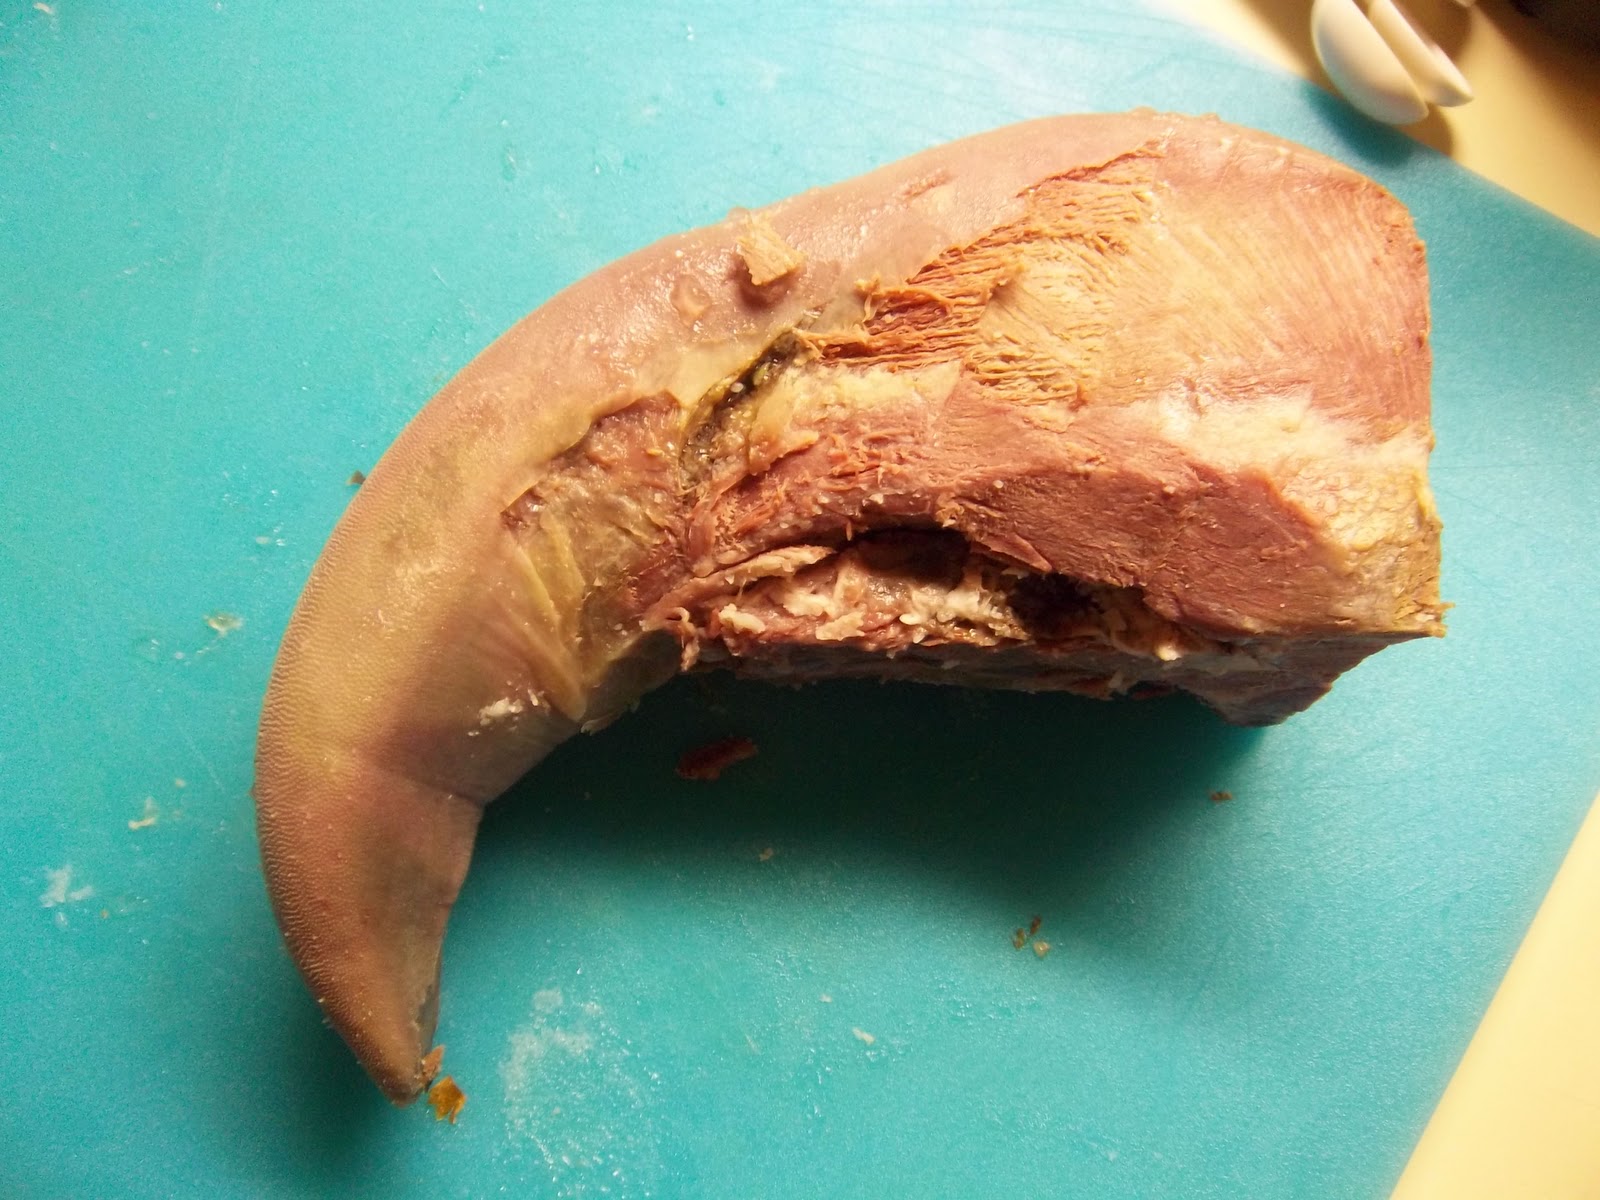
There is a certain amount of preparation required if you are to do this from scratch. The first thing is to pickle an ox tongue in brine (see here for instructions) and cook it (see the recipe here for making pressed tongue; there is no need to press it). You need 2 ½ pounds of cooked tongue, so start with one that weighs at least 3 pounds. Next is the birds: you need a 10 pound goose and a 5 pound chicken. If you can, ask the butcher to bone them for you, if that is not possible, try doing it yourself – all you need is a bit of patience and some good sharp knives. I followed the method on this website for boning a chicken, but had to change the instructions somewhat for the goose as it is much trickier than a little chicken. So here’s a little digression as I give you my version…
Boning a bird is actually quite easy – what you are essentially doing is undressing the meat from the skeleton of the fowl. As you can imagine, it is a little gory.

First thing to do is to cut off the wing-tips and then to peel the skin away from the shoulders and cut through the joints.

Next, pull on the wing bone and scrape the meat from it as you go, turning the wing inside out. Repeat with the other shoulder joint.
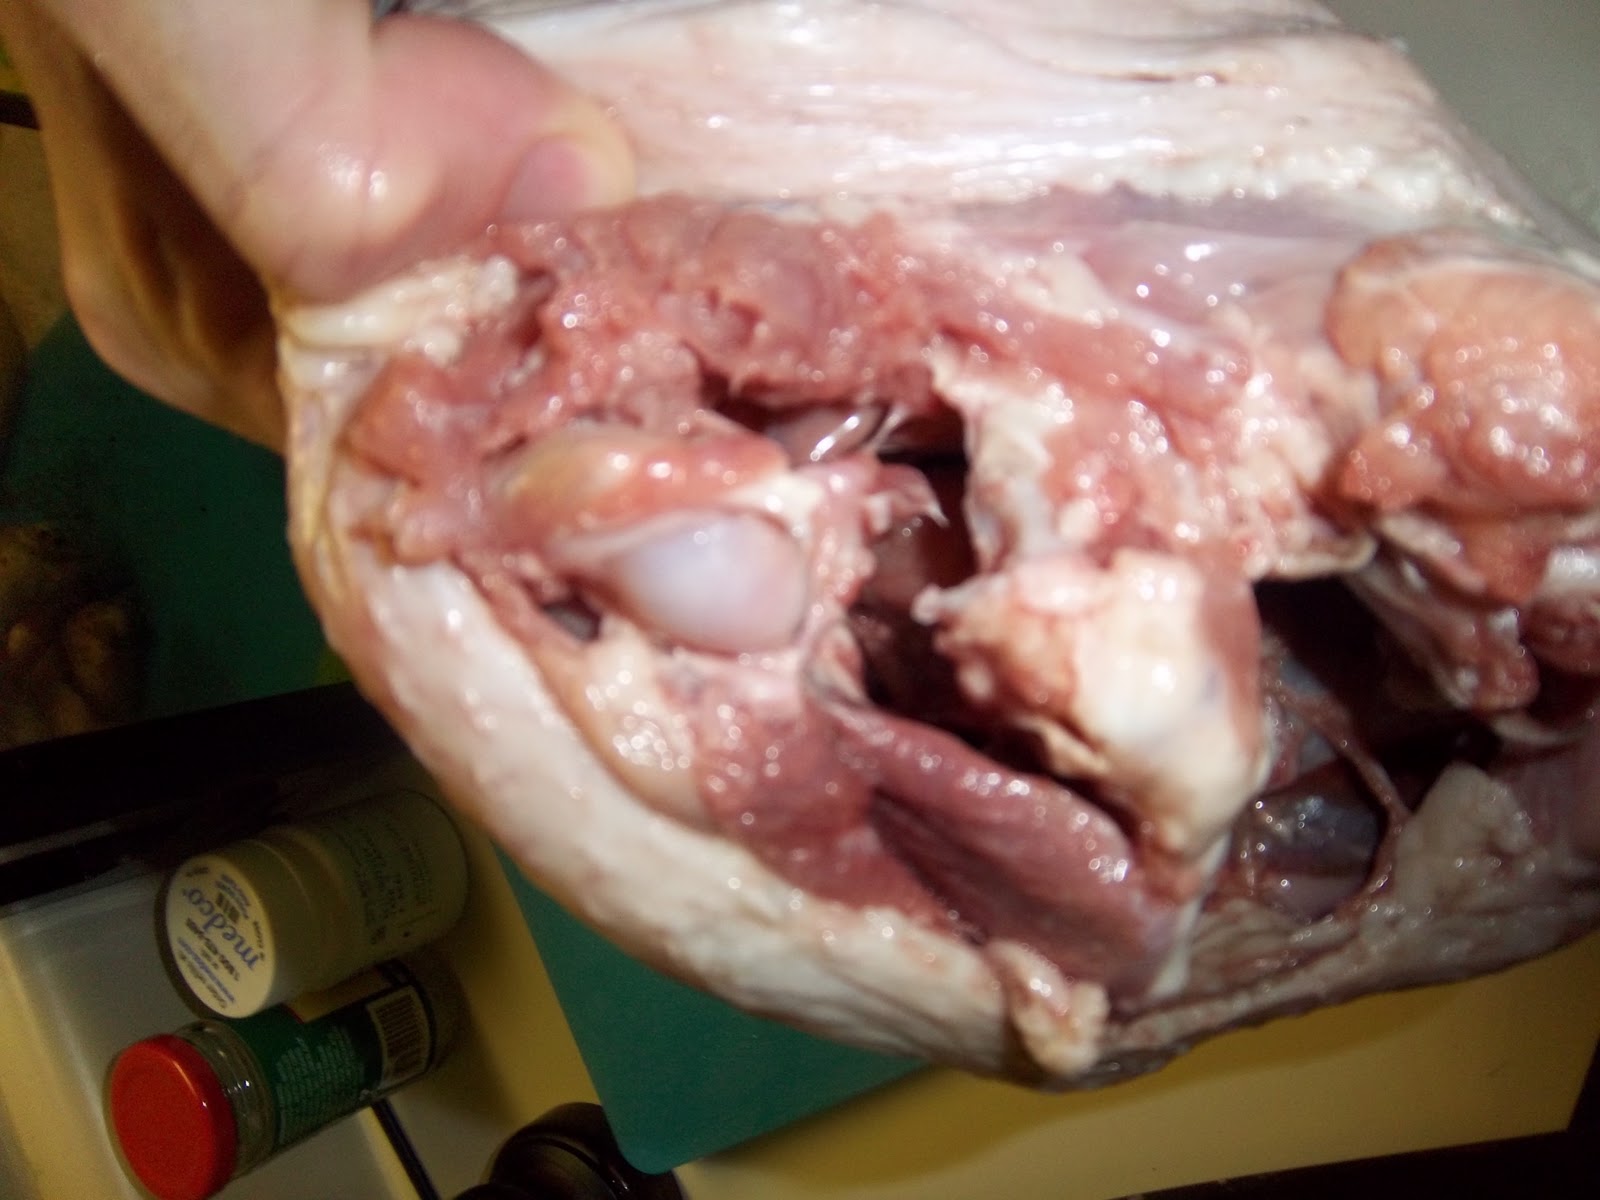
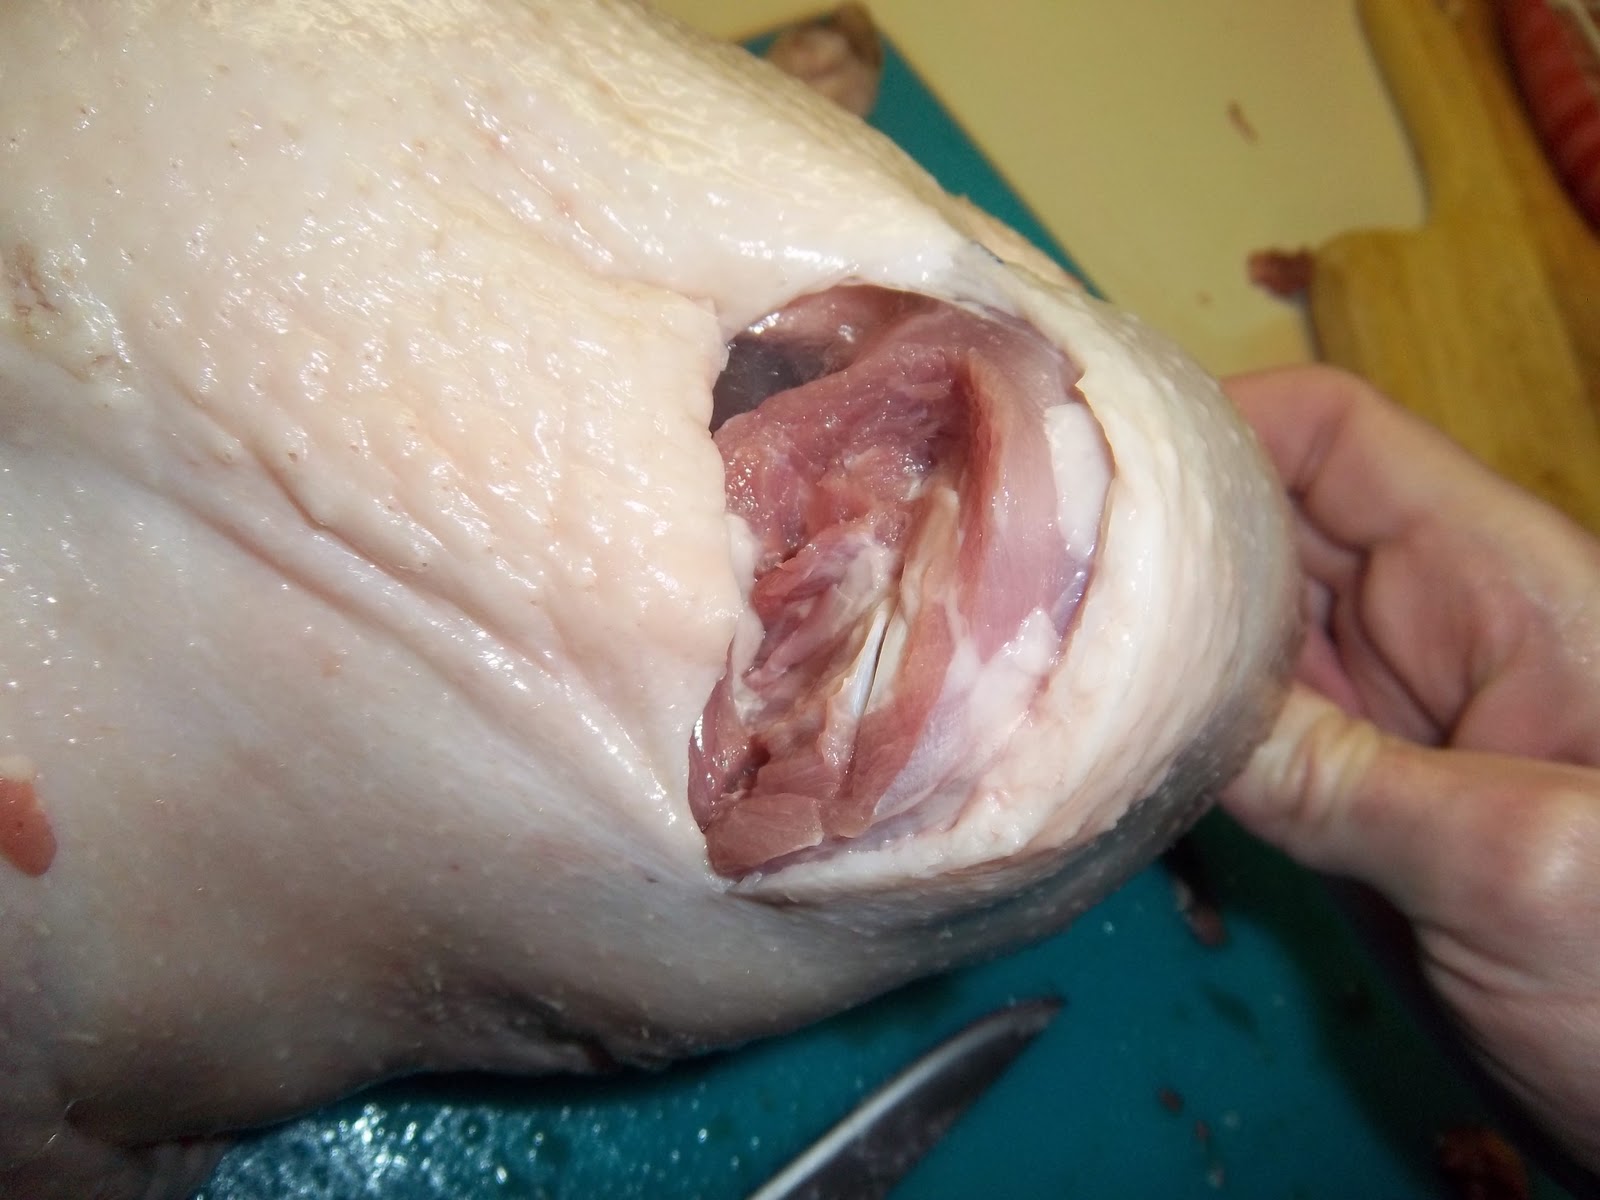
Now remove the wishbone from the top of the breasts and start cutting the meat away from the ribcage, pulling the meat back. Keep doing this around the whole of the body. When you are about half-way down, sit the bird up and let the meat hang down by its own weight. When you get to the hips, you need to pop the femur out of its socket, then continue until the whole of the carcass is removed from the bird. You can then remove the leg bones in very much the same way as the shoulder and wing bones. Getting through that socket is very tricky with a large bird like a goose because of the large joint and large amount of fat surrounding it – to get around this, I flexed the knee joint and cut through that so I could scrape the meat off the bones from the direction of the knee.

When the leg bones have been removed, all you have to do is turn the bird outside in. Don’t forget to turn the bones, trimmings and giblets into stock.

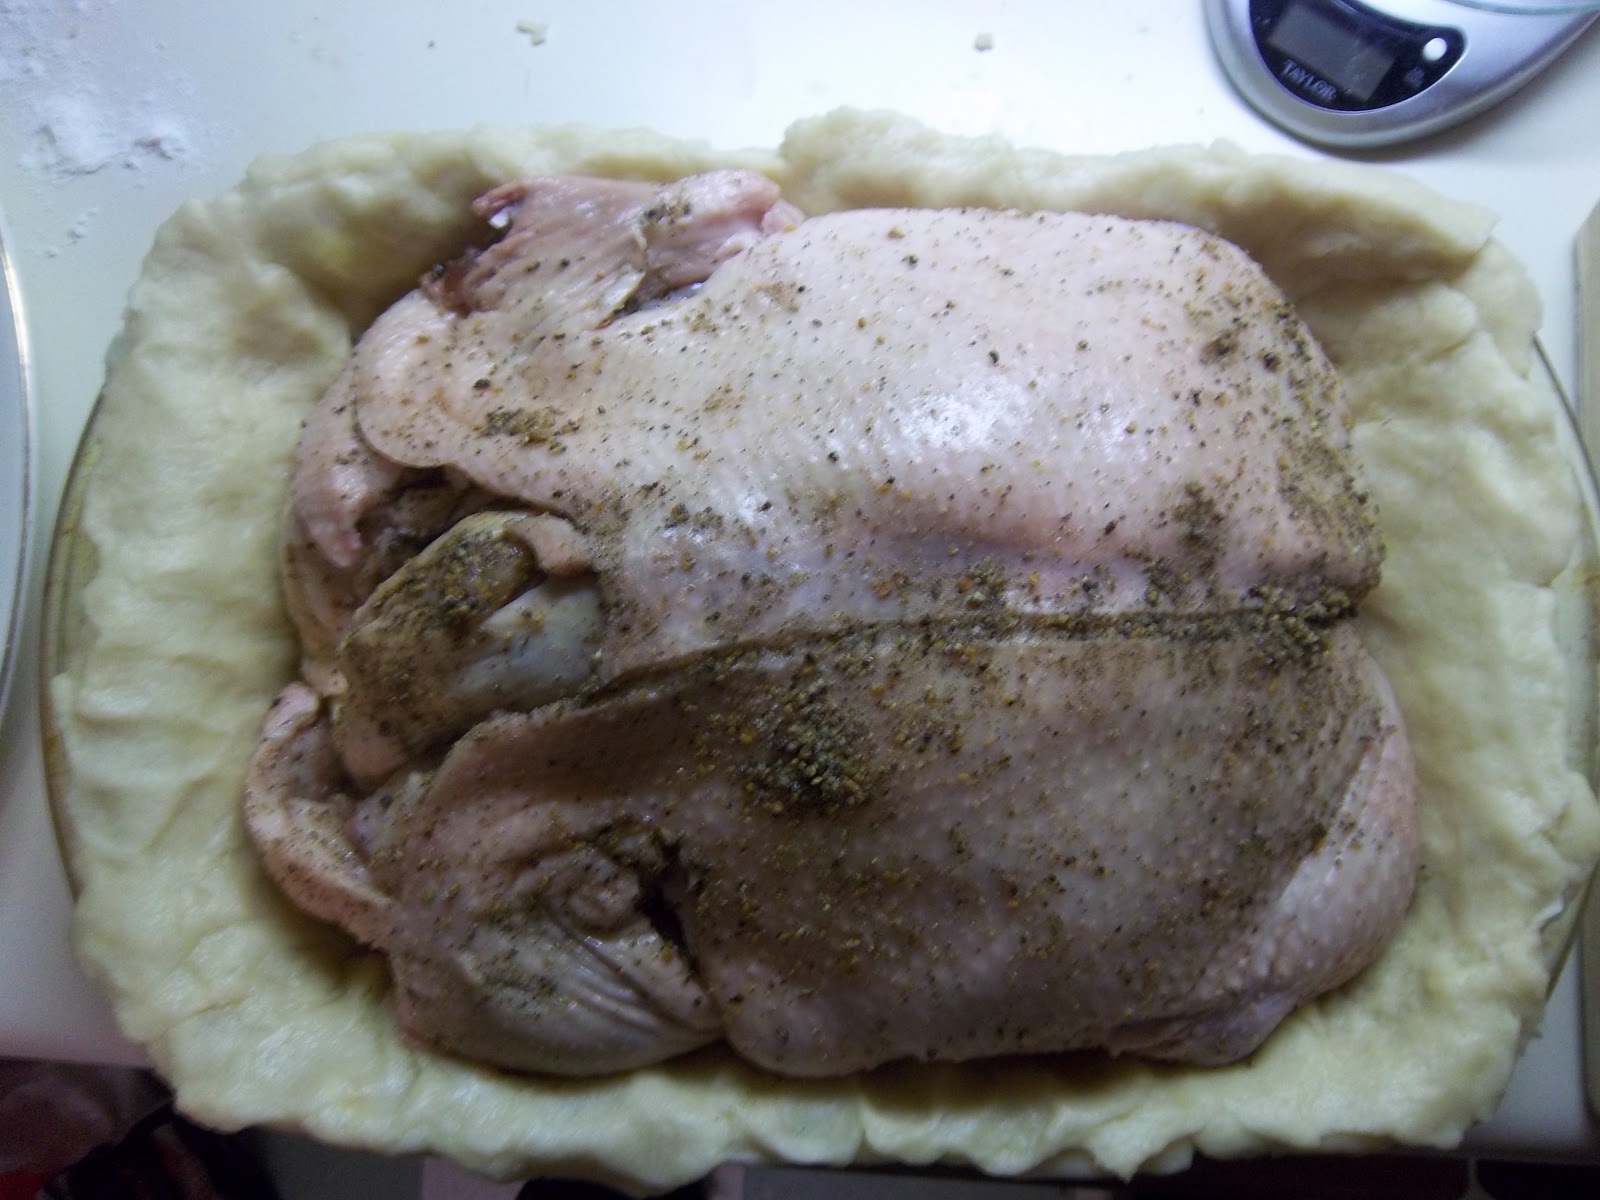
So, you have your tongue and you have your birds, next you need to get working on the hot-water crust. You need to make a crust using 3 pounds of flour. I’ve blogged about hot-water pastry before, so follow this link. I made it in 3 batches – the first I used to form the base. I made lots of smallish pastry balls to cover the inside of a glass roaster measuring about 12” x 9” x 2” and pressed them out to make a single layer that overlapped the edges of it.

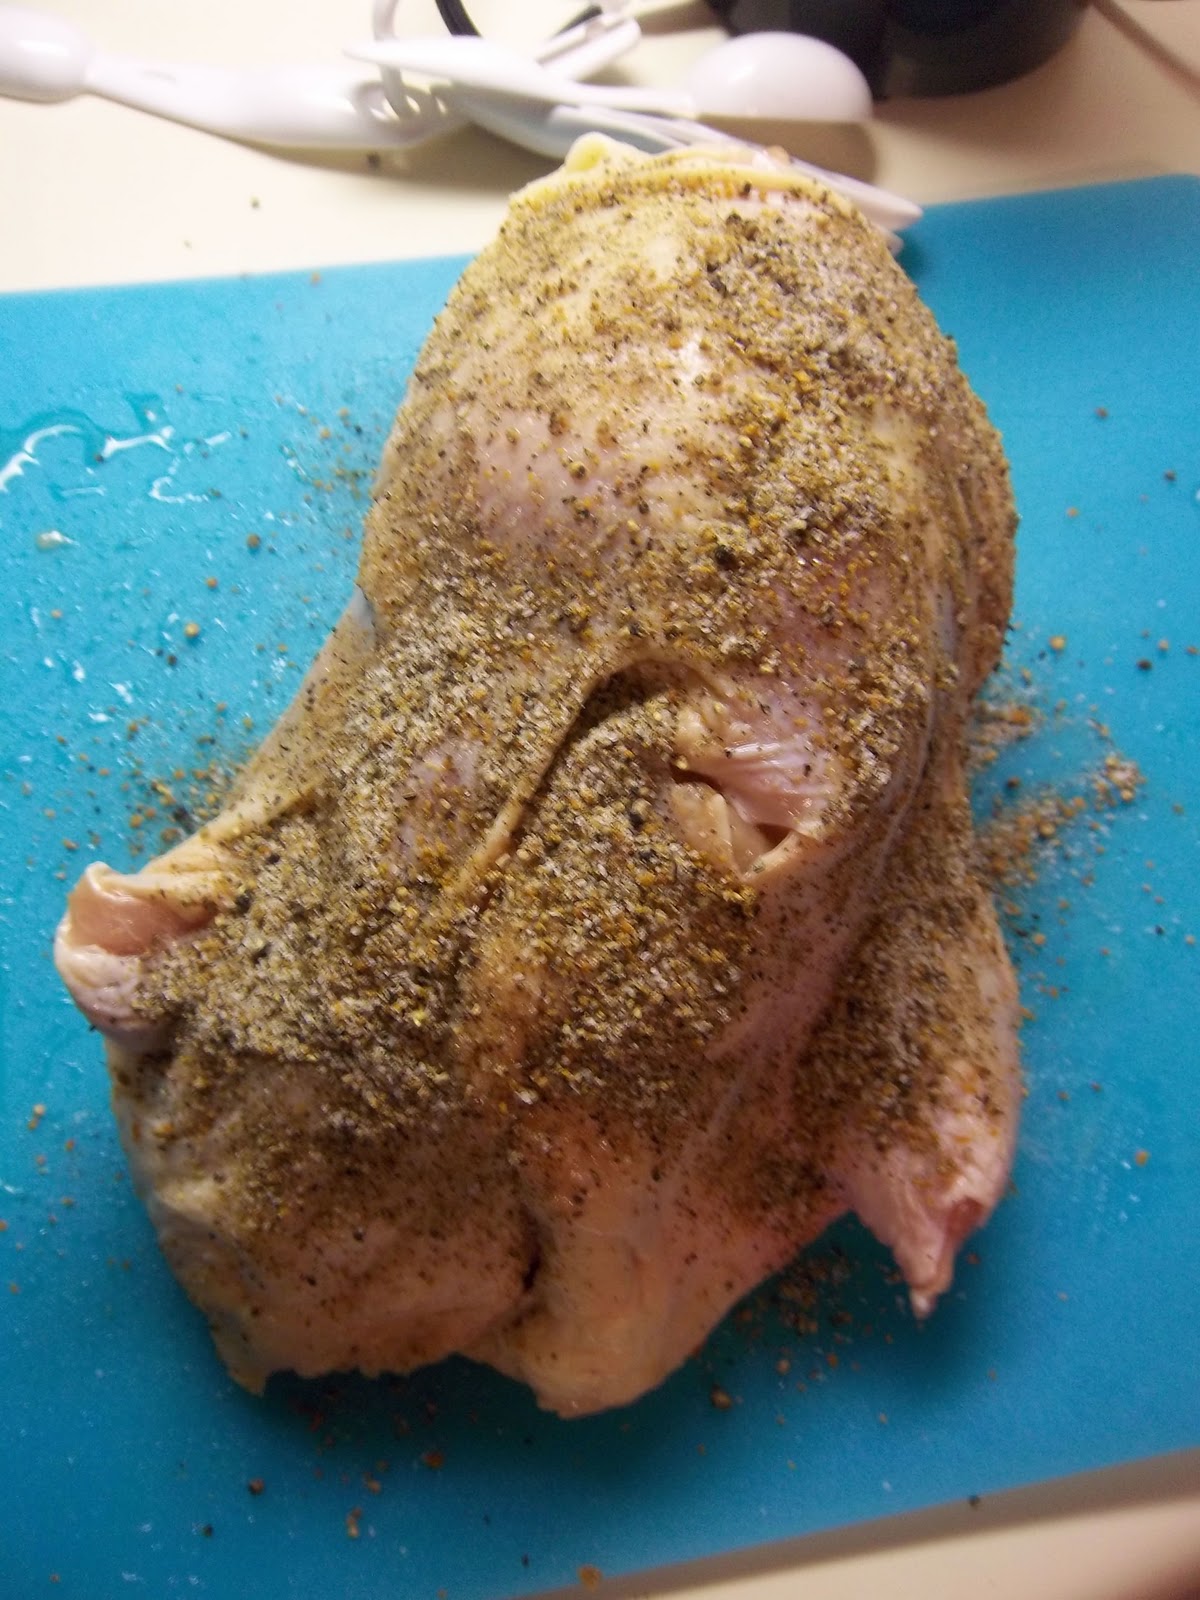
Next, mix together ¼ ounce of ground mace, 2 heaped teaspoons of ground black pepper and 5 rounded teaspoons of sea salt.

Now place the tongue in the chicken and rub in around a third of the spice mix into the chicken…

before gingerly wrapping fitting inside the goose. Place the goose in the pie and rub in the remainder of the spice and salt mix.

Lastly, smear two ounces of butter over the top of the goose.

Now roll out the rest of the pastry and cover the top of the pie, using some water as a glue. It is quite tricky to pick up such a large piece of pastry without it breaking – so use a rolling-pin and wrap it around it and unfurl it atop the pie. Crimp the edges, trim and decorate with the trimmings. Brush with beaten egg and make a central hole for the steam to escape.

Place it on a baking tray and bake the pie at 220°C (425°F) for 20 minutes and then turn the heat down to 180°C (350°F) and bake for another 2 hours. If the pie is browning too much, cover it with brown paper to protect it. If the pie bubbles ferociously, then turn down the heat again to 140-150°C (275-300°F). Loads of fat comes out the central hole, hence the precaution of the baking tray. I had to empty it twice during the whole process. I reserved it for making roast potatoes in the future, of course.

If you are wanting to serve it cold, then like most cold pies, it is best to make it a couple of days in advance so that the flavours can develop.

#322 To Make a Goose Pye. What a spectacle this pye was – especially when sliced up. I expected it to be rather macabre, but it wasn’t. It was indeed a ‘pretty little side dish’. The meat inside was wonderfully moist and a good jelly had formed inside without the need for jellied stock. Some people were a little suspicious of the tongue, but everyone seemed to like it. The only problem – though others disagreed – was that it was rather under-seasoned for me; with an extra 50 per cent salt, pepper and mace, this very, very good pye would have been excellent. 8.5/10

#321 Sweetmeat Cake

This recipe is apparently Jane Grigson’s favourite of the eighteenth century sweet tarts apprently. A sweetmeat is really any delicious sweet morsel – in this case candied orange peel, but I expect you can use any candied fruit or spice. The sweetmeats are scattered in a pastry case and covered in a sweet filling before being baked. I couldn’t really find any British recipes, though I found a couple of mentions in nineteenth century stories; I have no idea where Jane got hold of this one. I expect she pored over many a book in the National Library.

I did actually find a mention in a Canadian journal from the 1910s that sweetmeat cakes were made using honey thickened with breadcrumbs as a filling – this wasn’t a surprise as this sweetmeat cake (a tart, really) was the predecessor to one of my favourite puds, the treacle tart (as an aside she gives a brief description of a treacle tart, but not a proper recipe, not sure why she didn’t include this obvious one in the book).

Well, wherever she got it from, here is the recipe:

Preheat the oven to 180C (350C).

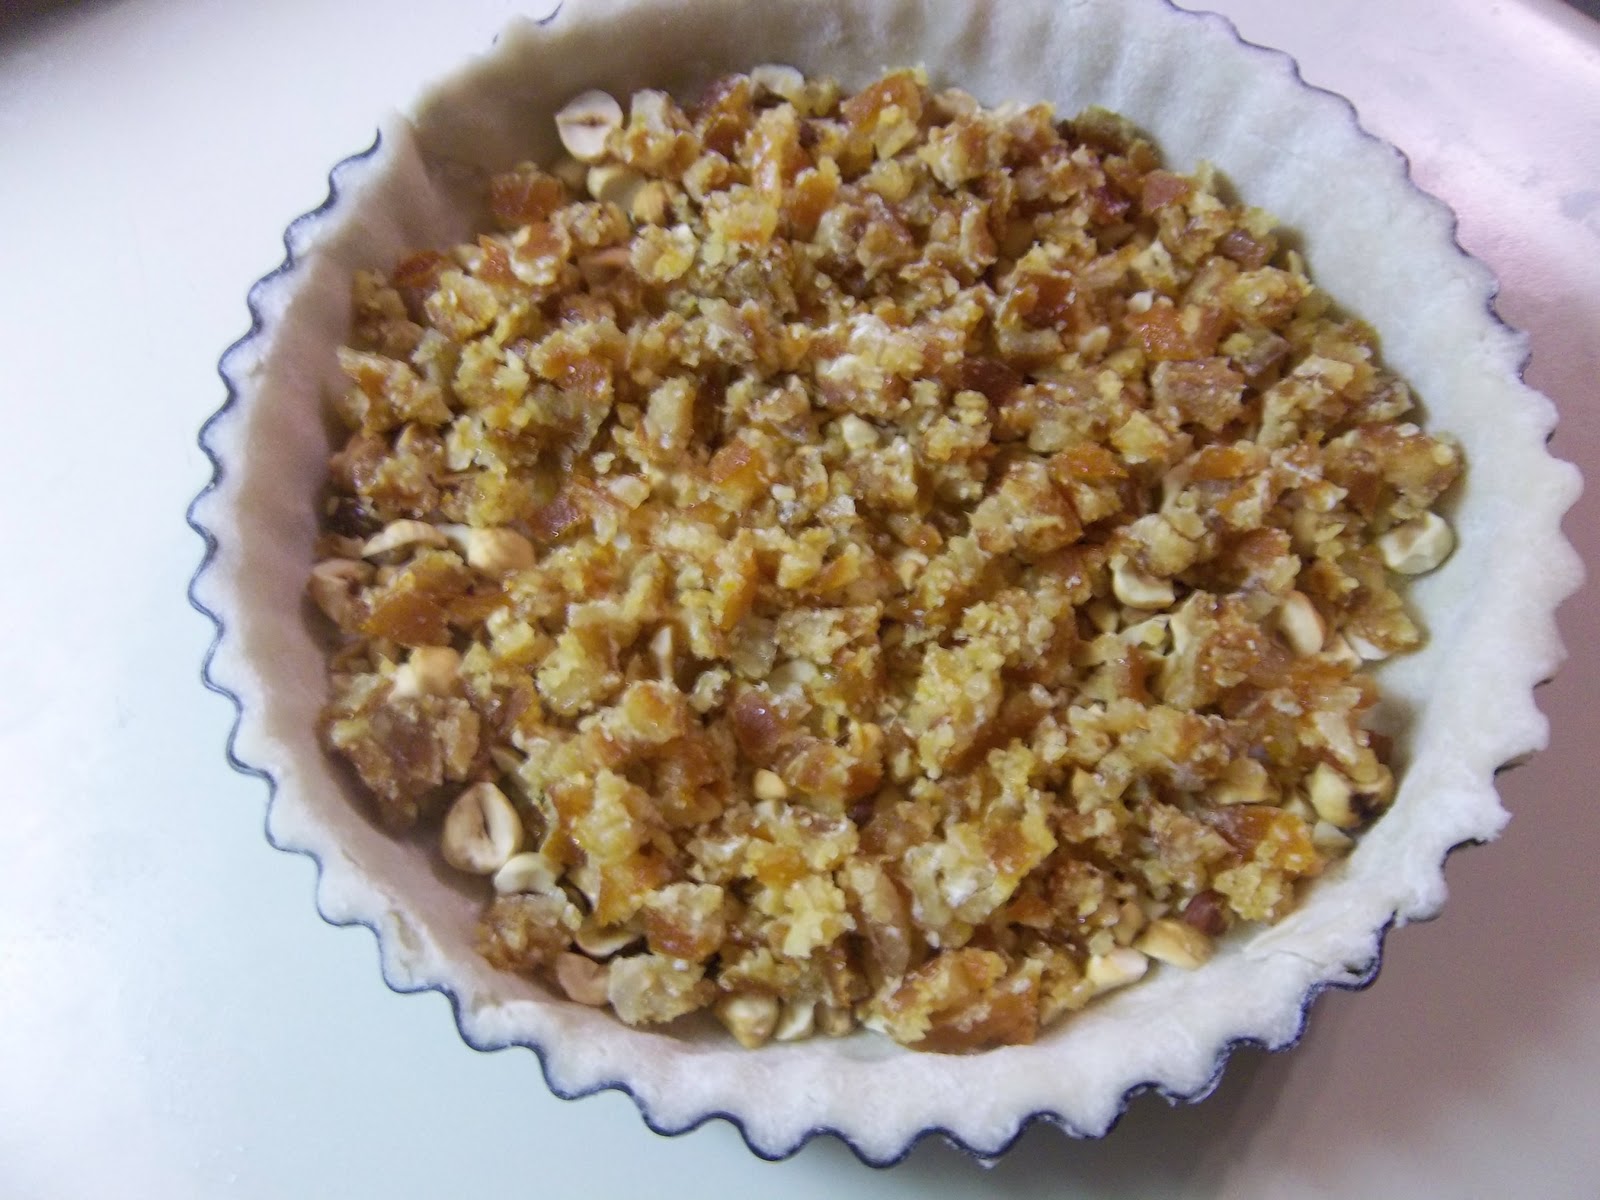
Start off by lining a nine inch tart tin with either shortcrust or puff pastry (I went with the former). Next, chop 2 ounces of roasted hazelnuts and 4 ounces of candied peel and scatter them over the pastry.

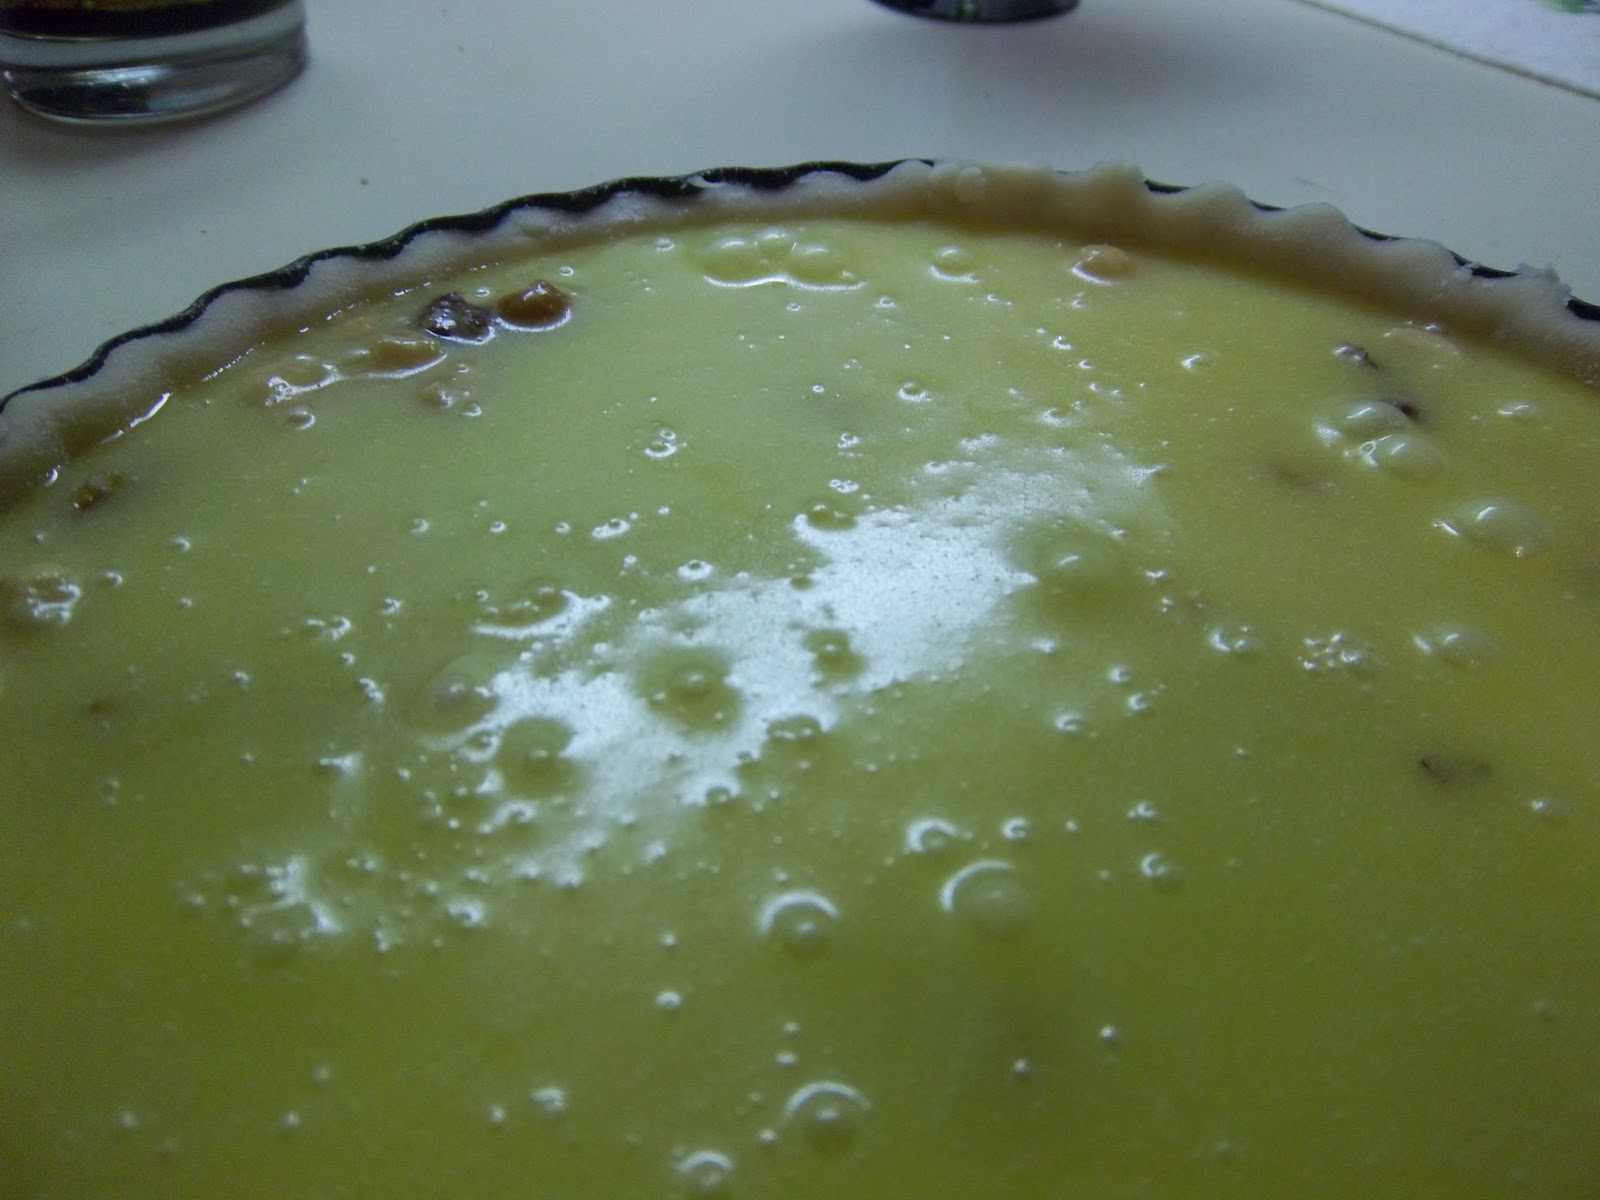
Mix together 2 large eggs, 2 large egg yolks, 6 ounces of caster sugar and 6 ounces of melted salted butter. Once thoroughly beaten, fill the tart with the mixture.

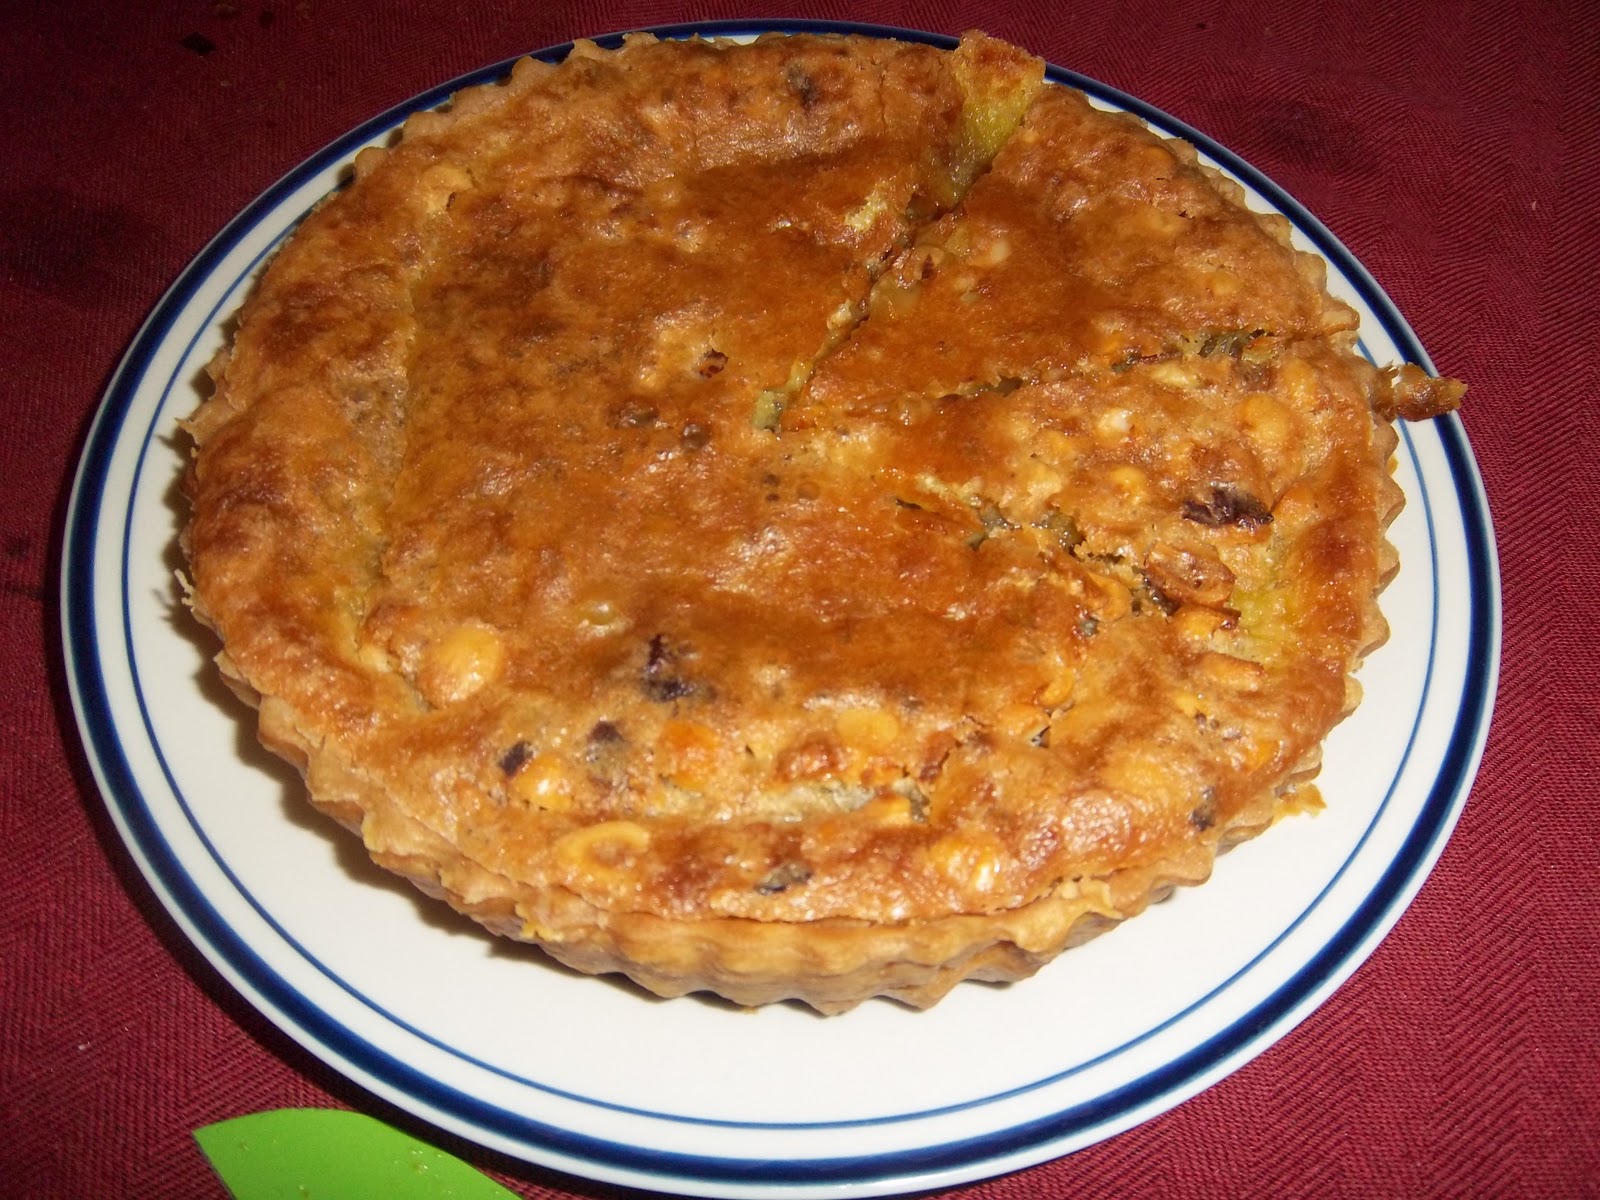
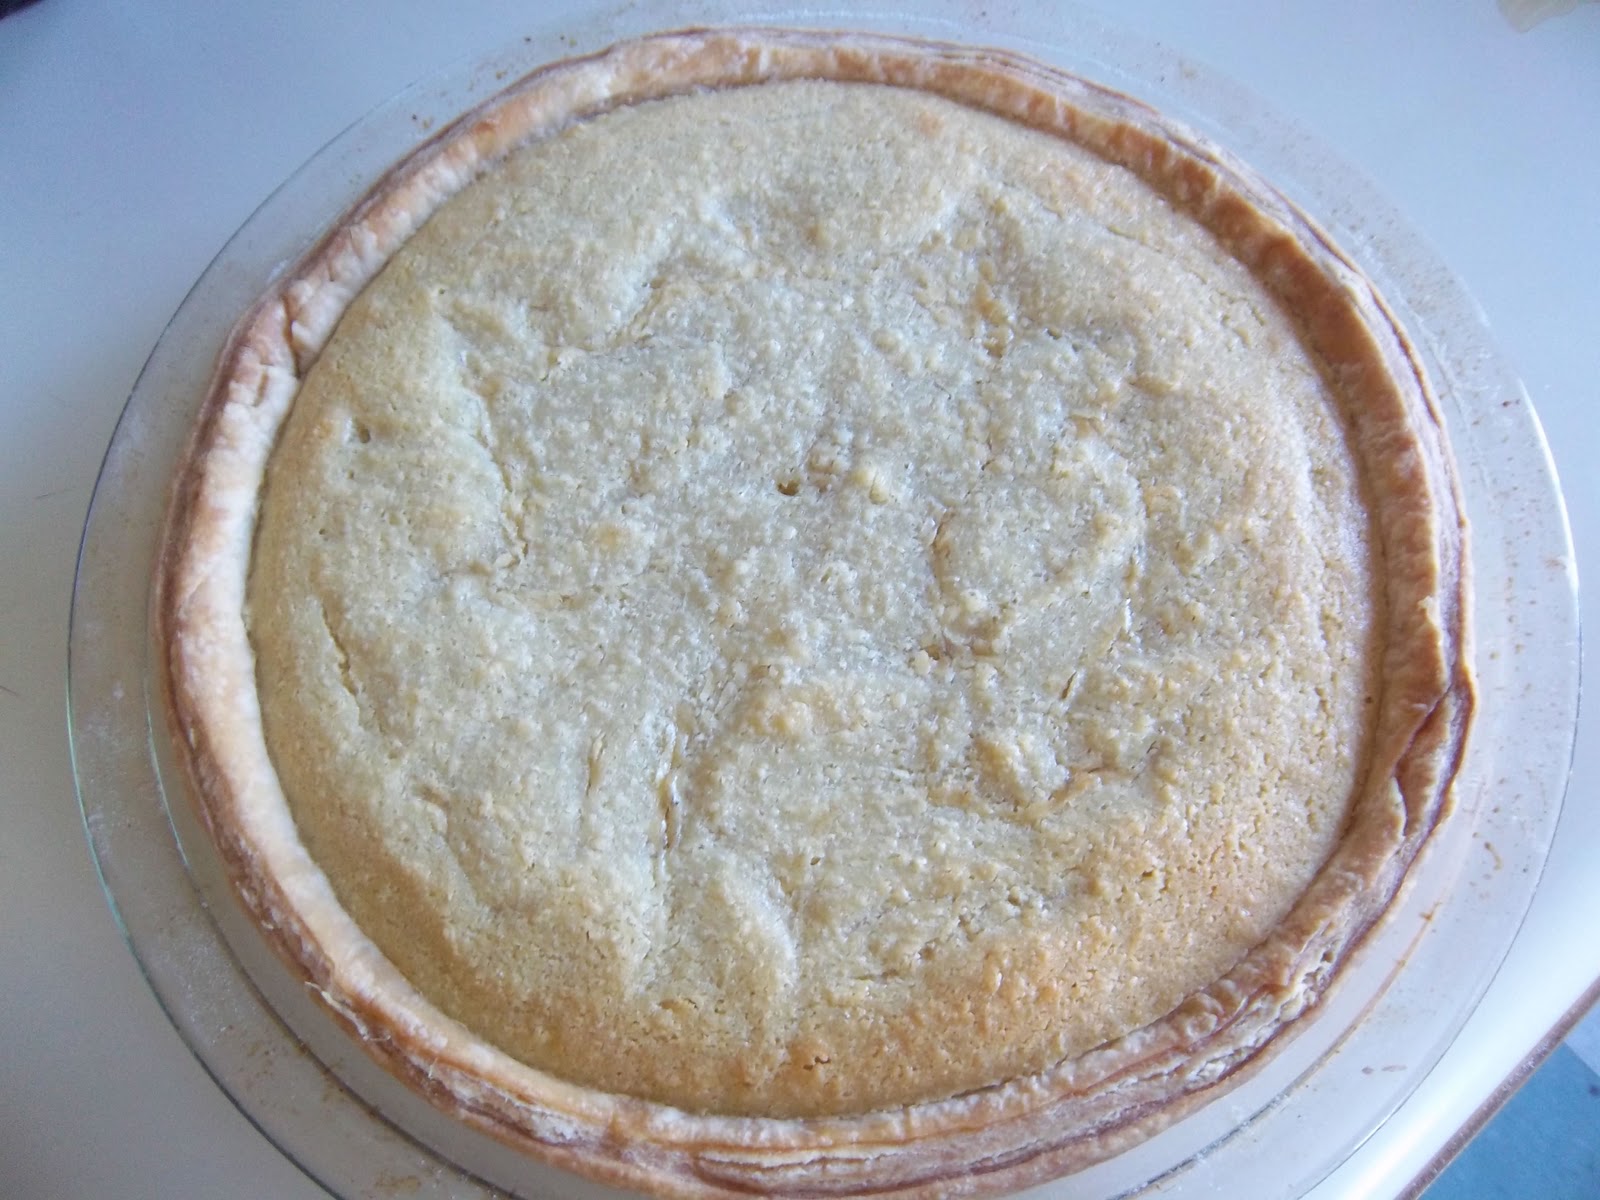
Bake for around 35 to 40 minutes until the top has turned a delicious golden brown. The tart will rise in the oven, but then sink when you take it out. Griggers says to eat it warm with cream, but it was pretty good with some nice vanilla ice cream too.

#321 Sweetmeat Cake. A fantastic and easy-to-do pud! The mixture turned into a slightly chewy toffee and its sweetness was perfectly counteracted by the still slightly bitter candied peel. Plus the hazelnuts lent a neutral earthiness and some texture. One major reason for this, I believe, is that I used home-made candied orange peel (see here for the post); it really made a difference. The bought stuff is too sweet, with too little bitter flavour and in pieces that are too small. This is well worth a try and even better than treacle tart! 10/10

#320 Steak, Kidney and Oyster Pie

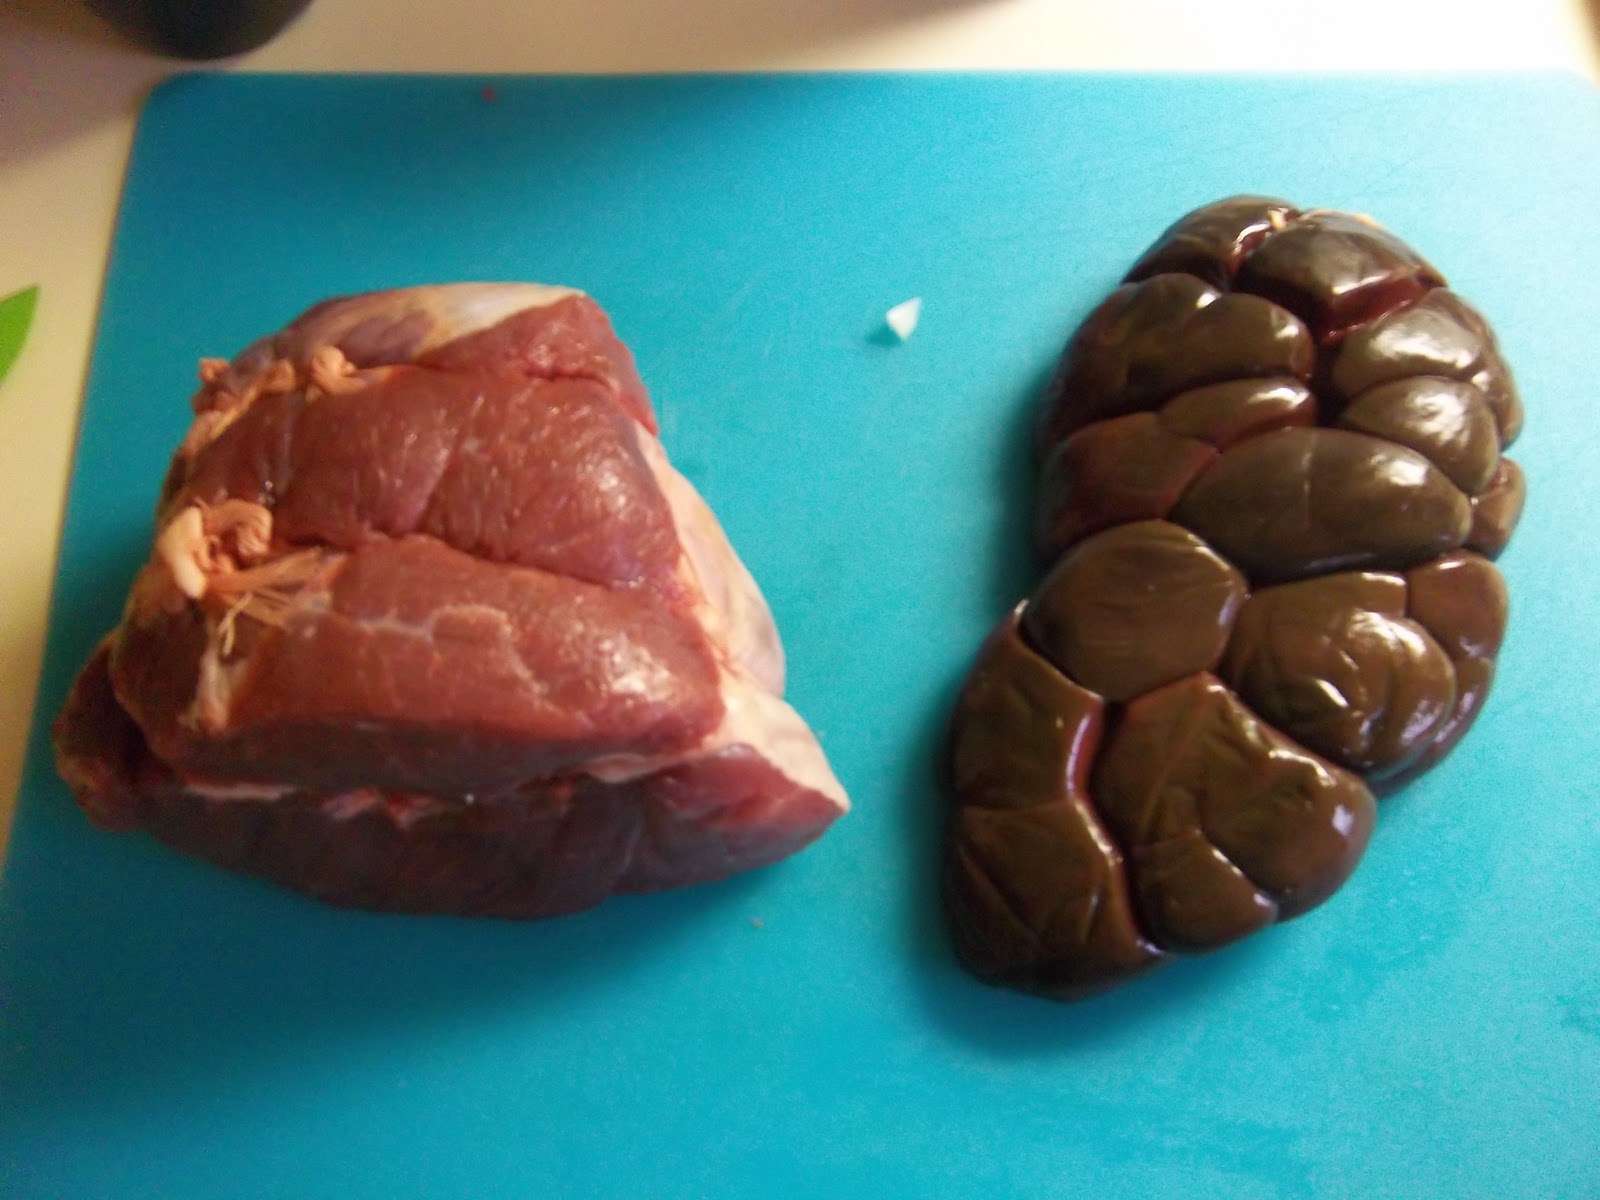
A while ago I made an extremely similar recipe – steak, kidney and oyster pudding. A seminal English dish that I had saved for the landmark 200th recipe. This pie essentially follows the same history (and recipe) as the pudding – the combination of the three main ingredients seems to start with Mrs Beeton. I have found similar recipes going back further like oyster pie, beef-steak and oyster pie, veal and oyster pie and calves’ foot and kidney pie. I could go on, but I shan’t, I think you get the message. The pudding was delicious so there was no way this could be a fail…

+
=
It is worth mentioning my supplier for the beef again – I got it from Missouri Grass Fed Beef, the boss, Jeremy, gave my the kidney for nothing as well! Good man.
This pie uses exactly the same filling as the pudding, so click the link here to find out how to make it; it’s pretty straight-forward stuff. The important thing to note is to check how much and how watery the gravy is before you add the oysters – if there is alot, strain the gravy and boil it down until it darkens and thickens. You need to make it thicker that you would think, because you add oyster liquor to it when it has cooled.
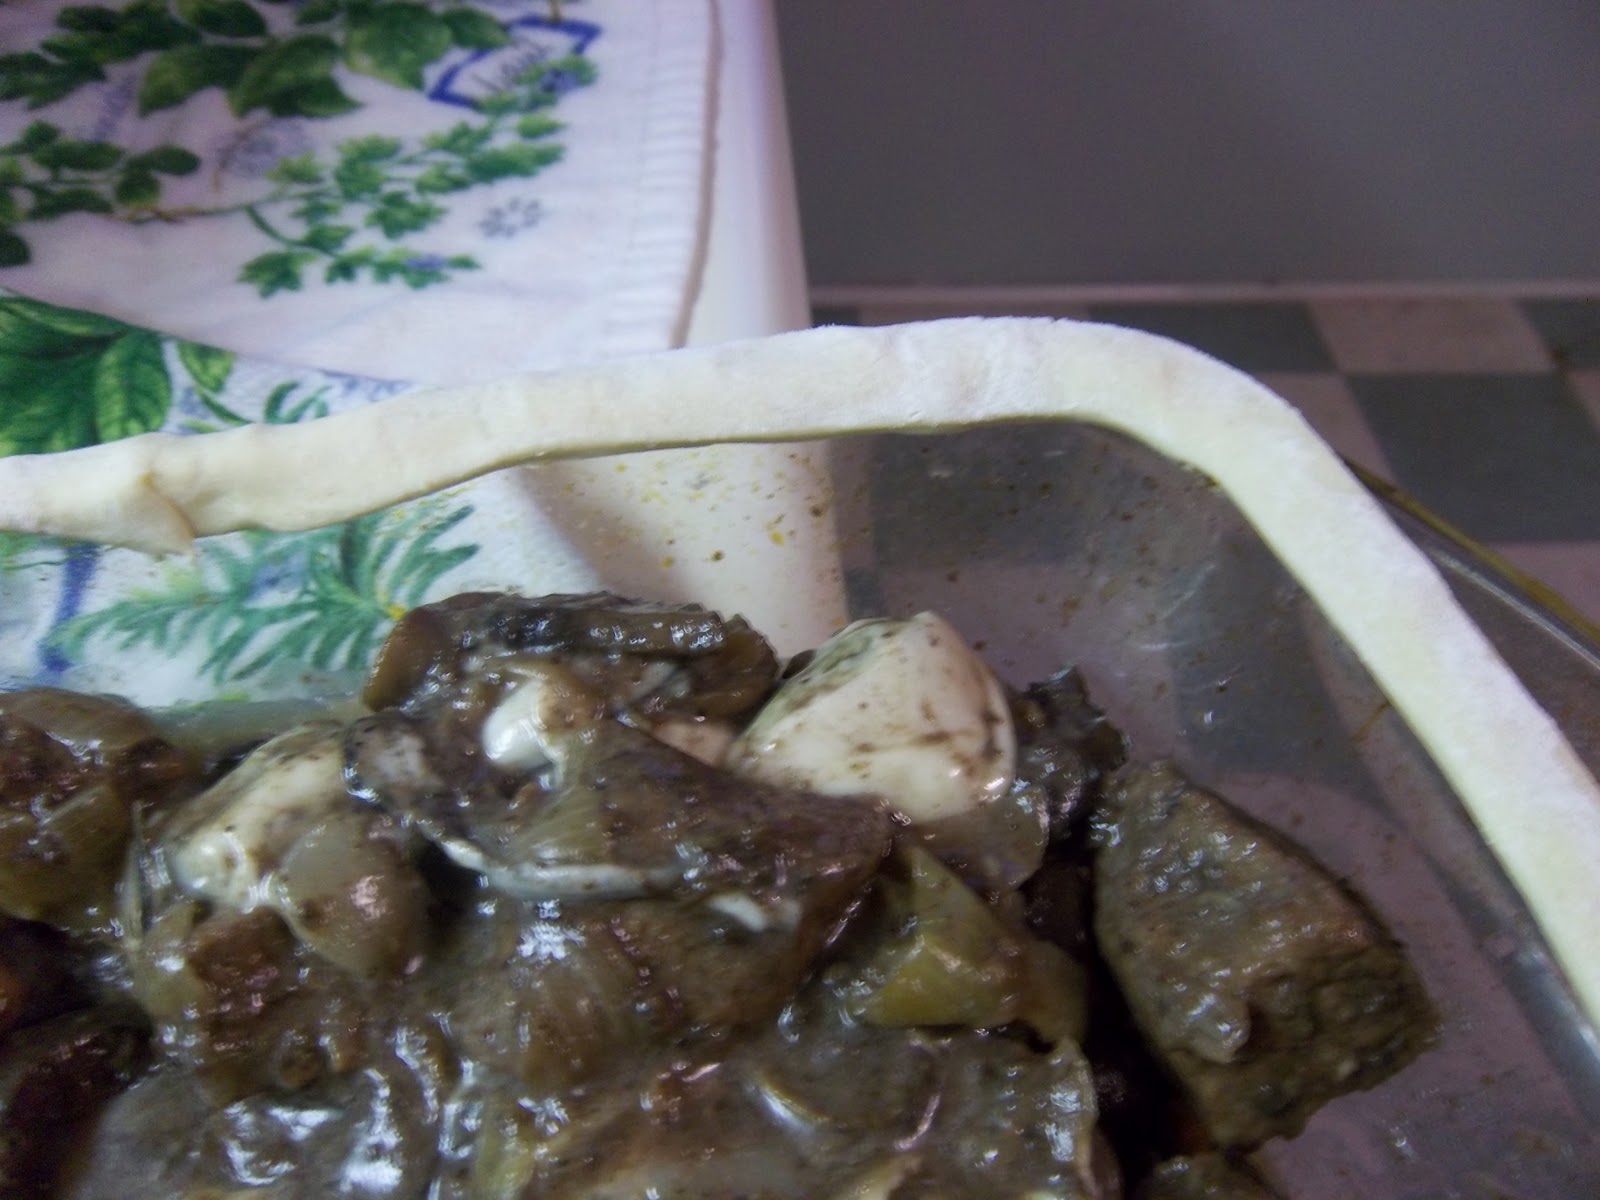
Put the cold filling in a pie dish and get the pastry ready. You can use either puff or shortcrust pastry for the pie. I went for puff. Roll the pastry out and cut strips of pastry about half an inch wide to cover the rim of the pie dish, using water as glue. Griggers says to let the strips hang inwards a little to prevent hot filling from leaking out.
Brush the pastry rim with more water and cover the pie. Crimp down the edges so that the pastry is well-secured. Then Jane says to scallop the edges if you have shortcrust pastry or nick the pastry if puff pastry, after that make a central hole and a leaf design from any trimmings. I hardly had any trimmings left as I didn’t really have enough pastry. Lastly, make a pastry rose with a stem and fit it loosely into the central hole, then give the whole thing an egg glaze.
Bake for around 45 minutes at 220-230⁰C (425-450⁰F).
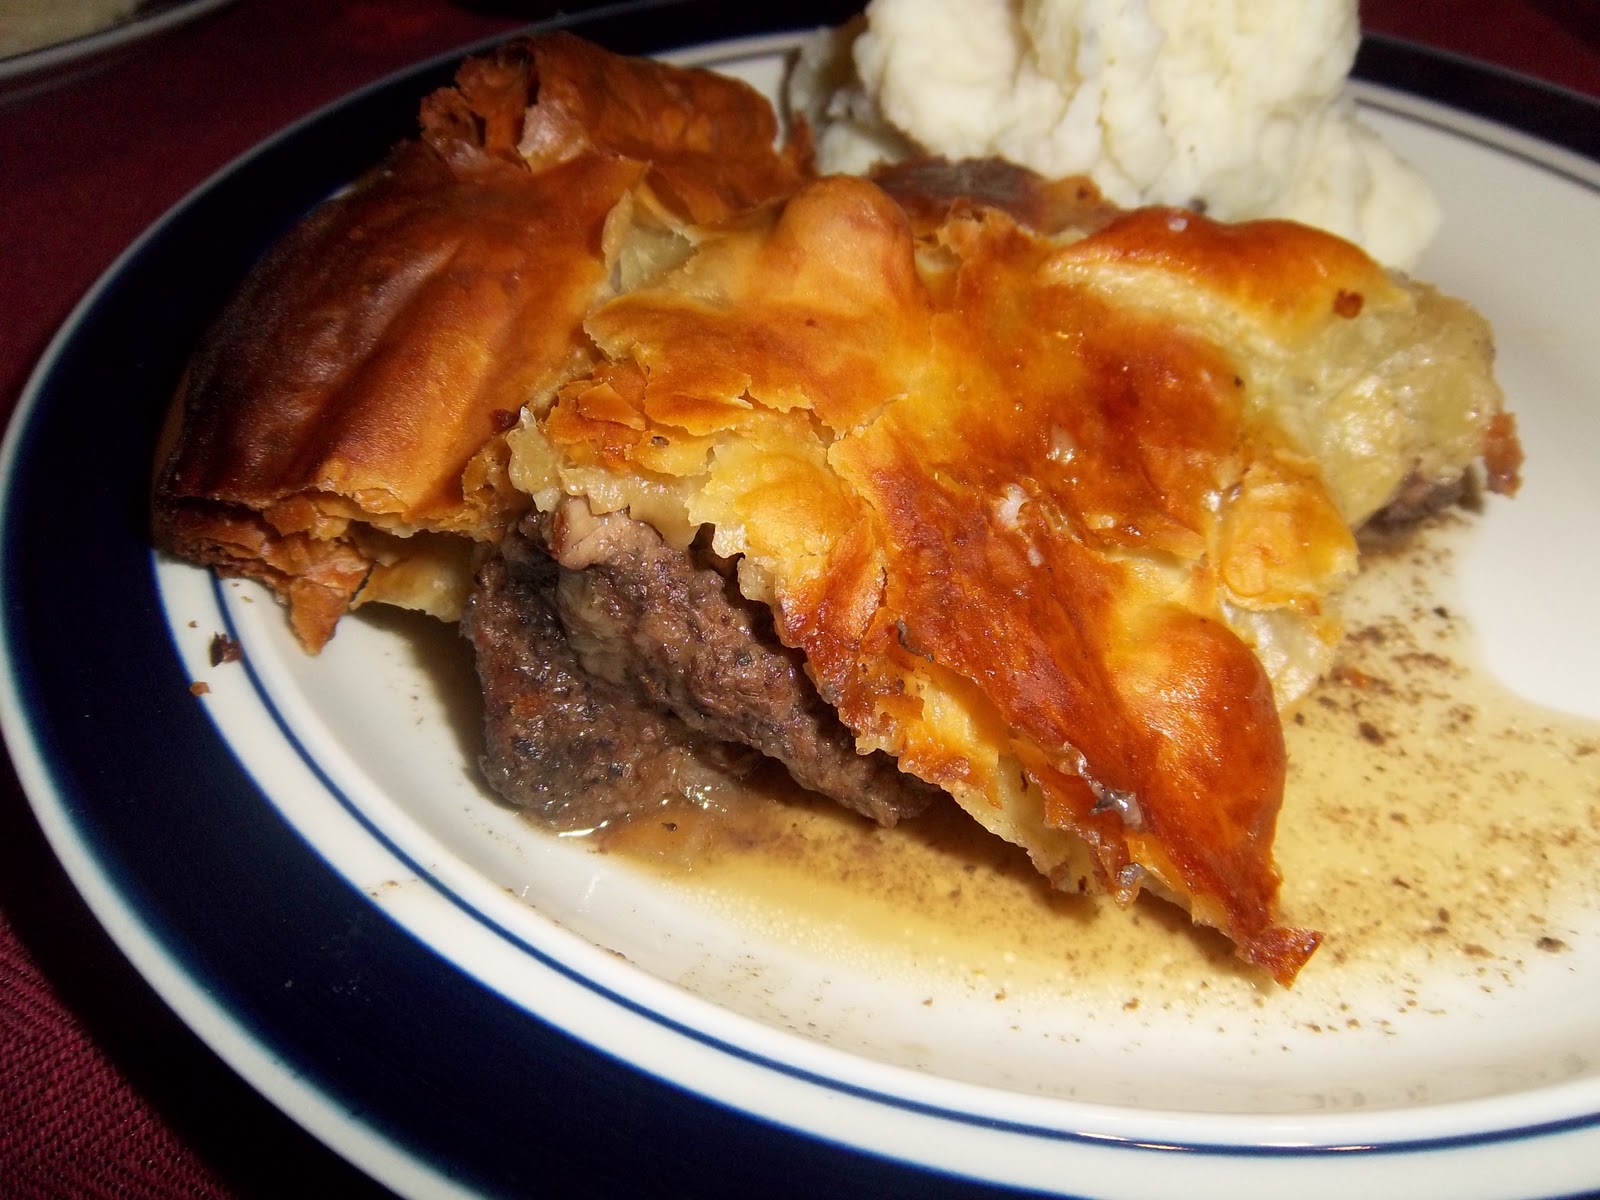
#320 Steak, Kidney and Oyster Pie – well I already knew this was going to be good seeing as I have essentially made this before, but just to reiterate: absolutely amazing. The combination of rich wine gravy, the metallic kidney and the creamy iodine finish of the oysters is fantastic. Mrs Beeton should be made a saint! 9/10.

#319 Marrow-Bones

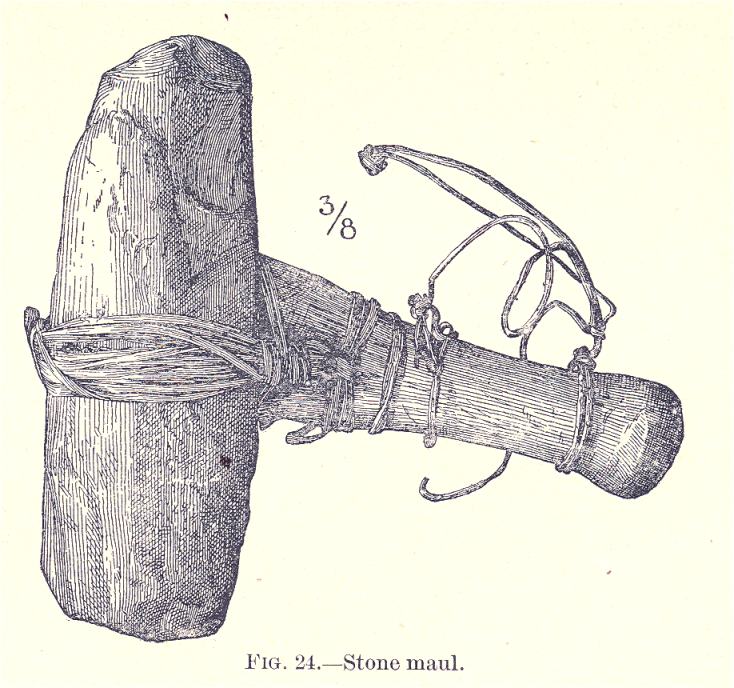
If you are looking for a historical recipe that goes far far back, you would find it hard to do better than some nice marrow bones. In fact, this one goes so far back it predates humans themselves. We humans belong to the genus Homo – we are Homo sapiens – and there have been over a dozen now extinct Homo species discovered. Palaeontologists have found very good evidence that individuals of the genus Homo were making tools for extracting the nutritious bone marrow from the prey animals they hunted. To give a little perspective, Homo sapiens arose around 200 000 years ago, so this behaviour has been around for ten times as long as we, as a species, have been on this planet. Crazy shit, man.

It is hypothesised that the ability of these intelligent creatures to crack open the bones of animals, helped snowball the evolution of their intelligence, increasing the size of their brains and the complexity of their tools over evolutionary time. Eventually the invention of controlled fire came about during the early stone age. Here, early humans and Neanderthals learnt to roast bones as well as other things like seeds to make foods easier to digest and more palatable. Go back 7 700 years, and late stone age man was taking part in large-scale hunting, butchering, cooking and feasting – according to the findings at an archaeological site in Holland. What was the apparent favourite? Bone marrow of course!
Stone mauls like this were used to crack open marrow bones.
Many have been found in Alaska, Canada and Australia
The bone marrow was prized because it contained a huge amount of energy in the form of fat, which allowed them to spend a larger portion of energy to brain production, fuelling the evolution of brain size itself. These days bone marrow is only fit for dogs it seems, and yet if you go back a century or two, bone marrow is a pretty common ingredient. Grigson points out that Queen Victoria herself dined on bone marrow on toast every single day. That said, these forgotten cuts are getting attention once more; the excellent nose-to-tail chef Fergus Henderson’s signature dish is roasted marrow bone.
Queen Victora obviously put away a few too many marrow bones!
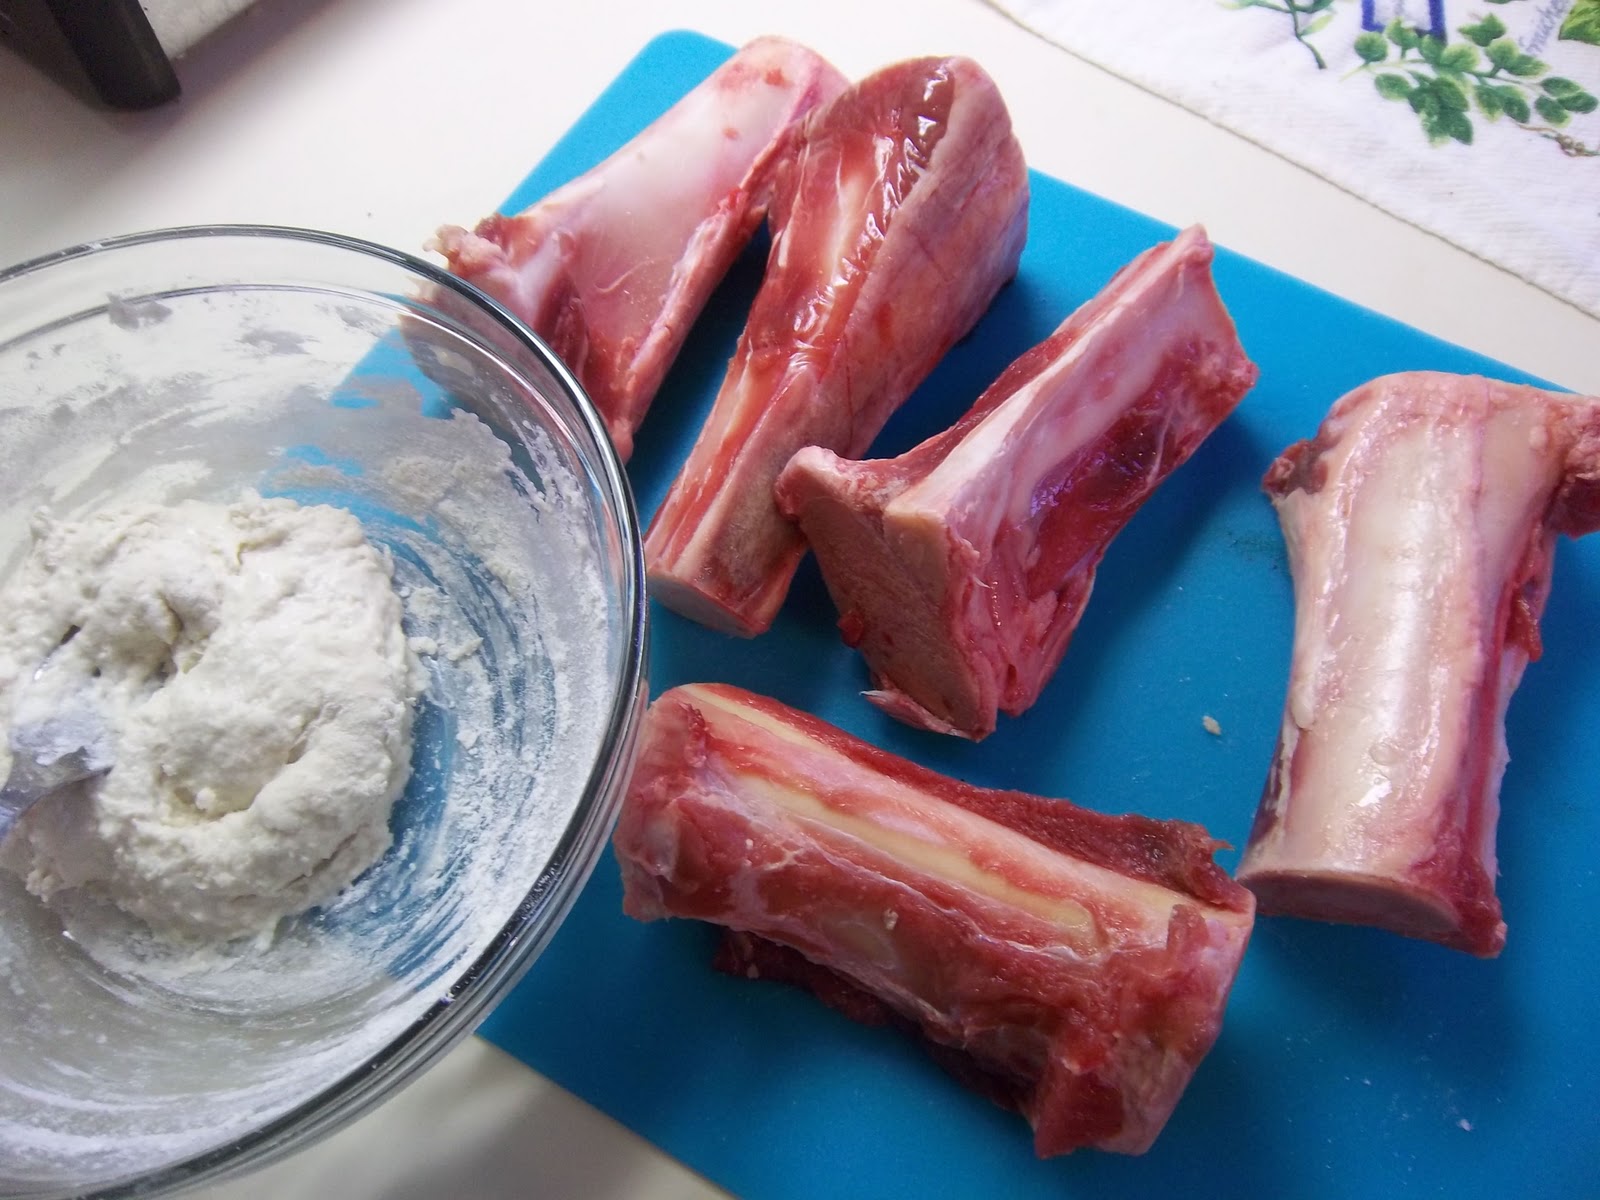
I managed to get some marrow bones from an excellent farmer in Missouri called Jeremy Parker who sells top-quality grass-fed beef (a big deal in America). His company is called Missouri Grass Fed Beef (here’s the link) and if you get the chance, get hold of some. I met him at the local farmers’ market and he very kindly cut me some bones right from the centre of the leg bones. It is sometimes possible to buy the marrow already extracted, but it usually costs a fortune.
If you want to have a go at cooking your own bone marrow, you will need one centre-cut piece of marrow bone per person between four and six inches long.
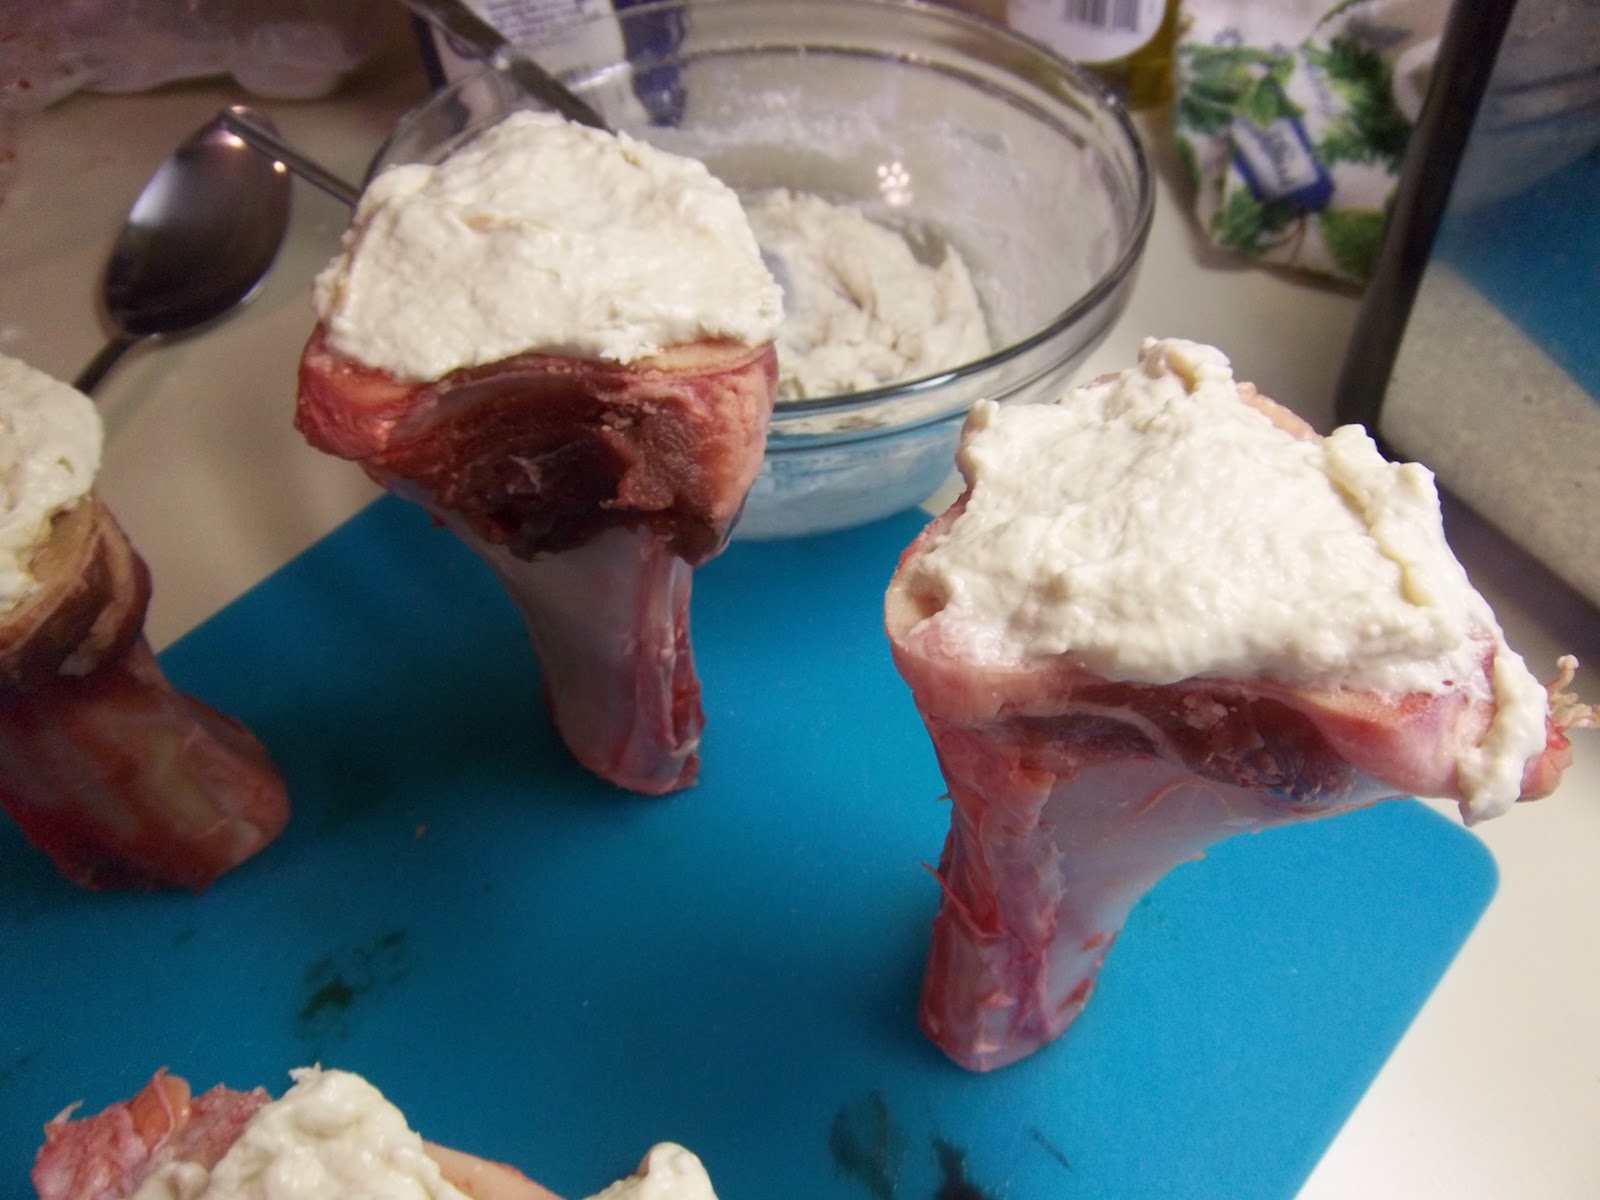
Make a thick paste of water and flour to cover the end of the bones and wrap the ends tightly in foil. The paste cooks and forms a barrier, preventing the marrow from leaking out.
Next, tightly wrap the entire bone in more foil and stand them up in a suitable cooking vessel such as a deep stockpot or fish kettle. Add water to at least half way up the bones and bring to a boil before turning the heat down to a good simmer. Cook for two hours, and remove the foil, peeling off the dough-plugs from the ends. Serve stood upright on a plate with slices of dry toast to spread the marrow on.
All you need is a little salt to sprinkle over. If you are the posh type you can buy some marrow spoons to eke out the marrow. We used teaspoons and lobster scoops instead, but skewers and knives would probably work too.
#319 Marrow-Bones. My goodness, these were so delicious. The marrow was extremely soft and well-flavoured. You could tell the marrow was massively high in fat – it seems to almost effervesce in the mouth. It was extremely satisfying to dig in with various implements to extract all the goodness. I now understand why this was the most sought-after part of the animal. I also now know that no dog of mine will be getting the marrow bone! 9/10.

#318 Baked Almond Pudding I

I made this almond pudding because I found that I just happened to have all the ingredients for it, so I thought why not? I had bought a load of baking ingredients for the Thanksgiving desserts for which I was in charge, you see.
This is the second of two almond puddings (I did Baked Almond Pudding II a while back) that have absolutely no introduction from Griggers. It is strange that a recipe she obviously thought so good and so English that it had to have two recipes devoted to it should be basically unknown. However, a quick bit of research later, I found that these puddings were popular from the eighteenth century. The recipe closest to this one in English Food, appears in Mrs Rundell’s Domestic Cookery from 1859.

The almond tree drawn by Elizabeth Blackwell 1737

This recipe requires bitter almond essence – it is quite easy to find online these days – and it is quite important to add some. The essence really gives any almond-based dessert a hit of almond aroma that the subtly-flavoured domesticated almond cannot provide. The bitter flavour is provided by benzaldehyde and cyanide – in time past, any king eating anything that tasted of bitter almonds, would have had good reason to start panicking! The essence just contains the benzaldehyde, so don’t worry, you won’t cark-it from using it. It is very difficult to get hold of bitter almonds themselves, but a good substitute is the nut inside the kernel of an apricot.

To make Almond Pudding I, begin by mixing together 4 ounces of melted butter, 8 ounces of ground almonds, 5 bitter almonds or a few drops of bitter almond essence, 2 tablespoons of double cream, a tablespoon of brandy, 4 or 5 heaped tablespoons of sugar, 2 egg yolks and 2 whole eggs. The mixture can then be turned into a greased shallow pie dish. Grigger says – as does Mrs Rundell – that you can line the pie dish with some sweet shortcrust pastry to make it go further. I had some left-over pastry and seeing as this dessert was for the Thanksgiving meal, I took their advice. Bake the pudding for around 45 minutes at 190C (375F) until there is a nice golden crust on the pudding.

Serve with some more sugar, butter and brandy, she also says.

#318 Baked Almond Pudding I. Much more cakey than the previous almond pudding, and as nice. It seemed rather bland – there wasn’t enough sugar and it would have been improved greatly if the pastry hah had a thin layer of raspberry jam. That said, it did get more moist and flavourful as it got older. An okay pudding that could be made very good with some minor alterations. 5/10.

#317 Skuets

This is an old recipe made up of sweetbreads, bacon and mushrooms grilled on skewers. Indeed, the work skuet is a corruption of the word skewer. The recipe first pops up in the literature in The Compleat Housewife by E Smith (a Lady) first published in 1729. Here’s her recipe from the 1753 edition:

Take fine, long, and slender skewers; then cut veal sweet-breads into pieces like dice, and some fine bacon into thin square bits; so season them with forc’d-meat, and then spit them on the skewers, a bit of sweet-bread, and a bit of bacon, till all is on; roast them, and lay them round a fricasy of sheep’s-tongues.

Chef to kings: Antoine Carême

Forced meat is simply meat mixed with other ingredients to ‘force’ it to go further. I made forcemeat balls a while back (click here for the post). The recipe given here is a jazzed-up version from French chef Antoine Carême’s 1833 book L’art de la cuisine franҫaise au dix-neuvième siècle. According to Grigson, he praises it as an excellent English dish. Jane suspects he found out about it when he lived and worked in London as the Prince Regent’s chef. The changes he made were simple: lose the forcemeat, add some nice mushrooms and serve with bread sauce (see here for recipe) as well as some crunchy browned breadcrumbs.

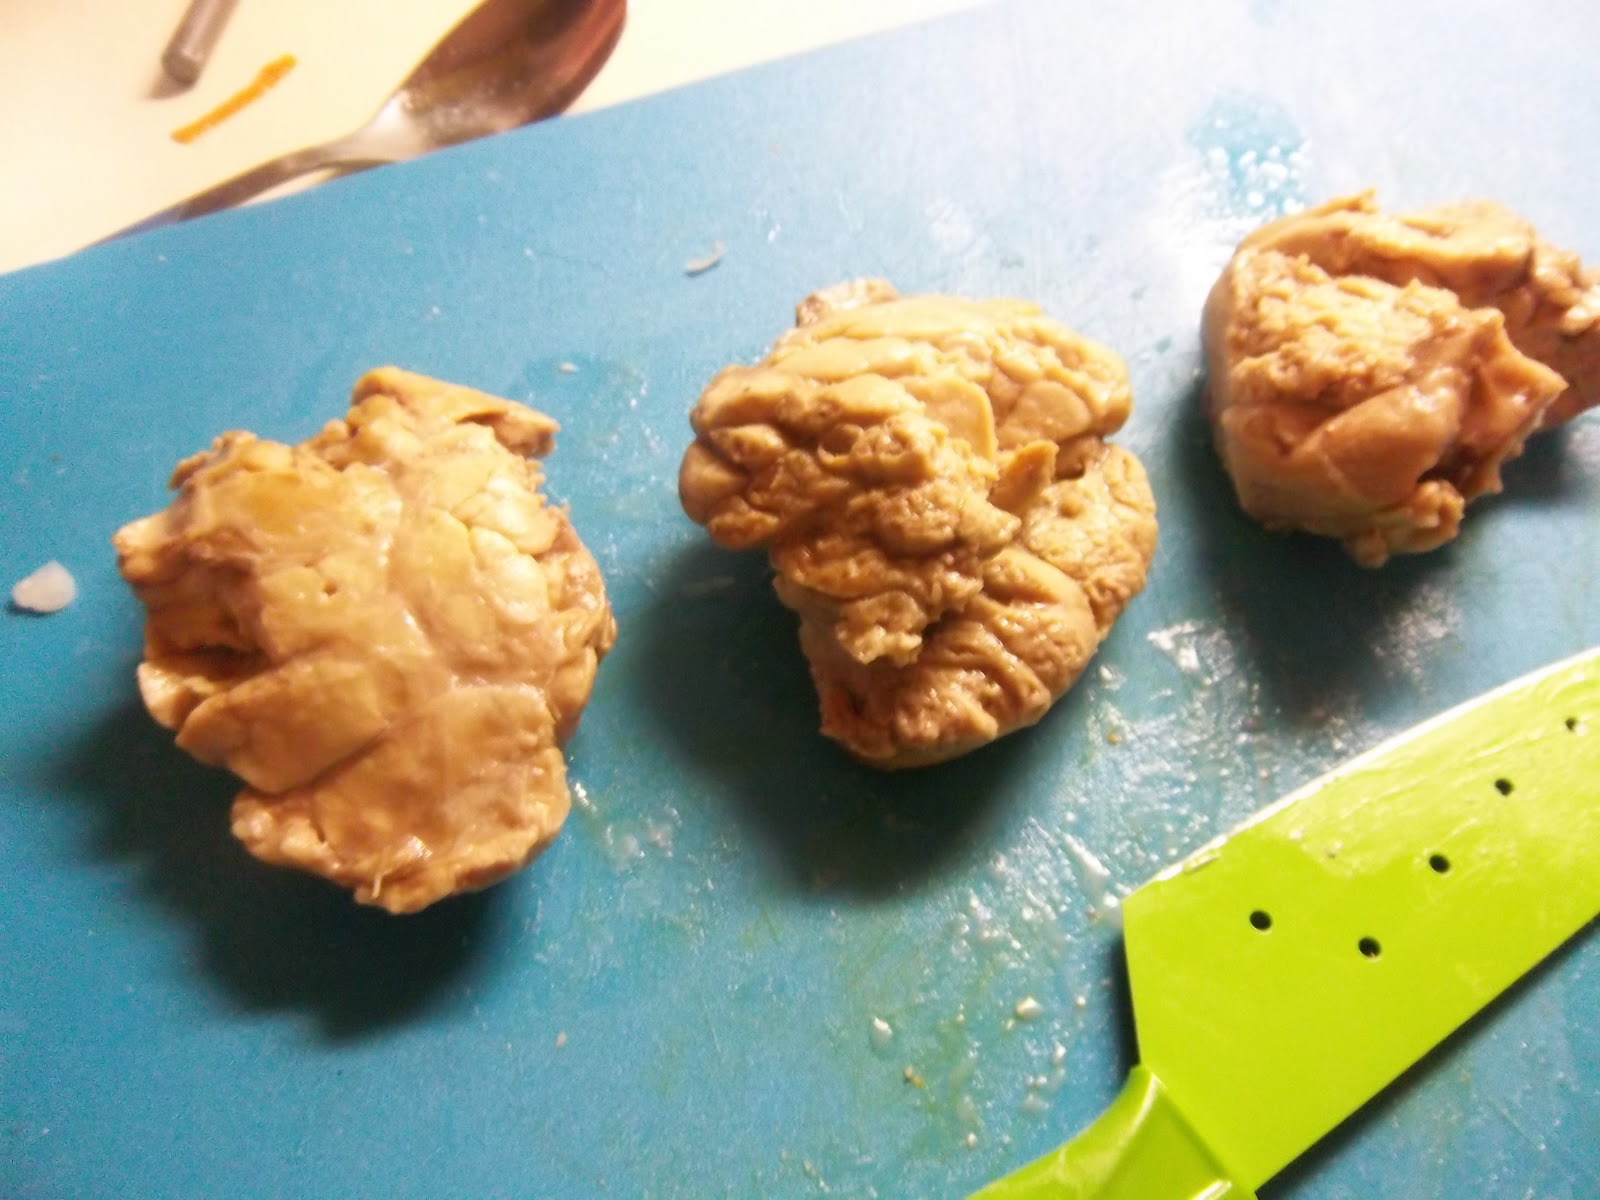
Sweetbreads are not the easiest of cuts to get hold of these days: I remember speaking to a butcher in Houston who said he came by them sometimes, but if I wanted some, I would have to buy a whole ten pound tray. I was tempted but declined. What if I didn’t like them? Well I am glad I didn’t because I spotted a pack of frozen calves’ sweetbreads in Whole Foods whilst buying some other bits and bobs. I do love that shop.


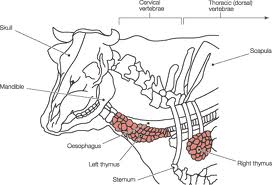
For those that are not aware, sweetbreads are a type of offal and come from the thyroid gland, situated around the throat, of either calves or lambs. The thyroid, or thymus, gland produces the hormone thyroxin which is involved in the proper regulation of metabolism. Hyperthyroidism is a common disease where the sufferer produces too much, causing very high metabolism and, as a consequence, is rather skinny. I had a cat with it once. Other glandular organs are also sold as sweetbreads such as the pancreas, the sublingual glands of the tongue, the parotid gland of the cheek and also the testicles, though ‘throat’ sweetbreads are by far the commonest. Why are they called sweetbreads? Well, they are sweet because they taste richer and sweeter compared to meat, and they are bread because the old English word for flesh is bræd. I assume the bread that we get in loaves carries the name it does because Jesus said bread was his flesh during the Last Supper (I’m surprised he didn’t put anyone off).

Diagram showing the position of the thyroid, or thymus, glands

Sweetbreads were once very, very popular, but have now died a death. Though, like many of the old forgotten cuts of meat, there is a slight resurgence. I had never eaten them, but certainly wasn’t nervous about eating a big gland; I just always worry that the reason people don’t choose to eat them anymore is because they taste bad.

This recipe makes enough for four people:


Begin by preparing a pound of veal or lamb sweetbreads. To do this, dissolve a tablespoon of salt in some water and soak them for around an hour. Rinse them, place in a saucepan and cover with chicken or veal stock and mix in a couple of teaspoons of either lemon juice or wine vinegar. Bring to a boil and allow them to simmer until they go from pale pink to a whitish opaqueness.

In the case of veal sweetbreads, this took about 15 minutes. Remove the sweetbreads and allow to cool a little before removing any membranes or gristly bits. You must be careful here – Jane makes a point of mentioning this and she was right – don’t let too much of the sweetbread come away with the membranes. If using lamb sweetbreads, be extra careful, as you’ll end up with nothing! Press the sweetbreads by pressing a plate on them until they cool.

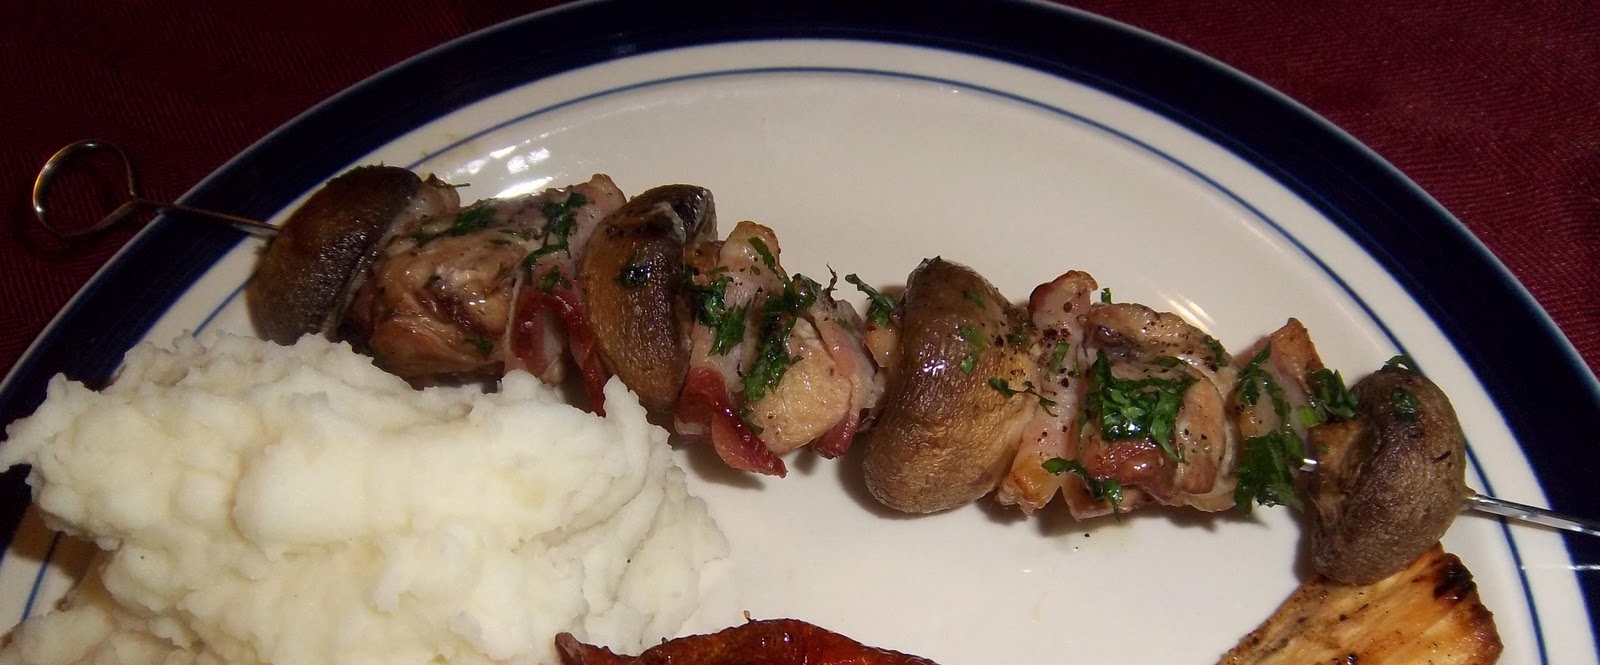
Turn the grill on to a medium heat. Whilst it warms up you can construct your skuets: cut the sweetbreads into chunks – 12 good sized cubes is best – cut around 8 rashers of streaky bacon to square shapes and brush any dirt from 16 medium-sized mushrooms. Take a skewer and add a mushroom, some bacon, a piece of sweetbread, a bit of bacon, a mushroom etc. I used four mushrooms and three pieces of sweetbread per skewer each separated with some bacon. Make four skuets in all.

Brush them with melted butter and grill them, turning occasionally for about 15 minutes. Whilst they are cooking, fry some breadcrumbs in butter until brown and crisp.

Serve with some of the browned crumbs and bread sauce as well as some nice vegetables.

#317 Skuets. What a revelation these turned out to be. A really good meal and the sweetbreads were by no means gross. They were very tender and sweet, and tasted faintly of oysters. I put this down to the fact there must be a lot of iodine in sweetbreads as it is required for them to function properly. The salty bacon and the juicy grilled mushrooms complemented it very well. The crumbs lent a nice bit of crunch and bread sauce is always welcome in my book. All-in-all a very good meal. 8.5/10

#316 Oyster or Mussel Soup

There is no introduction to this recipe by Grigson in English Food. I am never sure whether Jane did this because she didn’t want to, or whether she thought she didn’t need to. It turns out the recipe goes back quite a bit with a huge amount of similar recipes cropping up during the nineteenth century, including examples from stalwarts such as Eliza Acton (1845), Alexis Soyer (1850) and Elizabeth Raffald (1769). Recipes also crop up in their droves in American cook books of the nineteenth century.

Oysters were hugely popular in British cuisine up until the early nineteenth century, and were at one point considered poor-man’s food, until the seas of Britain became polluted from the Industrial Revolution. These days, they are rather more expensive, though dropping in price now that our seas are much cleaner than they used to be. Farming helps keep the price of the oyster down and there are several successful farms around the UK now. The oyster farm is by no means a recent invention – the Gauls in the 7th century BC farmed them and sold them as far afield as Rome. It went a bit tits-up however when they were completely trounced by the Barbarians.
I chose to use oysters here, but you can use mussels for this recipe instead. There are several pluses to using them: if you are on a budget, they are good and cheap; and also it is easy to get the meat from them. If I were in England, I would probably go for mussels simply for the reason that shucking oysters is one major pain in the arse. However, here in America where seafood is very popular and you can walk into your local supermarket and buy pre-shucked fresh oysters in their own liquor from the fish section. Now that I know this, expect to see a lot more recipes that use oysters in the blog. Mussel farming, like oyster farming, is a main contributor to the reason they are cheap; they can be grown quickly and in great numbers on ‘parks’ made by hanging ropes down into the sea.
Eating seafood such as like oysters and mussels before starting this project would have filled me with dread – our family never ate things like this – but now they fill me with joy. I just love the little beasties.
This recipe is for 6 people (or 4 greedy ones).
Start off with your appropriate seafood: according to the book you’ll need either 2 dozen oysters or 2 pounds of mussels. The number of oysters you need will actually depend on the species of oyster available – 2 dozen if native oysters, or one dozen if the large Pacific or Atlantic species. Shuck the oysters, or alternatively leave them flat-side up in the freezer for a while until they open up for you. Either way, make sure you keep any oyster liquor. If you are using one of the large species, cut each one into two or three pieces.
If the mussel is your bivalve of choice, then give them a good scrub and pull out their beards should they have any. Tap each one: if the shells close, your mussel be alive and well, if it remains open, your mussel be dead, so discard it. Chuck them in a large pan, cover, and place over a high heat. After a few minutes, give them a shake and see if the mussels have opened. If they have they are cooked. Remove the meat from them and place them in sieve over a bowl to collect the juices. Don’t forget to keep any juices from the bottom of the cooking pan too.
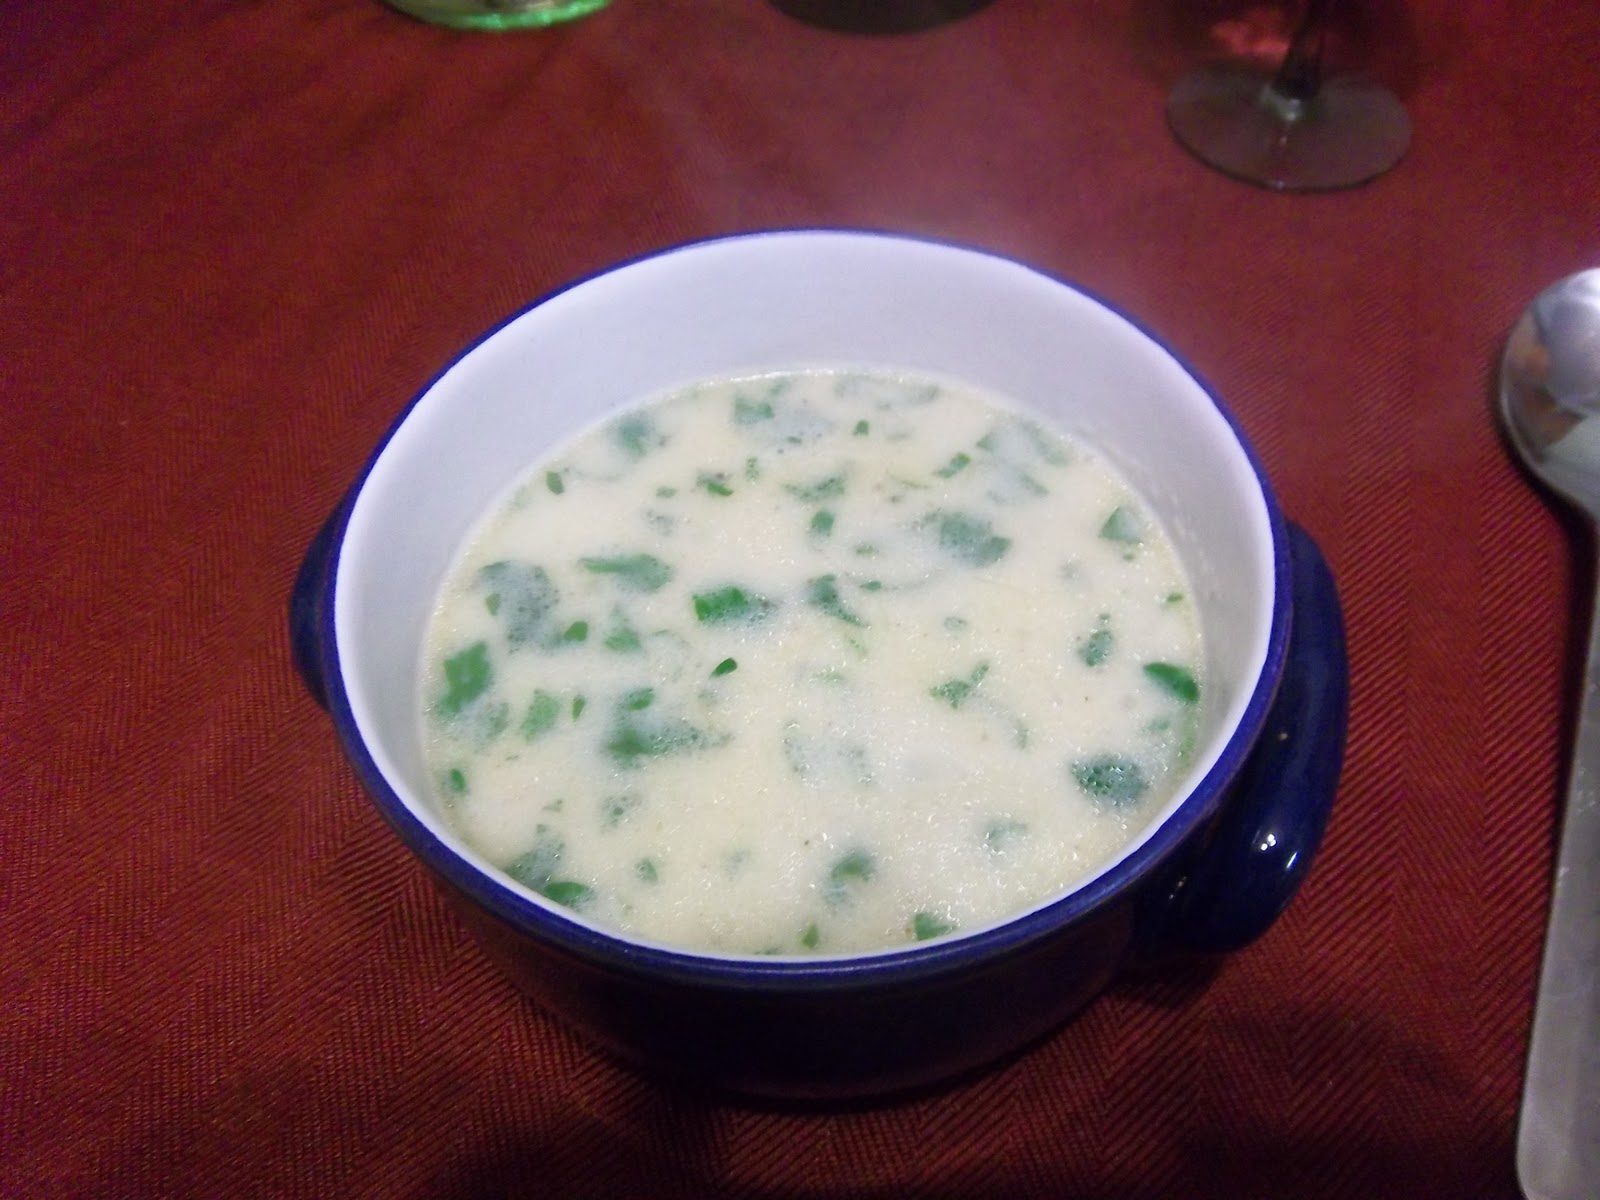
Now the shellfish is prepared, you can get on with making the soup. Finely chop 4 shallots and soften them in 2 ounces of butter. Once golden, stir in two tablespoons of flour and let it cook for a minute or two. Find yourself a whisk and mix in the reserved juices and then 1 ¼ pints of light beef stock or veal stock. Season with sea salt, black pepper, Cayenne pepper and nutmeg. Cover, and simmer for 20 minutes or so. When you are ready to serve, add the oysters or mussels plus ¼ pint of double cream and some chopped parsley. Bring it up to a boil, turn off the heat and add a squeeze of lemon juice. Serve immediately.
#316 Oyster or Mussel Soup. This was a fantastic soup! The combination of rich creamy stock and fresh iodine-scented oysters was magic. One of the best soups I’ve done – and really easy too. If you’re doing a dinner party and you want to impress without breaking your back, I would definitely have a go at this. I shall try it again soon but with mussels and see if they are as good as the oysters. 9/10.

#315 Cornel Cherry, Rowanberry, Bilberry or Cranberry Jelly

With Thanksgiving just around the corner, I thought I would have a stab at this jelly so we could have the traditional accompaniment to our Thanksgiving dinner. Even if it wasn’t Thanksgiving, it would have been the cranberry jelly I chose from the four possibilities; the other three not being available in the USA. It isn’t strange that the cranberry is on the list of fruits here: we Brits have been eating cranberry jelly with our turkey on Christmas Day for ages now – since the end of the nineteenth century. Prior to that, people either had goose (for Southerners) or beef (for Northerners), but they still may have had the jelly.

In America, of course, cranberries and turkey were two of the foods eaten at the first Thanksgiving dinner and they have become traditional and necessary fayre. They were not the only foods eaten on that day though; the feast also consisted of cod, eels, bass, clams, lobster, mussels, ducks, geese, swans and venison. I wonder why the turkey endured but the others did not. I’d quite happily tuck into some nice roast swan.

The four fruits that can be used in this recipe all have one thing in common: they are very tart and therefore great to go with fatty foods like roast turkey, goose, ham and the like.

Cornel cherries are not cherries at all but the fruit of a dogwood tree. They are only really used to make jellies in Britain, though other countries use them to flavour spirits. You can buy dried ones in health food shops these days as a super-food, but are unlikely to find them fresh in shops. They are native to Europe so you might just find some growing wild. I am no botanist, but I will keep a look-out for them on my return to Britain. These seem to be Jane Grigson’s favourite out of the four as it’s the only one she actually mentions in her little introduction to the recipe.

Rowanberries – the fruit of the rowan tree – on the other hand are very familiar. Rowans must be one of the most common trees in Britain; equally likely to be found in forests, parks and gardens alike. I envisioned making this jelly using rowanberries, who’d have thunk I’d end up in America? Rowanberry jelly is traditionally eaten with venison or lamb. It seems crazy with so much of it just growing wild everywhere it isn’t put it to good use. Next Autumn I will make some.

Bilberries are more common in Scotland and Ireland than England and Wales, though some are found in the northern climes. They are similar to the American blueberry, but they are much darker and have a very dark blue flesh. If you can’t find any bilberry bushes, you might be lucky to find the fruit at farmers’ markets, but they’ll probably cost you an arm and a leg; they spoil easily and the plant cannot be cultivated with much success. The bilberry is the only fruit of the four that can be eaten unsweetened.

It might surprise you to learn that the cranberry is not a New World fruit (it surprised me!). There are several species of them around the globe. When we think of cranberries we think of the large plump ones from America, but two species are found in the UK and are smaller, paler and more tart that their American cousins; one is found across the whole of the country, and the other is just found in Northern Scotland. If you buy cranberries at a supermarket, however, they will be the American species.

Whichever fruit you choose make sure you give them a good wash and pick out any bits of twigs and leaves. Weigh them and then cut up the same weight of apples – don’t peel or core them though, just chop them up. Use a tart apple; Bramley or Cox if you are in Britain, Macintosh if in the USA. Put all the fruit in a large pot and cover with water.
Bring it up to the boil and simmer until the whole thing has become a nice mushy pulp. Whilst it is cooking, set up a jelly bag over a bowl. If you don’t have a jelly bag and stand, use a large piece of muslin or even a pillowcase. Ladle the mush into the muslin and let the clear juice drip through.
It is best to hang it on a cupboard door if you don’t have a stand. Be patient now: if you add any pressure to the pulp it will make your jelly cloudy. On the other hand, it will make it more flavourful, so it is a trade-off. Grigson goes for the squeeze. I did not, for these cranberries were not precious, but bilberries for examples are, so I would want as much flavour as possible.

When the juice has dripped through, measure the amount of juice you have, return it to a cleaned pan and add a pound of sugar for every pint of juice. Bring to a boil and then to ‘setting-point’. Setting point is when the natural pectin in the apples and berries forms a gel. To achieve this, you need to get the temperature to 104C (221F) and keep it there for a few minutes. If there was a lot of water in the juice, it will take a while to reach the correct temperature. If you don’t have a thermometer you can use a cold metal spoon – dip it in the boiling jelly and push with your finger, if it wrinkles, the juice is now a jelly. If you turn the heat down under the pan, you’ll also notice the surface trying to gel over. Skim off any scum that the jelly produced and pot into sterilised jars. To sterilise jars, put them and their lids on a tray in a cool oven for 35 minutes. Soak any rubber seals in boiling water.

#315 Cornel Cherry, Rowanberry, Bilberry or Cranberry Jelly. This was a very good jelly – nice and tart and not overly-sweet like some of the bought ones are. It is a shame that I didn’t pick any from the wild, but never mind. It’ll be good with turkey for Thanksgiving and all the other meats and cheeses I’ll be eating on the lead up to it. There’s something very satisfying about making jams and jellies, I think it is because there are just three ingredients – fruit, sugar and water – and they magically become transformed into delicious, clear rubies shining away in their little jars. Pretty and delicious. 8/10