#422 Peppered Redcurrant Jelly

This is the last fruit jelly recipe in the book, and I’ve become somewhat of a seasoned jelly maker, making up my own recipes and these days cooking them up at The Buttery to go with meat and cheese platters, roast meats and the like. This is the second of two redcurrant jelly recipes from English Food.

Redcurrant jelly is considered a rather niche preserved, being served with rich meats such as lamb, venison and other game, or as an ingredient in Cumberland Sauce, but it is versatile; I like it with cheese.

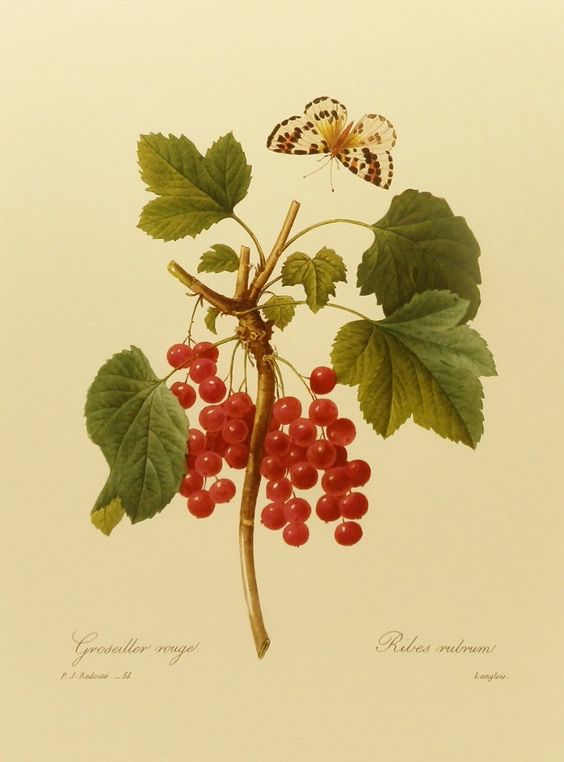
Redcurrant jelly is very much the preserve of the gardener – the delicate berries do not transport well and have a short shelf life, which is why they are expensive to buy fresh. On a recent walk around nearby Chorlton Meadows I found dozens of sprays of ruby-red currants growing out of sight beneath a huge mass of thick brambles. Typically in these situations, I brought neither bag nor tub and so I ate them straight from the bush until acid reflux began. It was a shame really, as I could have made a huge amount of jelly. Hey-ho, I’ll remember this secret spot next year.

Our cultivated redcurrants are actually made up of three distinct species, and the less common whitecurrant is simply a variety of redcurrant that has lost the ability to produce the distinctive red pigment. There is also a pinkcurrant.

Country houses and kitchen gardens particularly in the 18th Century, grew vast amounts of red and white currants; their pectin-rich and tart juice used as a base for dozens of other preserves and sauces. I have never made whitecurrant jelly, and I wonder why one doesn’t see it anywhere?

This redcurrant jelly is enriched with red wine and contains cracked black peppercorns, I imagine it would work just as well using whitecurrants and white wine.

This recipe can be easily scaled up or down, depending on how many redcurrants you have, and the great thing about making a jelly is you don’t have to go through the rigmarole of stripping the berries from their stalks as they all get left behind during straining.

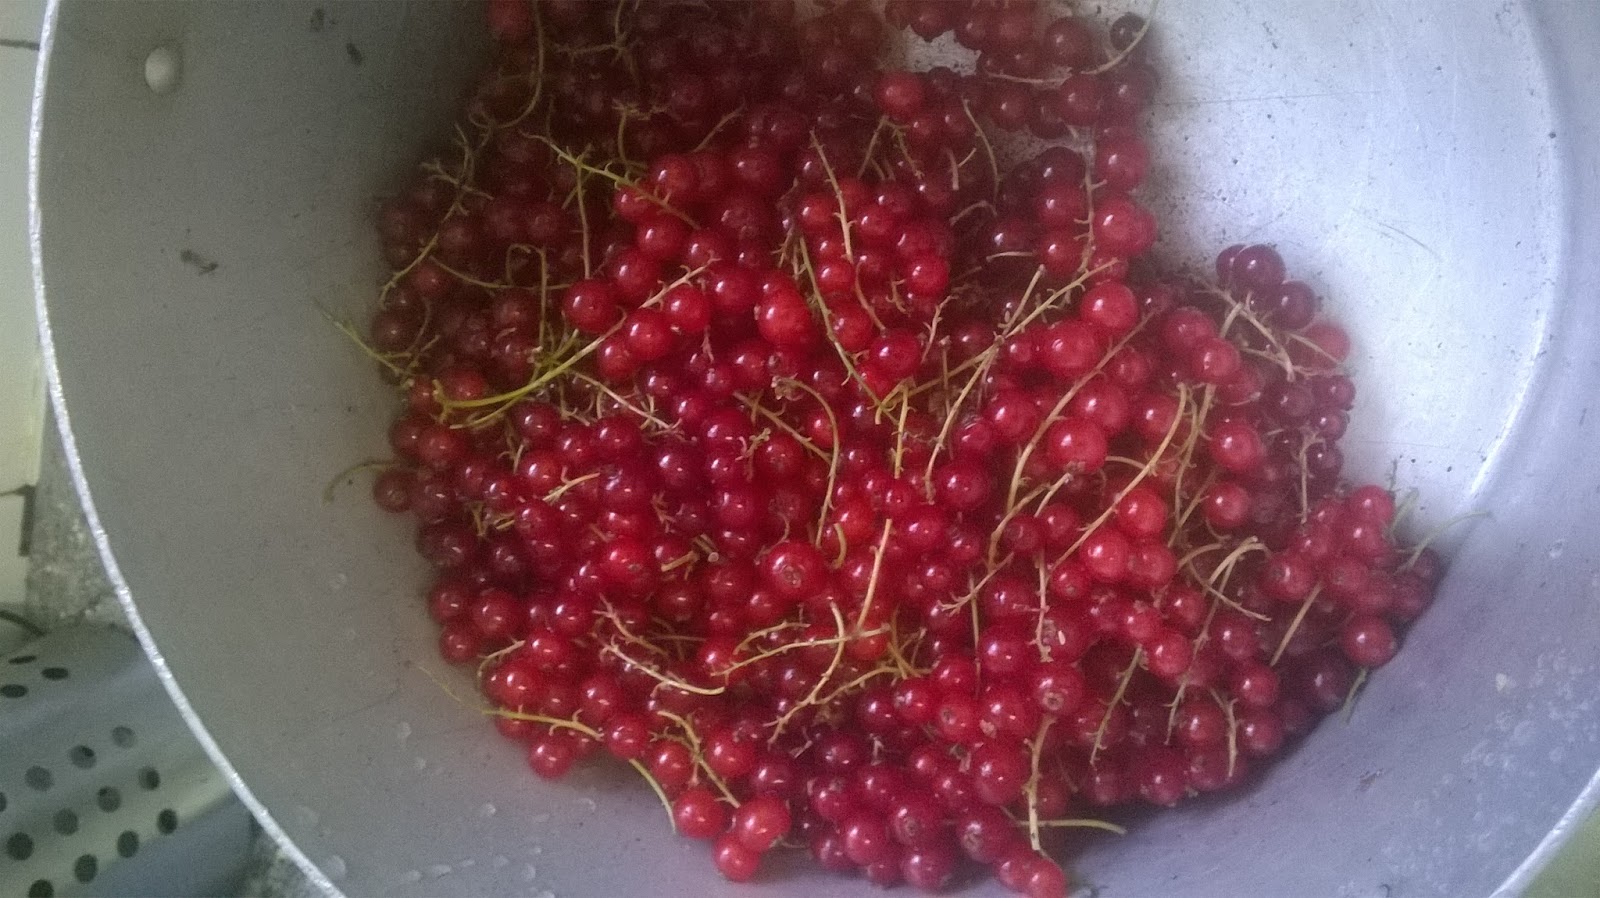
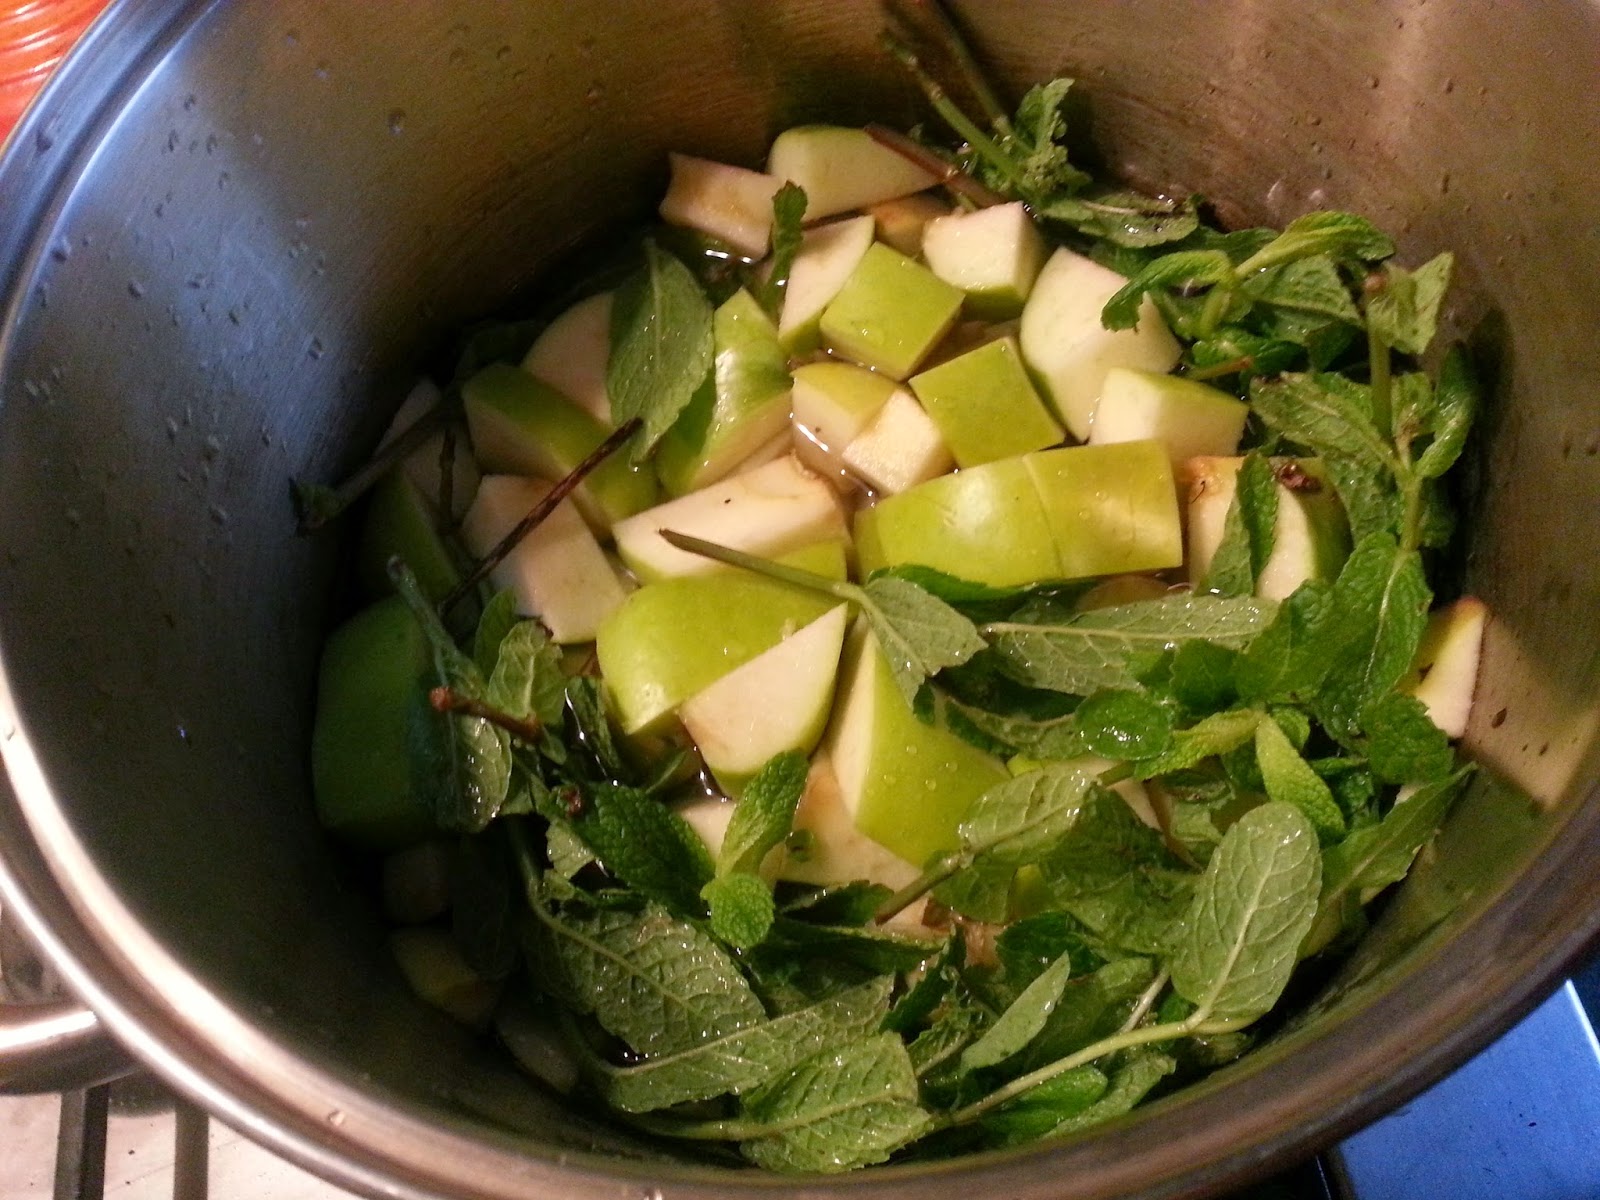
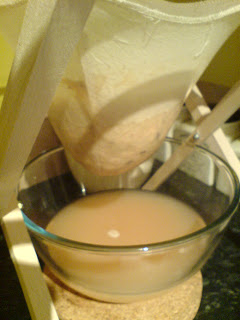
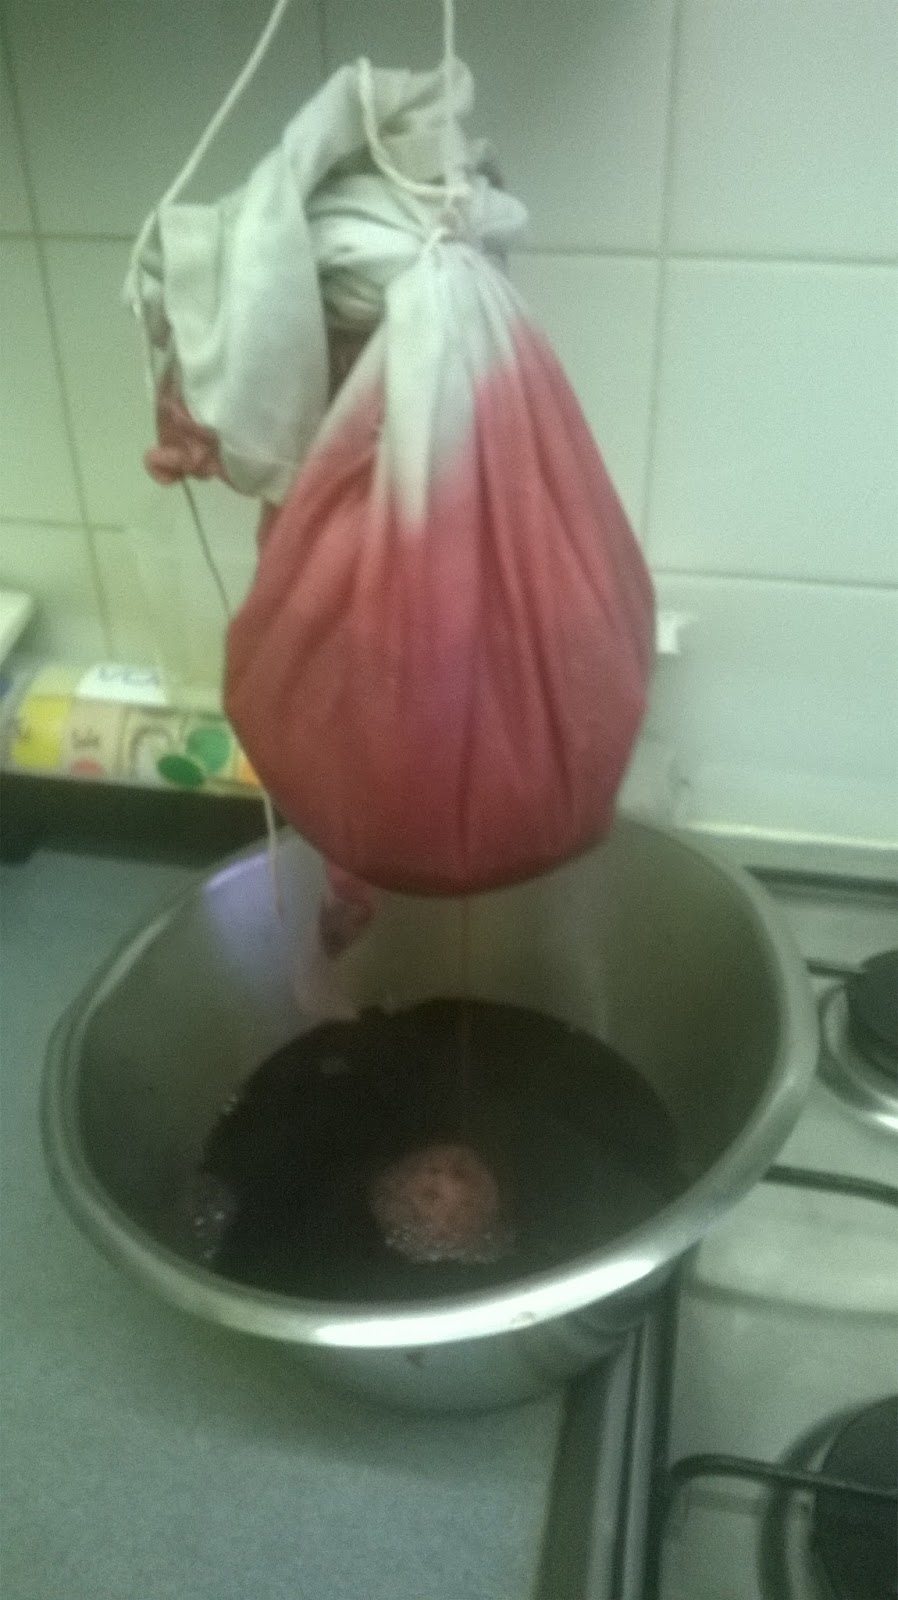
Put three pounds of redcurrants in a saucepan. To this, add around 2 ¼ pints of liquid; between 8 and 16 fluid ounces of it should be red wine, the remainder water. Bring to a boil and simmer until the currants are soft and pulpy. Pass through a jelly sieve or bag and allow to drip overnight.

Next day, place the juice in a saucepan or preserving pan with three pounds of granulated sugar. Put over a medium heat and stir with a wooden spoon until the sugar has dissolved. Remove the spoon and turn the heat up so that the fruity syrup boils enthusiastically. At this point put a saucer in the freezer so you can test for a set later.

After 15-20 minutes boiling, test to see if the jelly has set. There are two ways: (1) use a thermometer, pectin gels set at 105C; (2) the wrinkle test where a few drops of jelly on a cold saucer cool and wrinkle when you scrape them with a finger. I usually do both to be on the safe side. If the jelly isn’t set, boil for another 10 minutes and retest.

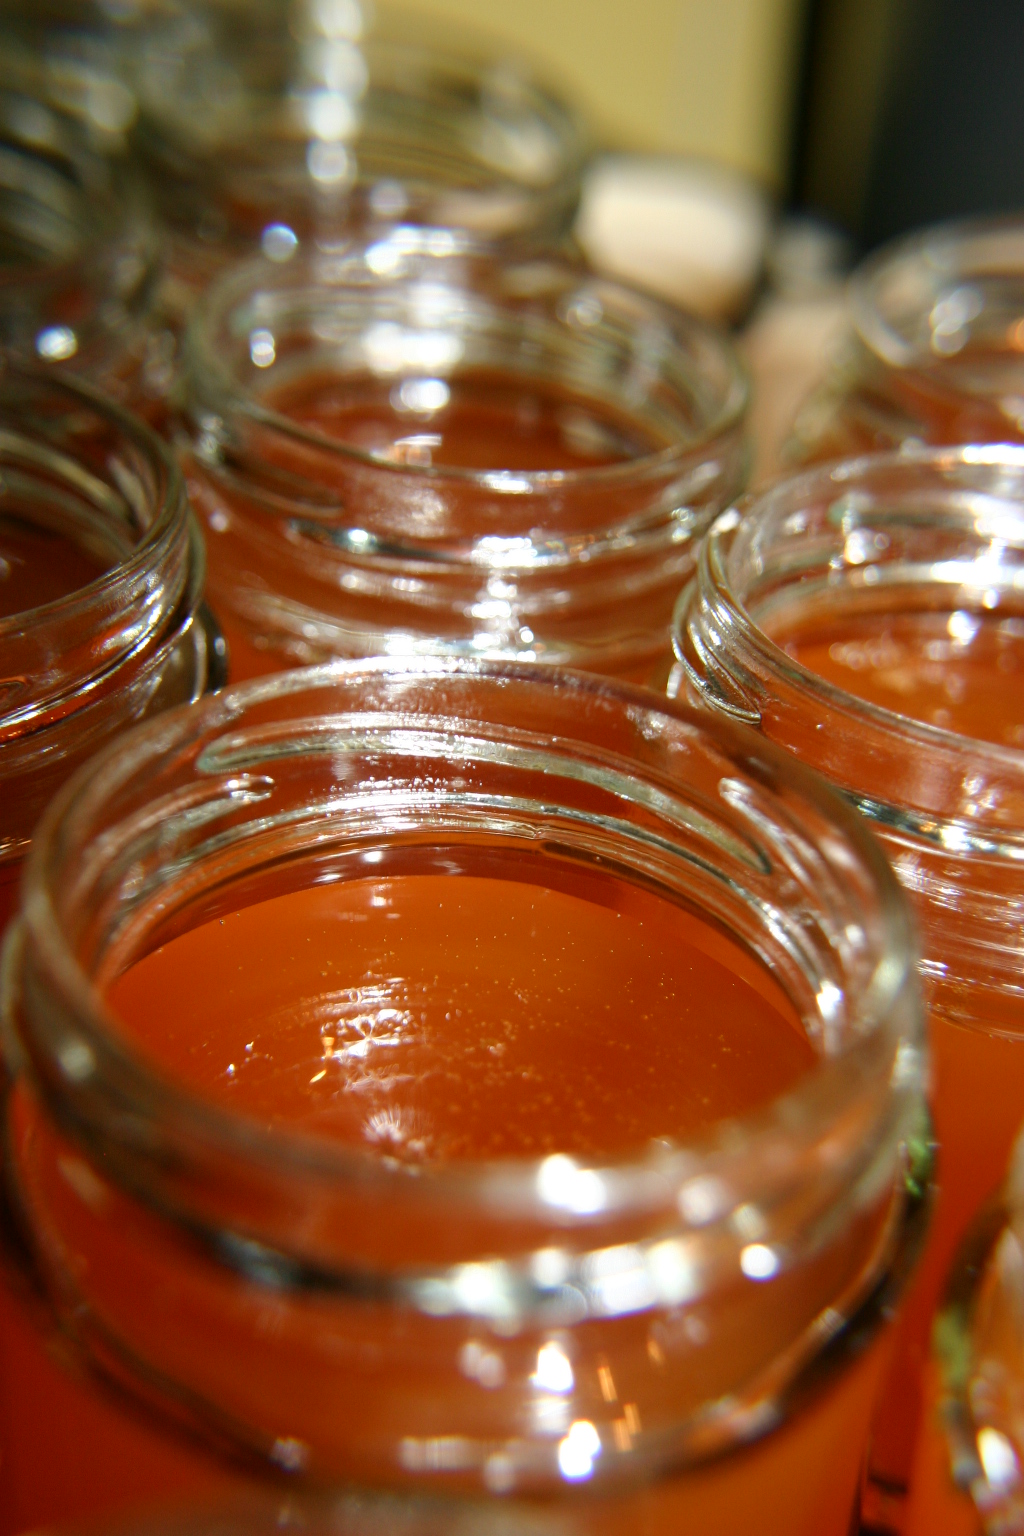
Finally, roughly grind about a teaspoon of black peppercorns using a pestle and mortar and stir in right at the end of cooking. Allow to sit for 15-20 minutes before potting in hot, sterilised jars.

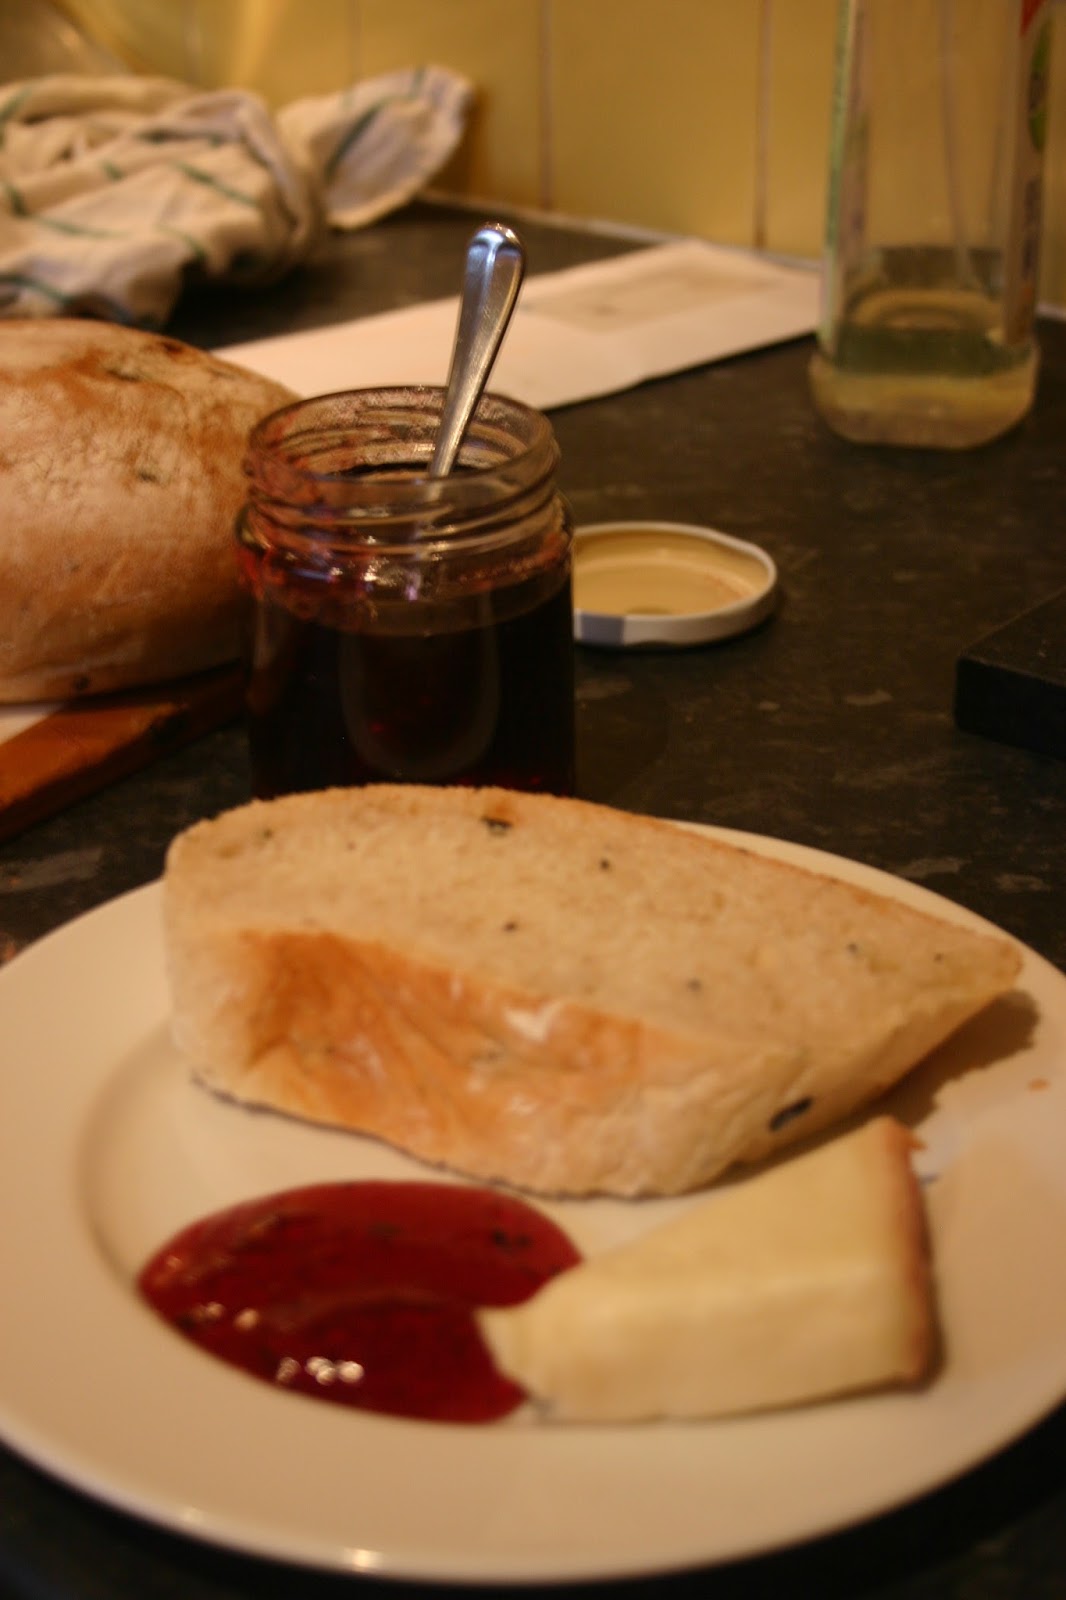
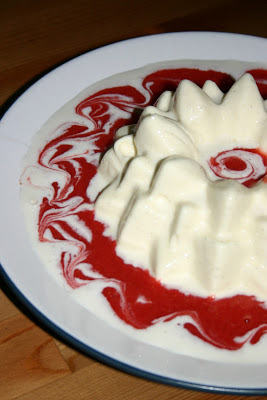
#422 Peppered Redcurrant Jelly. This is a delicious jelly, spiked with rough spicy peppercorns giving it both interesting flavour and texture. The red wine doesn’t make it too rich, as you might expect it to, so be generous with it. I am going to use it for some future lamb dishes I think, though I did try a little sample with some good cheese, butter and bread. Very good, 8/10.

#397 Herb Jellies

Here’s a quickie from the Preserves part of the last chapter of English Food.

Herb jellies are apple jellies flavoured with a herb and a little vinegar for piquancy. They can be served with roast meats, cold cuts, cheese, even fish or vegetables such as peas.


You can use any herb you like. On my allotment there are vast amounts of mint, lemon thyme, chives, sage and oregano.

Here are some suggestions to give you some ideas:
Mint; lamb, duck, mushy peas, garden peas, new potatoes
Thyme; chicken and other poultry, pork, rabbit
Lemon thyme; chicken, fish
Sage; Pork
Marjoram/Oregano; pork, chicken, cheese
Chervil; game
I shan’t go on – I’m sure you get the idea!
My patch of mint needed taming so I put both the leaves and stems to good use.
It is pretty straight-forward.
First weigh, then roughly chop, some Bramley or windfall apples and place, skin core and all, in a large pan. Add 3 ½ fluid ounces of white wine vinegar to every 2 pounds of apples. Add enough water to only just cover the fruit. Amongst the apple pieces, tuck in 2 or 3 big springs of your chosen herb. Bring to a simmer and cook until the apples have become all mushy, around 20-25 minutes.


Pass the juice through a jelly bag and allow to drip overnight.

Next day, pour the juice into a preserving pan and to every pint add a pound of granulated sugar. Put on a medium heat and stir until the sugar is dissolved. Turn up the heat and bring to a boil. Keep it on a good rolling boil until setting point is reached.
To test for setting point, bring the juice to a temperature of 104⁰C. To do this, the best thing to do is invest in a sugar thermometer, failing that place a drop or two on a freezing-cold plate and push it with your finger when the jelly is cool. If it wrinkles, it is set. I actually use both methods – the thermometer so that I know I’m there, and the wrinkle test to make doubly sure.
Pour into sterilised jars.

#397 Herb Jellies. This is a great recipe, though I found it too sweet. I adapted it by adding 50% more vinegar, and some of the herb itself, finely chopped, added once the sugar dissolved. Orginal recipe gets a 6.5/0, but it was pretty easy to make it an 8/10.

#367 Hot Red Pepper Jelly

Chilli peppers and sweet bell peppers have never really been absorbed into our eating culture. I cannot think of a single English (or indeed British) dish that uses it. You do find some sliced red pepper on a salad, but that’s about it. When Portuguese and Spanish explorers brought them back from their travels to the New World, many of the Southern European and Northern African countries quickly assimilated it into their cooking. Of course, peppers are most successful in Asia. Who can imagine an Thai, Indian or Pakistani curry without it?
Whenever I cook with peppers – sweet or hot – it is always in a curry or an Italian pasta sauce. Well with this recipe I think that Jane Grigson is trying to use peppers in a very English way. In fact it comes from her daughter Sophie Grigson, now a very successful food writer in her own right. I think it is a very British preserve; a clear sweet jelly cut with a bit of vinegar to make it certainly savoury.


Halve and core 2 pounds of cooking apples such as Bramleys seedling, but don’t chuck out the cores (they are a valuable source of pectin). Chop the flesh and blitz in a food processor. Tip them into a preserving pan or stockpot with the reserved cores. Tip in 15 fluid ounces of cider vinegar to prevent the apples from discolouring. Next, deseed and roughly chop 3 red peppers and 4 red chilli peppers. Blitz those up too and add to the pot. 

Bring to a boil and simmer for a good 20 minutes. At this point there will be an absolutely delicious smell. Savour it – the smell from this aromatic sharp concoction is wonderful! Strain the hot mixture through a jelly bag and allow it to drip overnight.


Next day, measure the volume of juice you have and pour it into you pan. Stir in granulated sugar – you’ll need a pound for every pint of juice. Once the sugar has dissolved, turn up the heat and boil for 20 minutes.

Normally, the apples alone have enough pectin in them to easily set a jelly like this, but the chilli peppers somehow interact with the pectin and prevent it from happening. To get around this problem you need to add extra pectin which comes in the form of a viscous liquid or a powder. Grigson suggests using 3 fluid ounces of liquid pectin (e.g. Certo), but you could use a sachet of pectin powder in its place. Whichever you use, mix it well into the boiling jelly. Test for a set using a thermometer; 104⁰C is what you are looking for. This will take about 10 or 15 minutes of hard boiling. It is important to note that you shouldn’tfollow the instructions on the packet. Pot the jelly into sterilised jars.


#367 Hot Red Pepper Jelly. This was very refreshing and delicious – the sweet jelly combined with sharp vinegar is a great one that really brought out chilli flavour as well as chilli heat. It was very good with cheese. 8.5/10

#315 Cornel Cherry, Rowanberry, Bilberry or Cranberry Jelly

With Thanksgiving just around the corner, I thought I would have a stab at this jelly so we could have the traditional accompaniment to our Thanksgiving dinner. Even if it wasn’t Thanksgiving, it would have been the cranberry jelly I chose from the four possibilities; the other three not being available in the USA. It isn’t strange that the cranberry is on the list of fruits here: we Brits have been eating cranberry jelly with our turkey on Christmas Day for ages now – since the end of the nineteenth century. Prior to that, people either had goose (for Southerners) or beef (for Northerners), but they still may have had the jelly.

In America, of course, cranberries and turkey were two of the foods eaten at the first Thanksgiving dinner and they have become traditional and necessary fayre. They were not the only foods eaten on that day though; the feast also consisted of cod, eels, bass, clams, lobster, mussels, ducks, geese, swans and venison. I wonder why the turkey endured but the others did not. I’d quite happily tuck into some nice roast swan.

The four fruits that can be used in this recipe all have one thing in common: they are very tart and therefore great to go with fatty foods like roast turkey, goose, ham and the like.

Cornel cherries are not cherries at all but the fruit of a dogwood tree. They are only really used to make jellies in Britain, though other countries use them to flavour spirits. You can buy dried ones in health food shops these days as a super-food, but are unlikely to find them fresh in shops. They are native to Europe so you might just find some growing wild. I am no botanist, but I will keep a look-out for them on my return to Britain. These seem to be Jane Grigson’s favourite out of the four as it’s the only one she actually mentions in her little introduction to the recipe.

Rowanberries – the fruit of the rowan tree – on the other hand are very familiar. Rowans must be one of the most common trees in Britain; equally likely to be found in forests, parks and gardens alike. I envisioned making this jelly using rowanberries, who’d have thunk I’d end up in America? Rowanberry jelly is traditionally eaten with venison or lamb. It seems crazy with so much of it just growing wild everywhere it isn’t put it to good use. Next Autumn I will make some.

Bilberries are more common in Scotland and Ireland than England and Wales, though some are found in the northern climes. They are similar to the American blueberry, but they are much darker and have a very dark blue flesh. If you can’t find any bilberry bushes, you might be lucky to find the fruit at farmers’ markets, but they’ll probably cost you an arm and a leg; they spoil easily and the plant cannot be cultivated with much success. The bilberry is the only fruit of the four that can be eaten unsweetened.

It might surprise you to learn that the cranberry is not a New World fruit (it surprised me!). There are several species of them around the globe. When we think of cranberries we think of the large plump ones from America, but two species are found in the UK and are smaller, paler and more tart that their American cousins; one is found across the whole of the country, and the other is just found in Northern Scotland. If you buy cranberries at a supermarket, however, they will be the American species.

Whichever fruit you choose make sure you give them a good wash and pick out any bits of twigs and leaves. Weigh them and then cut up the same weight of apples – don’t peel or core them though, just chop them up. Use a tart apple; Bramley or Cox if you are in Britain, Macintosh if in the USA. Put all the fruit in a large pot and cover with water.
Bring it up to the boil and simmer until the whole thing has become a nice mushy pulp. Whilst it is cooking, set up a jelly bag over a bowl. If you don’t have a jelly bag and stand, use a large piece of muslin or even a pillowcase. Ladle the mush into the muslin and let the clear juice drip through.
It is best to hang it on a cupboard door if you don’t have a stand. Be patient now: if you add any pressure to the pulp it will make your jelly cloudy. On the other hand, it will make it more flavourful, so it is a trade-off. Grigson goes for the squeeze. I did not, for these cranberries were not precious, but bilberries for examples are, so I would want as much flavour as possible.

When the juice has dripped through, measure the amount of juice you have, return it to a cleaned pan and add a pound of sugar for every pint of juice. Bring to a boil and then to ‘setting-point’. Setting point is when the natural pectin in the apples and berries forms a gel. To achieve this, you need to get the temperature to 104C (221F) and keep it there for a few minutes. If there was a lot of water in the juice, it will take a while to reach the correct temperature. If you don’t have a thermometer you can use a cold metal spoon – dip it in the boiling jelly and push with your finger, if it wrinkles, the juice is now a jelly. If you turn the heat down under the pan, you’ll also notice the surface trying to gel over. Skim off any scum that the jelly produced and pot into sterilised jars. To sterilise jars, put them and their lids on a tray in a cool oven for 35 minutes. Soak any rubber seals in boiling water.

#315 Cornel Cherry, Rowanberry, Bilberry or Cranberry Jelly. This was a very good jelly – nice and tart and not overly-sweet like some of the bought ones are. It is a shame that I didn’t pick any from the wild, but never mind. It’ll be good with turkey for Thanksgiving and all the other meats and cheeses I’ll be eating on the lead up to it. There’s something very satisfying about making jams and jellies, I think it is because there are just three ingredients – fruit, sugar and water – and they magically become transformed into delicious, clear rubies shining away in their little jars. Pretty and delicious. 8/10

#283 Jellied Stock

If you are going to attempt to make a raised pie, then you need to make a jellied stock. The jelly in these pies is either loved or hated. Many people can’t stomach the thought of savoury jelly I think and either have to pick it out or avoid eating these delicious pies altogether. The jellied stock is very important though. The meat inside is cooked for a long time and can dry out a little – some water escapes through the hole in the top and some is absorbed by the pastry. The stock soaks into the meat, making it nice and juicy again and it fills any gaps made by the shrinking contents.
So here’s the recipe. You could, of course, just use some stock and gelatine, but that would be cheating!
First you need some bones that will release alot of gelatine, so use either two pig’s trotters or a veal knuckle – ask the butcher to cut them into several pieces for you. To these, add any bones you may have left over when you prepared the fillings. You’ll also need a sliced large carrot, a medium onion studded with three cloves, a bouquet garni and twelve black peppercorns. Place all of these in a big stockpot.

From this…
Now add four to five pints of water, bring to the boil, skim off any scum and cover and simmer for three to four hours.

…to this…
Strain the stock through some muslin into a clean pan and boil it down until it is a concentrated ¾ of a pint. Season it with some salt and more pepper if required. The stock is now ready to be funnelled or poured into the raised pie (see here for instructions).

…to this!

#283 Jellied Stock. I won’t write a review for this as it’s not a dish in itself, but I will say that it was a very satisfying process; condensing that big set of ingredients into the viscous well-flavoured stock. Made me feel like a real baker.

#282 Raised Pies

Is there anyone who doesn’t like a pie made with hot-water pastry? Everyone, I say, from the Mayor of Melton Mowbray to, er, Sweeney Todd. Oh, except for vegetarians. They’re so quintessentially English and I’ve not seen anything remotely close here in Texas. I must admit I’ve been putting off making these pies – I’d never made one before and I knew that it would take a lot of time, and presumably, effort. However, I felt I was ready – and so I should be because there are several to do in this book so I need the practice. Hopefully I’ll get it right first time.
So, for those of you not in the know, a raised pie is a pie made from pastry using boiling water and lard, unlike shortcrust pastry that is kept as cold as possible. Hot water pastry achieves a putty-like consistency that allows the pie mould or tin to be moulded and raised up the sides of the tin, rather than rolled. The hot water makes the pastry very absorbent too; you need this as the filling cooks and releases juices. Normal pastry that contains butter would just turn into a sloppy mess. Raised pies became crazily over-the-top in the seventeenth and eighteenth centuries. Elizabeth Raffald’s receipt for a Yorkshire Goose Pie gives the following instructions:
Take a large fat goose, split it down the back and take all the bones out. Bone a turkey and two ducks the same way, season them very well with pepper and salt, with six woodcocks
You don’t get pies like that in Yorkshire nowadays, I can tell you. Imagine the meat sweats you’d get from a slice of that!
The raised pie hasn’t quite fallen out of favour in Britain these days – I’m sure Melton Mowbray pork pies are as popular as ever, but that’s all you generally see now. The book proffers more, and I shall be adding them as I go. The basics are: Pork Pie; Veal, Ham and Egg Pie; Raised Mutton Pies; and Game, Chicken or Rabbit Pie. They all have the same basic parts: the pastry, the jellied stock and the filling itself.
It all seems a bit complicated, but it’s not really. In this post I’ll deal with the construction and baking of the pie. The jellied stock and the fillings can have their own posts (these are coming in the next day or two).
Begin by making the hot water pastry. Bring a third of a pint of water and six ounces of lard to the boil. In the meantime, weigh out a pound of flour and place in a bowl with half a teaspoon of salt. When boiling, tip the water and fat into the flour and mix quickly – electric beaters are the best for this, but don’t use a high speed as the pastry won’t bind properly. To enrich this pastry add an egg, or a tablespoon of icing sugar. Cover the dough and leave until it cools enough to handle, but don’t let it cool down completely. Take three-quarters of the pastry and put it in a six or seven inch cake tin with removable base. You can buy fancy hinged raised pie moulds – they are quite expensive though, but they are beautiful (see this link). Quickly, but carefully, mould the pie by gently pushing the pastry up the sides of the mould or tin until it overlaps the lip, making sure there are no holes or tears. If it just flops down, then it is too hot. Wait five minutes and try again.
If you want to make small pies, you can mould the pastry around the outside of a wide rolling pin or a jam jar. This method is required for the mutton pies. This is alot trickier apparently. So unless you can avoid it, do the big pie.
Now you can start on the jellied stock and prepare your pie filling. Pack the filling well into the raised crust.
…if it mounds up above the rim, so much the better.
Roll out a lid with the remaining pastry and fix in place with a little beaten egg, making a hole in the centre for steam to escape. Decorate the pie with leaves and roses using pastry trimmings. It’s strange that savoury pies have the ornate decorations in England and that the sweet ones are left plain. I don’t know why this is. Anyway…. Brush the lid with more egg (don’t throw unused egg away, you’ll need it later).
Bake in the oven for half an hour at 200°C (400°F) to colour the top, and then lower the temperature to 160°C (325°F) for two hours for large pies and just one hour for small pies – you need this time for the meat to cook and become tender. Watch the pie doesn’t brown too much though – if it needs a little protection, cover with some brown or wax paper. Remove it from the oven and leave it to cool for thirty minutes before removing it from its mould very carefully. Brush the sides with beaten egg and return it to the oven for a final half an hour to brown and crisp up.
Whilst the pie cooked, the meat shrank, so the gaps need filling with the jelled stock. This can be carefully poured through the hole in the lid, or better using a small funnel. Let the pie cool and eat the next day. The pie will keep for days wrapped in wax paper and kept somewhere cool.
Phew!
#282 Raised Pies. It won’t write a review for this recipe – I’ll save that for the fillings. However, it is worth saying that although making a pie like this is no mean feat, it is worth having a go. I had such fun pottering about the kitchen making my first riased pie (the Veal, Ham and Egg Pie). But then, I am a great big geek. Anyway, hopefully I have inspired you to give it a go, if not at least appreciate how much effort goes into these beautiful and delicious artisan pies.

#245 Coconut Cream with Strawberry Sauce

This is a dessert that I had been looking forward to making for a while – I was just waiting for strawberry season. What could possibly not be delicious about strawberries, coconuts and cream?? Griggers doesn’t say anything about where it comes from; whether it was modern at the time of writing or if it has a good stoic history in the annals of English cookery. Scroll down to the picture, though, and you have to assume it’s probably from the Fanny Craddock School rather than the Alexis Soyer School.

It’s a little bit of a faff this one and the coconut cream needs to be made well in advance because it contains gelatine and that needs to set. To make it, bring ¼ pint of single and soured cream slowly to a boil along with a split vanilla pod and 4 ounces of desiccated coconut and 7 fluid ounces of water. Let the mixture simmer for 10 minutes and let it cool down until ‘tepid’. Pass through a sieve and add either powdered or leaf gelatine dissolved in 6 tablespoons of water; follow the instructions in the packet and make enough for a pint of liquid in total. Also add a good tablespoon of grated creamed coconut and add sugar and lime juice to taste. Griggers says: “the citrus juice is an enhancer, it should not be identifiable”. Pop the cream in the fridge and allow to cool and reach an ‘egg white consistency’. At this point, fold in ½ pint of whipping cream that had been whipped stiffly. Pour the whole mixture into a lightly-oiled decorative jelly mould and allow to set. To turn it out, dip the mould in hot water briefly before upturning it.

The strawberry sauce is much easier. Hull a pound of strawberries, keeping the nicest ones behind for decoration, and liquidise the rest with the addition of some icing sugar to sweeten. Pour the sauce around the coconut cream and “dispose of the strawberry halves in a decorative manner”. Or else.

#245 Coconut Cream with Strawberry Sauce. Oh, I had looked forward to this one for so long; I should have learned by now that some of these desserts are just plain rubbish. And this one definitely fits into that category. The coconut cream was pretty tasteless bearing in mind the number of what should be delicious ingredients that made it up. Next time, strawberries and cream will be served. 3/10.

#201 Tea Cream

A good dessert to make if people are round because you can make it a couple of days in advance.

The tea in question for this tea cream recipe is green gunpowder tea. Green tea is a strange thing – I don’t ever drink it because it tastes of a combination of washing-up water and seaweed. Bleurgh. However, having it with cream and sugar did appeal slightly more; cream and sugar never taste bad, now do they!?

FYI: green tea comes from the same plant as our more familiar ‘black’ tea (e.g. PG Tips, Tetley, etc), but is unfermented thus retains its natural green colour, as opposed to black tea which turns its dark colour due to oxidisation during fermentation. Green tea is popular in China and Japan as we all know – but also in Muslim counties where it is forbidden to drink fermented tea. How bizarre. Anyone know why this is?

To make this tea cream mix together half a pint each of double and single cream in a jug. Pour around three-quarters of it into a small saucepan along with two tablespoons of sugar and an ounce of green gunpowder tea. Slowly bring to a boil, though keep on tasting it as you don’t want the tea to be ‘over-stewed’. Pour the hot cream into a bowl through a sieve. Taste again; if too strong add more cream. Use either a packet of powdered or five leaves of leaf gelatine to make the cream set. It’s best to follow the instructions on the packet at this point but generally you dissolve the powdered stuff in a little hot water and stir it into the cream, or soak leaf gelatine in cold water until soft and stir into the still-hot cream. Pour the whole lot into a mould – buy a fancy one if you can, I did. Cover with cling-film, allow to cool and then place in the fridge until needed. Turn it out onto a plate – you will need to dip the mould in hot water briefly to help loosen the jelly, I left it in too long and it went a little liquid around the edges. Serves five or six.


#201 Tea Cream. A funny one this one. I really liked the creaminess of the ‘jelly’, but the tea taste – though strong when hot, diminished greatly when chilled so I couldn’t really tell it was there. I certainly liked it enough to give it a second go at some point though. It did look very good in its fancy shape. 6/10.

#126 Kickshaws

As we are being constantly reminded of Global Recessions and Credit Crunches in the news, I thought it’s best to get as thrifty as possible and make some meals out of leftovers. I’ve managed to get two extra things out of the feast I made – one of which is a recipe from English Food, the other one of my own devising.

I made the Kickshaws from the leftover puff pastry trimmings. They are very easy to make – good one to make with kids if you’ve got any and don’t mind getting their filthy little paws in you food.

Roll out your puff pastry trimmings thinly and cut out circles of around 3 inches in diameter. Next, place a scant teaspoon of jelly or jam in the centre and use milk or beaten egg to make little parcels or turnovers; I used bramble jelly, quince jelly and apricot jam. Deep fry at around 160°C for a few minutes until the pastry has puffed up and golden brown. Sprinkle some sugar over them and eat warm. I poured some double cream over them that was also left over from big feast.

FYI: the name “Kickshaws” comes from an Anglicisation of the French quelque chose. I don’t know any French, but Griggers says it means “some odd thing or other”.

#126 Kickshaws – 8/10. Kickshaws go right back to Medieval times, though survived until the Eighteenth Century, though we don’t really make them now. We should definitely bring them back though as they are delicious. They are definitely being made every time there are trimmings to be used up!

#114 Quince, Medlar, Sorb or Crab Apple Jelly

The quinces I bought the other day were beginning to look a bit sad and I needed to use them up with something. I really like quince, so quince jelly was the obvious choice – making a few jars of this would mean I would still be eating them way beyond their season had ended.

By the way, this recipe can be followed as is but with medlars, sorbs or crab apples, so if you are lucky enough to know where their might be some growing near you try this jelly.

Begin by scrubbing clean your quinces and chop them roughly along with the same weight in Bramley apples. Do not peel or core them – that is where the pectin resides that will set the jelly. Place the fruit in a pan and barely cover them with water. Simmer the fruit until they have become a pulp (I used a potato masher to help the quinces along).

Place the pulp in a jelly bag suspended over a bowl – if you don’t have one, use a muslin-lined sieve instead. Leave the pulp to drip dry – this takes a while, a few hours at least, overnight if you’ve done loads. Measure the volume of liquid and pour into a heavy-based pan and add a pound of sugar for every pint of liquid. Boil this mixture until this has reached setting point (read the recipe for marmalade for more info on this) and pour into sterilised jars.

Quince jelly can be used like any fruit jelly, but is typically an accompaniment to cheeses, game and turkey.


#114 Quince Jelly – 6.5/10. A nice conserve, but I perhaps more apple than I should have, as the quince flavour is not super strong and is sweeter than I’m used to. That said, I used as jam and I think it’ll be a lot better with some game or cheese. Also, the recipe’s very good as I got four jars of jelly from just two quince!